background image

Change for life

Thank you for choosing our product.

Please read this 

User's

 Manual carefully before operation and 

retain it for reference.

If you lost the 

User's

 Manual, please contact the 

Tool Box

 or visit 

www.gilman-group.com

 or send an email to 

Tool Box

 for the 

electronic version.

User's

 Manual

Operation

 Instructions


Dehumidifier

Models:


GGD18L

Summary of Contents for GGD18L

Page 1: ...r s Manual carefully before operation and retain it for reference If you lost the User s Manual please contact the Tool Box or visit www gilman group com or send an email to Tool Box for the electronic version User s Manual Operation Instructions Dehumidifier Models GGD18L ...
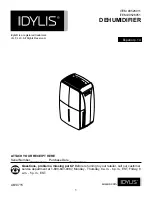
Page 2: ... this manual are only for reference Please refer to actual products for specific details Error Codes 16 8 This appliance is not intended for use by persons including children with reduced physical sensory or mental capabilities or lack of experience and knowledge unless they have been given supervision or instruction concerning use of the appliance by a person responsible for their safety Children...

Page 3: ...ell conne cted and not damaged Children and disabled people are not allowed to use the dehum idifier without supervision Keep children away from playing or climbing on the dehumidifier Memory function is included in this dehumidifier When there is nobody is taking care of the unit please turn it off and remove the power plug or disconnect power Do not repair or disassemble the unit by yourself or ...

Page 4: ...s windows and other outside openings of the room to improve the operation effectiveness Please keep the air inlet outlet clean and not blocked Avoid exposed to direct sunlight Note Note The dehumidifier has rollers to aid for placement Do not attempt to roll the dehumidifier on carpet or over objects Otherwise water may spill out from water tank or the dehumidifier may get stuck by the objects Ple...

Page 5: ...Front Side Back Side 3 Control Panel Air outlet Cover plate continous drainge Air inlet Water Tank Fixing hole of power cord Power cord General Structure ...

Page 6: ...ilure Below are the checking steps 1 Hold the handles on both sides of the water tank and pull it out following the arrow direction tank moved a little after long time transportation If it is not placed properly move it to the correct position 3 Replace the water tank as instructed in step 1 Float Correct Position Wrong Position 4 ...

Page 7: ...l panel will be on and 1 ON OFF Button 3 Timer Button Press Timer button to set timer on or off The timer can be set in 1h increment among 0 24h with each press of Timer button If hold the Timer button time will increase rapidly circularly After timer is set time will be displayed for 5s and timer indicator will be on Press Fan button can set high medium or low fan speed When the corresponding ind...

Page 8: ...Cont indicator is on it indicates the unit enter into continuous dehumidify mode The unit will always dehumidify only until the humidity is decreased to the inapplicable humidity of human If the Quiet indicator is on the unit enter into quiet mode The unit will If the Dry indicator is on the unit enters into dry mode After clothes are dried room humidity will be kept at certain range to prevent mi...

Page 9: ...ease lock function Other Instructions Alarm Warning If the water tank is full or the water tank has not been put on the correct position for 3mins the buzzer will give out sound for 10s for reminding you to empty the water tank or re install the water tank at correct position Auto Stop When tank is full remove the unit or not placed the unit correctly or the humidity is 10 lower than the set humid...

Page 10: ...if using water tank to collect water When the hose is connected water will be drained out through it instead of into the tank 1 Hold the handles on both sides of the water tank and pull it out following the arrow direction Attention Pull out the tank carefully in case the water may spill out from the tank and onto the floor 2 Pour out the water 8 water tank ...

Page 11: ... choke plug at first rotate the drainage adapter into the continuous drain outlet in clockwise direction Pull the drainage adapter through the continuous drain outlet and then rotate it into the drain outlet tightly Please check whether the gasket is in good condition Note When using the water tank to drain water please re assemble the drain cover and the drainage choke plug Otherwise leakage may ...

Page 12: ... make the water can be drained out smoothly Please check drainage adapter and drain hose periodically to see whether they are connected tightly or they are damaged or blocked Note Please make sure the drain hose is put along the direction of drain out of water bucket Insert one end of drain hose into the floor drain and then cover the lid of floor drain Please do not press and flatten the drain ho...

Page 13: ...e As shown in fig pull up the panel to remove it 2 Remove air filter As shown in fig pull the clasps of air filter outwards to remove the air filter 3 Clean air filter Clean the filter in warm soapy water Rinse it and let the filter dry before replacing it 4 Install air filter Before cleaning turn off the dehumidifier and disconnect the power Otherwise it may lead to electric shock Clean and Maint...

Page 14: ...yed 3 Water Tank Clean the water tank every week to prevent growth of mold mildew and bacteria Use soft brush to clean the water tank and then rinse it 1 Take out the water tank and then pour out the residual water 2 Press down 4 buckles around the water tank Lift up the drain lid 3 After cleaning replace the drain lid and make sure the float of water tank is placed properly The side with foam pla...

Page 15: ...efore Operation Disconnect power Empty the water tank Care After Operation steps below in order to maintain the unit in good condition Make sure the water inside the water tank is poured out and the drain hose is removed Unplug the dehumidifier and pack the power cord Clean the unit and then wrap it well for preventing dust Long time Storage 13 ...

Page 16: ...properly set If unit is operating in a room where temperature is from 5 to 15 C it will start to defrost automati cally Compressor will stop for a brief period of time fan will operate in high fan speed normal operation emitted has musty odor Due to temperature rising of heat exchanger the air may have some strange smell at the beginning Unit has noises There might be some noise if unit is operati...

Page 17: ... and replace it Unit can function normally but it can not start up Humidity is set too high If you want the air drier press button to lower the humidity or press MODE button for select to dehumidify continuously Bad dehumidifying performance Check whether there is any obstacle around the unit Make sure there is no curtain shutter or furniture that blocks blocked Doors and windows are left open Mak...

Page 18: ...y have been put upside down and cause short circuit Ambient temperature sensor is damaged Display board is damaged 2 Tube Temperature Sensor Malfunction F2 Temperature sensor on the evaporator is loosen or is poorly connected with the terminal of display board Some element of display board may have been put upside down and cause short circuit Temperature sensor on the eva porator is damaged Displa...

Page 19: ...is blocked 5 6 Overload protection H3 E5 Ambient operation condition is bad The evaporator and condenser are blocked with filth The system is abnormal 17 Overcurrent protection Relay is short circuited or broken circuited Operation environment condition is formidable high temperature and high humidity The compressor stops Buttons are invalid ...

Page 20: ...eness ToolBox Customer Service Centre 4 F DCH Building 20 Kai Cheung Road Kowloon Bay Hong Kong Service E mail 8210service gilman group com Please register now at www toolbox hk Website www gilman group com Please record the following product information Model Serial No Name of the franchiser Date of purchase 66129934059 Proudly Serviced by 匡至三l a Gilman Group Company 嵒 Gilman since 1841 ...

Reviews: