Bedienungsanleitung
Instruction Manual
Manuel d’utilisation
Ersatzteile -
Spare Parts -
Pièces de rechange
Montage -
Assembly -
Montage
Garantie -
Warranty -
Garantie
Deutsch 01-09
English 10-18
Francais 19-27
28-31
32-41
42
GM-Racing 90168.RTR Road
fi
ghter Buggy 2WD
www.gm-racing.de
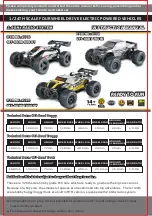
1/10 2WD RACING BUGGY
1/10 2WD RACING BUGGY