Traxxas 1/16 SLASH 4x4 70054, Owner'S Manual
The Traxxas 1/16 SLASH 4x4 70054 is a powerful and versatile remote-controlled truck designed for off-road excitement. To properly operate this reliable masterpiece, make sure to refer to the comprehensive Owner's Manual. You can easily download this manual for free from manualshive.com, enabling you to maximize your enjoyment of this amazing product.
Share
Download


Reviews:
No comments
Related manuals for 1/16 SLASH 4x4 70054
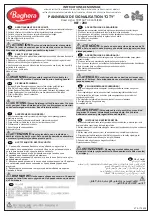
200
Brand: Baghera Pages: 3

404935
Brand: Jamara Pages: 8

AADC2017
Brand: Audi Pages: 36

E-Maxx 3908
Brand: Traxxas Pages: 31

Mighty Thunder
Brand: FTX Pages: 36

VW Beetle 2,4GHz
Brand: Jamara Pages: 8

403084
Brand: Jamara Pages: 2

9401056937400
Brand: Active Intent Pages: 10

Space Taxi
Brand: Carson Pages: 48

S8 REBEL TX
Brand: LRP Pages: 72

S10 Twister
Brand: LRP Pages: 62

S10 Twister 2 BL
Brand: LRP Pages: 80

Derago XP1
Brand: Jamara Pages: 8

FX-101 Series
Brand: Kyosho Pages: 66

C-4ZG
Brand: Reely ROAD Pages: 128

Power Wheels Series
Brand: Fisher-Price Pages: 56

John Deere GATOR
Brand: Peg-Perego Pages: 28

RC10T
Brand: Associated Electrics Pages: 45


