background image

Reference Manual

8 Track Digital Recorder

Model


16 Track Digital Recorder

Model


<About this manual>

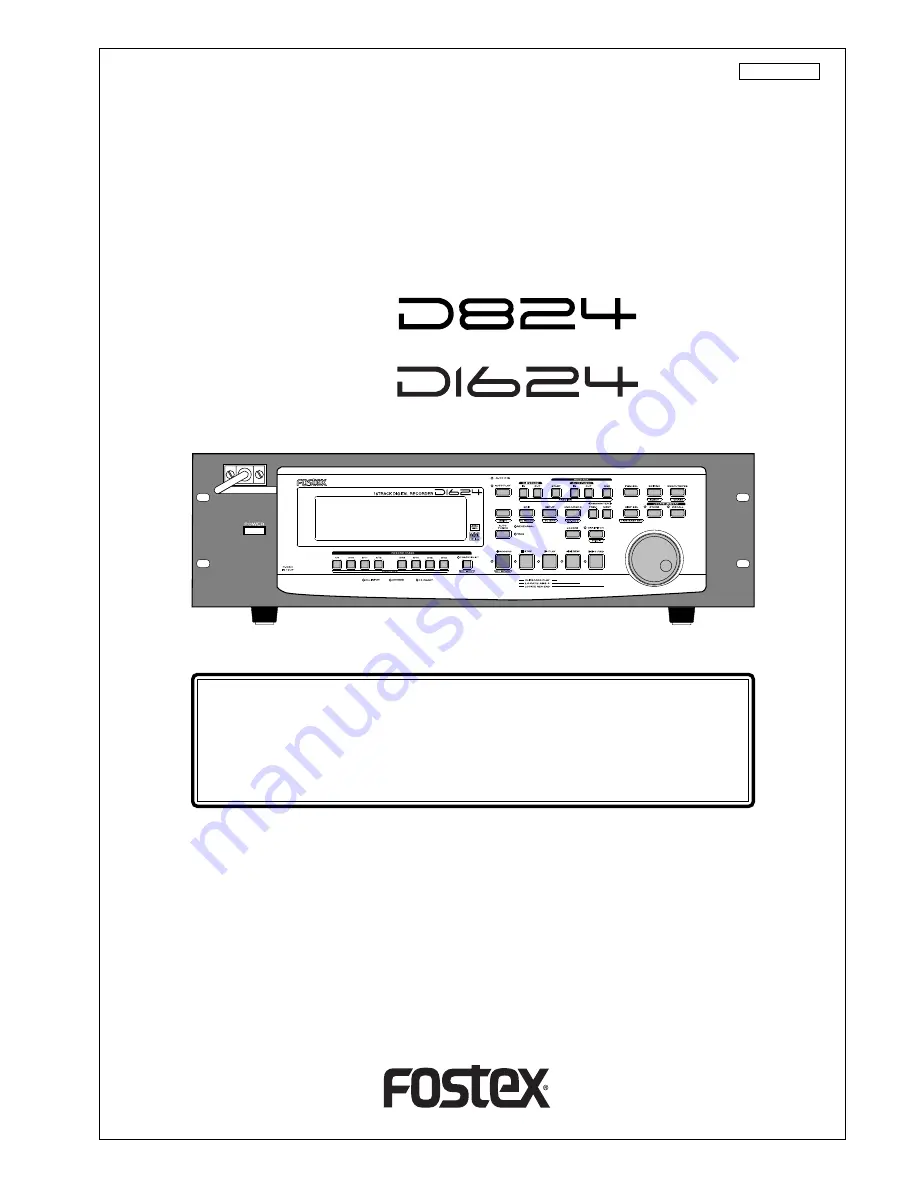
This manual is the Reference Manual for the Model D824/D1624.
Because all keys and buttons on the Model D824 and D1624 are identical, most
descriptions are done based on the Model D1624.
Please note any differences between the Model D824 and D1624, the explanation
or note for each model will be described.

8288 461 000

Summary of Contents for D-1624

Page 1: ...ual is the Reference Manual for the Model D824 D1624 Because all keys and buttons on the Model D824 and D1624 are identical most descriptions are done based on the Model D1624 Please note any differen...

Page 2: ...symbol within an equilateral triangle is intended to alert the user to the presence of uninsulated dangerous voltage within the product s enclosure that may be of sufficient magnitude to constitute a...

Page 3: ...28 Formatting and Optimizing disks Formatting a current drive disk 30 Formatting a brand new hard disk 31 Reformatting an E IDE hard disk 32 Formatting a backup disk SCSI disk 32 Optimizing the disk...

Page 4: ...66 Storing the edit point 67 Checking and adjusting the edit points 67 Executing Copy or Move 67 Checking the clipboard data 67 Executing Paste 68 Single undo redo Paste 68 Copy Paste between program...

Page 5: ...oad by WAV file 96 Saving of WAV files 96 Loading WAV files 99 Changing the Initial Setting SETUP mode Selecting SETUP menu 102 Time Signature Setting 103 Setting a Tempo 105 Setting the Metronome fun...

Page 6: ...ecording on all 8 tracks an adat digital signal A digital output setup function is provided to digitally output by selecting from the real track any 2 output sources S P DIF or 8 output sources adat Y...

Page 7: ...a the HD ACCESS LED is lit or flashing Otherwise not only will you lose recorded data but you may damage to the recorder FOSTEX is not responsible for the data lost during operation of the recorder Be...

Page 8: ...D824 D1624 Reference Manual Names and Functions 8 D824 front panel D824 rear panel D1624 front panel D1624 rear panel OPTICAL...

Page 9: ...switch On again after waiting 1 or 2 minutes 2 Controller mount The detachable remote controller is mounted on the front panel 6 Hard disk access LED Red This LED lights up or blinks when the hard di...

Page 10: ...nt Auto Return mode When the END point is reached during playback the START point is automatically located in this mode This function is effective only when the START and END points have been specifie...

Page 11: ...down the SHIFT key when the recorder is stopped you can preview the fade out part at the stored CLIPBOARD OUT point Refer to page 57 for locating the CLIPBOARD OUT point Refer to page 66 for copying m...

Page 12: ...ram select key PGM When this key is pressed the mode will change to setup for a new program and allow program selecting Refer to page 35 for program select function 13 Store key STORE This key is used...

Page 13: ...essing this key while pressing on the SHIFT key when the SCSI disk is stopped Refer to page 66 for more information about using this key for the Paste or Erase operation Refer to page 101 for more inf...

Page 14: ...mbers 01 99 The last LOCATE time setting bar beat clock setting constantly replaces the data stored in the LOCATE key as data in memory number 00 Therefore it is possible to press this key alone to re...

Page 15: ...correct value is stored to the AUTO PUNCH IN key and the AUTO PUNCH OUT key both the REHEARSAL LED and TAKE LED will blink indicating that Auto Punch mode is on If a correct value is not stored pressi...

Page 16: ...utes preview of the stored point of each memory key Ejects disk in the external SCSI drive Please see Note below Switches the slave mode ON OFF Selects the time base Switches TC READY ON OFF Enters th...

Page 17: ...anel B for an optional card This is the panel used for installing the optional Model 8345 TC SYNC card The Model 8345 gives the recorder have LTC input and output connectors Also the sync lock with vi...

Page 18: ...6 for information Digital Recording 11 SCSI connector SCSI connector half pitch 50 pin Connect a backup SCSI device to SAVE LOAD data Up to one SCSI devices can be connected to the SCSI connector Refe...

Page 19: ...ghts up to indicate available recording time and space on the disk With the optional Model 8345 TC SYNC card installed this will be lit when MTC or LTC is externally input Lights up when MTC OFFSET me...

Page 20: ...nput It will blink if the digital signal is not correctly input Inotherthan Int iftheSETUPmode ClockSel menu is set to Auto Word Video and data is loaded from adat DAT thedigital Inissetto adat Sync o...

Page 21: ...to the selected Program s ABS indication The Time Base display will indicate the selected Program s Time Base since you can set the Time Base for each Program individually To change the Time Base dis...

Page 22: ...menu return the data to the recorder by the same SETUP mode LOAD menu The editing number of points will be cleared and you can continue editing Action to take Check to see if there is an abnormality w...

Page 23: ...tional tracks 5 Input monitoring and playback monitoring 6 Audio file and Event Time Base The word Time Base appears frequently in this manual The concept of Time Base is similar to a tape counter on...

Page 24: ...s 12 minutes The disk space actually used for recording is five minutes 3 minutes 2 minutes That is the area between three minutes and ten minutes that corresponds to 25 minutes of recording space in...

Page 25: ...u may also delete unnecessary Programs The recorder also features Program Change function that enables you to select one of the Programs set on the disk Programs on the disk are something like indepen...

Page 26: ...recorded on the cleared Real Track This recorder contains the Track Exchange function to make exchanges between the Real Track and the Additional Track If this function is used between mono tracks it...

Page 27: ...Y mode by pressing the RECORD button while holding down the SHIFT key Entering a track set to Input Monitoring to recording mode To enter the recording mode with any desired track or all tracks in the...

Page 28: ...f events may be reached To avoid this event number overflow you need to check the number of events for each track The recorder provides an event check menu in Setup mode for this purpose Notes on digi...

Page 29: ...h In Out the event is split at the edit point Also if a continuous long recording is made the recorded data might scatter to different locations on the hard disk thus dividing the data unto multiple e...

Page 30: ...ng the access time for each block on the disk Time required for formatting is longer but you can be sure of a highly reliable format Ordinarily this format type is selected This option is displayed an...

Page 31: ...The recorder displays the screen which enables you to set the Multiple Undo function on or off 5 After setting the Multiple Undo function on or off using the JOG dial press the EXECUTE YES key The re...

Page 32: ...function on or off using the JOG dial and press the EXECUTE YES key The recorder displays the screen which enables you to select the format type If you have formatted the disk with Standard Format yo...

Page 33: ...the disk If you are using a disk that was formatted with the Multiple Undo function turned on free disk space becomes smaller quickly because the disk always keeps the Multiple Undo files Optimizing s...

Page 34: ...ade the same initial setup of the currently active program will be copied as the initial setting for the new program If you wish to make a new program under the same settings as those of a previous pr...

Page 35: ...at is if only one Program exists and when you create a new Program it will be named Program 2 If Programs 1 5 already exist a new Program number will be 6 If there is insufficient recording space on t...

Page 36: ...s the EXECUTE YES key The ABS Time Base indication for the selected Program appears In this way you can be sure to select a Program before you start working You can select from PGM 01 up to in this di...

Page 37: ...the button or key the recorder will return to a higher level in the hierarchy and finally exit SETUP mode 4 Press the EXECUTE YES key again When the recorder displays Deleting and finishes deleting t...

Page 38: ...Up to 16 digits and the following letters numbers symbols can be input 5 After you enter the title press the EXECUTE YES key The new title is confirmed and the ABS time value of the Program appears 6...

Page 39: ...the Auto Punch In point recording start point and the Auto Punch Out point recording end point Preparation Storing the edit points 1 Refer to Storing the edit points to set the Auto Punch In Out poin...

Page 40: ...INPUT 8 MIN MAX GAIN MAX MIN GAIN 2TRK IN PHONES MONITOR 10 0 10 20 30 40 ADAT IN 0 10 20 30 60 40 PAN PAN PAN PAN PAN PAN 40 36 24 18 12 9 6 3 OL ST BUSS SOLO L R METER 10 34 10 34 CHANNEL FADER MODE...

Page 41: ...ehearsal The recorder operates as shown in the figure below during rehearsal operations Auto Punch Out point Rehearsal Out End point of playback All tracks are in playback monitoring mode Only track 3...

Page 42: ...n after Punch Out At Take of punch out the punch in recording track will not immediately enter the repro monitor mode from the input monitor mode enter the repro monitor mode about two seconds after m...

Page 43: ...points the points at which you press the foot switch and the sound is not recorded You can practice the Punch In Out operation repeatedly before you proceed to actual recording 1 Press the foot switch...

Page 44: ...Press the foot switch at the Punch In point Track 5 Track 6 Track 7 Track 8 Auto Punch In point Take In Track 1 Track 2 Track 3 Track 4 This part is changed Start point of playback Auto Punch Out poin...

Page 45: ...rent drive was formatted with the multiple undo function ON Multiple Undo is also possible Refer to page 64 for details on the Multiple Undo function Notes at executing sigle undo redo Note 1 This fun...

Page 46: ...tion The DIGITAL DATA IN jack of the D824 D1624 can be used either for an S P DIF digital signal optical or for an adat digital signal You must use the digital input setup menu in Setup mode to select...

Page 47: ...ital input tracks as described above you must set the operation clock in Setup mode 1 Use the Clock Sel operation clock setting menu to set the operation clock to Int See page 117 for more information...

Page 48: ...ck from WORD IN the recorder synchro nizes to the incoming clock while the DIGITAL and EXT SYNC in dicators light in the display Regardless of receiving or not receiving word clock from WORD IN the re...

Page 49: ...acks the outputs of tracks 1 and 2 are assigned to Outputs 1 8 and the outputs of tracks 3 and 4 are assigned to Outputs 9 16 If you select adat for the digital output the outputs of tracks 1 8 are as...

Page 50: ...EQ EDIT EQ EDIT EQ EDIT EQ EDIT SOLO ON ON SOLO STORE RECALL EQ ON STORE RECALL STORE RECALL SOLO 1 1 DATA EXIT ENTER MASTER 15 14 13 12 11 10 9 1 8 ANALOG IN 9 16 ADAT IN 17 20 EFF RTN AUX1 AUX2 AUX3...

Page 51: ...ing playback When using the analog mixer When using the digital mixer OPTICAL Q FREQ GAIN Q FREQ GAIN Q FREQ GAIN INPUT 4 INPUT 3 INPUT 2 INPUT 1 PAD 26dB A B PAD 26dB A B PAD 26dB A B PAD 26dB A B 16...

Page 52: ...e READY mode 6 Press the RECORD button The LED of the RECORD button will flash and the READY track will go to the input monitor mode 7 Press the PLAY button and playback the Program from the top Only...

Page 53: ...UT point Copy end point for copying or moving data to the clipboard during the Copy Paste or Move Paste operation Locating the AUTO RTN START point Locate end point from AUTO RTN END in Auto Return or...

Page 54: ...g the STORE key This menu is used to store data in the LOCATE ley described later Ignore this menu and go to the next step when storing data in the memory key 3 Press the desired memory key The STORE...

Page 55: ...e information on Auto Return and Auto Repeat Storing and editing LOCATE key You can store up to 99 individual time data in the LOCATE key for Locate only operations The time data stored can also be as...

Page 56: ...desired time data already stored in the LOCATE key edit that data and re store it 1 Press the RECALL key while the recorder is stopped The menu to select the LOCATE number will appear 2 Turn the JOG...

Page 57: ...currently selected Program Locate the position stored in one of the memory keys Press the desired memory key then press the LOCATE key The recorder will locate the point edit point stored in the corr...

Page 58: ...UP mode so that the recorder will start playback preroll time before the locate point You can set the preroll time from 0 to 10 seconds Refer to the chapter Changing the Initial Settings SETUP Mode on...

Page 59: ...T point then play up to the AUTO RTN END point until you cancel the function by pressing the STOP button To enable this function both AUTO PLAY mode and AUTO RTN mode should be turned on and the AUTO...

Page 60: ...riginal play back speed 5 Press the REWIND button instead of the F FWD button This cues in the rewind direction at five times speed The PLAY LED and REWIND LED lights up while cuing is taking place 6...

Page 61: ...ple shows the indication of track 4 envelope after RECORD TRACK select key 4 12 is pressed At this time the recorder is in the STILL status scrub mode is in still status and the REWIND LED and F FWD l...

Page 62: ...the sound This function is effective only when the recorder is stopped Previewing the rise of the sound fade in While holding down the SHIFT key press the AUTO RTN START key the AUTO PUNCH OUT key or...

Page 63: ...ial while you preview the sound At this time you can also adjust the size of the trimming steps the amount of offset controlled by the JOG dial Trimming allows you to fine tune the position of the loc...

Page 64: ...time of Take 4 Completion data and time of Take 5 Completion data and time of Take 6 Notes regarding the Multiple Undo operation The time stamp of each take references to the internal clock of the rec...

Page 65: ...hen optimize the disk Keeping only one take First apply the Multiple Undo function to the take you wish to keep then optimize the disk For example if six takes exist on the disk as shown below and you...

Page 66: ...d then edit it Copy Paste and Move Paste Copy Paste and Move Paste might seem like the same function However they are different as shown in the diagram Remember this difference when you start using th...

Page 67: ...ve 1 Press the RECORD TRACK select key of the copy or move source track to set it READY Select from mono tracks or adjacent odd even tracks 1 2 3 4 5 6 etc 2 Press the EDIT key repeatedly until Copy C...

Page 68: ...lete the flashing Copy P or Move P lights up continuously and COMPLETED is displayed 8 Press the EXIT NO key or the STOP button The recorder exits edit mode and displays the previous Time Base indicat...

Page 69: ...the switched program Check the registered editing point with the Preview function and if necessary correct the editing point In the same way as before enter the editing mode by pressing the EDIT key...

Page 70: ...track you need to move the data to a real track then erase it When you erase all tracks data the REC END point will move backward However if you erase data on a mono track or multiple tracks but not a...

Page 71: ...rogram In either case you can expand the recordable area on the disk Use either one of the erase operations to erase unnecessary data if the recorder displays an alarm message indicating insufficient...

Page 72: ...you to swap mono track data or multiple track data of the current Program between Real tracks and Additional tracks in units of single or multiple tracks You can swap mono track data between Real tra...

Page 73: ...lashing Swapping mono track data between any two tracks 1 When 1 8 is flashing turn the JOG dial Turning the JOG dial allows you to select a mono track from 1 2 3 4 24 in the left column The right col...

Page 74: ...CENE MEMORY REC BUSS 8 7 6 5 4 20 20 1 2 3 19 19 18 18 17 17 ANALOG IN ANALOG IN EFF R EFF RTN TN PAGE SELECT MIDI OUT MIDI IN MIDI clock song position pointer Master Recorder MIDI sound sources MIDI...

Page 75: ...map is made in steps 2 and 3 Initial setting 001 bar 1st meter Tempo120 Permissible bar setting Follows the previous Setup of the time signature Permissible signature setting Follows the previous Setu...

Page 76: ...1BEAT 00CLK This setting is made in consideration of the time required it will not sync immediately for the MIDI sequencer etc to enter into sync As a result if the recorder is played back from ABS 0...

Page 77: ...g will be held even though power is switched OFF Refer to page 110 SETUP mode MTC offset time setting for operating procedure 3 In the SETUP mode MTC offset mode setting whether the MTC offset time se...

Page 78: ...rst bar and therefore it can be made to sync from the head of the tune Offset mode For BAR As mentioned before because the ABS 0 position is set at the 002BAR 1BEAT 00CLK position the setup MTC offset...

Page 79: ...recorder 3 connect MIDI THRU Note to MIDI IN Notes In order to slave drive the recorder with each other the best setting is to supply word clock signals together with MTC from the master As shown in...

Page 80: ...g procedure and details 2 Set the SETUP mode MTC offset mode setting to the same mode as in the recorder 1 Refer to page 111 SETUP mode MTC offset mode setting for operating procedure and details 3 Se...

Page 81: ...om lit to blinking 4 During FF REW the master only will be in the FF REW mode and the slaves will remain stopped but when playback recording is started the slaves will immediately chase lock Note The...

Page 82: ...the computer with MIDI interface with MIDI IN of the recorder The computer sequence software complying to MMC MTC must be activated Setup of external equipment Sequence software is setup as follows Se...

Page 83: ...lay will change from lit to blinking 3 During FF REW of the sequence software the recorder will remain stopped but upon starting to record the recorder will immediately chase lock Note Chase lock of t...

Page 84: ...rogram individually Following about five seconds of pilot signal shown in the diagram below song data in the current drive is output to a connected DAT Two tracks of audio data shown in black in the d...

Page 85: ...formatted in 24 bits only the upper 16 bits will be loaded and the lower 8 bits will be 0 Likewise in a 20 bit machine the upper 20 bits only will be loaded and the lower 4 bits will be 0 Note when s...

Page 86: ...ial converter to use an S P DIF digital signal Connecting both output and input connectors on the recorder to the input and output connectors on the external digital device respectively may generate a...

Page 87: ...EXECUTE YES key again Save Trk 1 8 1 is flashing appears on the display and you can select tracks to save 8 Select the desired track range using the JOG dial You can select 1 9 and 17 of the points th...

Page 88: ...would disconnect the S P DIF signal until the session is complete Otherwise the recorder will generate noise and affect the connected device If the external device has only COAXIAL type RCA digital I...

Page 89: ...ith some sort of data is selected and loaded only the song data loaded will be valid All the data of the programs recorded on that same track up to then will be erased 6 Press the EXECUTE YES key Now...

Page 90: ...connect a SCSI device to a D824 D1624 Notes on connection Before making connections make sure that both the recorder and the SCSI drive are turned off One SCSI drive may be connected on the recorder...

Page 91: ...rive 3 Press the SETUP key to enter the Setup mode 4 Turn the JOG dial to select Disk Format flashes and press the EXECUTE YES key again Disk Format IDE IDE flashes appears 5 Rotate the JOG dial to di...

Page 92: ...e the JOG dial to select Save PGM will flash and press the EXECUTE YES key The indication of the type of digital signal to be saved will flash on the display 3 Rotate the JOG dial to select a flashing...

Page 93: ...has been successfully saved Please remember this The instructions on the left was based on use of disks that were already formatted for backup use when saving programs using several disks It is recomm...

Page 94: ...s the EXECUTE YES key The external digital device is set to SCSI 6 and the existing Song numbers will flash on the display 4 Rotate the JOG dial to select the back up number to load You can choose to...

Page 95: ...rs and SURE flashes Turning the JOG dial in this state makes it possible to select a program on the current drive The size of the program appears when the program is selected If you select a program t...

Page 96: ...prevent loss of data due to overwriting DIRECTORY OF THE BACKUP DISK The saved WAV file will be recorded in the root directory first level of the backup disk WAV files that can be loaded must be plac...

Page 97: ...After selecting the track press the EXECUTE YES key If All Trk or any desired track was selected the display will change to the following When All Trk is selected The display will change to making a n...

Page 98: ...o the disk this WAV file will be additionally recorded Alternate display of Title New PGM and MB Disk capacity is short by the amount of to be able to add a new WAV file Press the EXECUTE YES key Note...

Page 99: ...e beginning 6 letters of the file name will be individually acknowledged and can be selected 5 Select WAV file then press the EXECUTE YES key The display will change to selecting the track to be loade...

Page 100: ...e WAV files which can be saved loaded by this recorder must have file names written as WAV Other file names cannot be acknowledged by this recorder Unknown file names will not be acknowledged and coul...

Page 101: ...NC preset Sync Preset Available with option Model 8345 Refer to theAPPENDIX Setting the Virtual LTC display Virtual LTC Available with option Model 8345 Refer to theAPPENDIX Setting the chase offset d...

Page 102: ...nding menu indicator will flash Note With the factory initial settings or when you turn on the power again after you format a current drive disk Signature Set Setting a signature appears Otherwise the...

Page 103: ...s to the current time signature appears The initial setting is 001bar 4 4 4 4 for the first measure At this time rotating the JOG dial clockwise enables you to check the current time signatures in seq...

Page 104: ...steps 1 3 described in the Storing a time signature section 2 While the measure number is flashing turn the JOG dial counter clockwise to select All Clear When All Clear appears SURE flashes and you...

Page 105: ...ime signature setting Setting range of beats Determined by the time signature setting Setting range of tempo 30 250 quarter note delete Max setting points 64 points You can set the tempo for each Prog...

Page 106: ...specify tempo values in the song with 001bar 4 4 and 005bar 3 4 settings the Tempo Map includes the settings shown in the table below Modifying or deleting stored tempo settings 1 Repeat steps 1 3 de...

Page 107: ...all be used for record playback Initial setting Off Option Off or On You can turn the function on and off for each Program individually The settings cannot be saved and loaded as part of the song dat...

Page 108: ...saved and loaded as part of the song data The settings are maintained after you turn off the power to the recorder This point is located if the current position is after the locate point Setting a pr...

Page 109: ...nc signal type appears on the display Press the EXECUTE YES key to turn off the flashing indication The MIDI sync signal type indication flashes and the indicator flashes indicating the SYNC OUT setti...

Page 110: ...exits SETUP mode and displays the previous Time Base Note There are no 29 97nd or 29 97df in the MTC standard Use either 30nd or 30df unless you definitely need to synchronize the recorder with NTSC...

Page 111: ...not set a preroll value If you set Offset mode to BAR and use MTC to synchronize sequence software on the computer the tempo of the sequencer may sometimes slip gradually This is because the tempo of...

Page 112: ...e power to the recorder The Program is automatically checked before the operation The sampling rate is automatically checked before the operation Setting the Slave type 1 While the recorder is stopped...

Page 113: ...synchronous or asynchronous By using this function signals from external digital equipment CD MD DAT adat digital mixer can be digitally recorded If SP DIF is selected the S P DIF L R signals input t...

Page 114: ...isplay In such a case the track not locked will automatically be analog input By using this function 16 track simultaneous recording can be done by input of analog signals to tracks 1 8 and adat signa...

Page 115: ...ETUP mode and displays the previous Time Base Setting BAR BEAT resolution mode Resolution menu The Setting BAR BEAT resolution mode menu enables you to turn BAR BEAT resolution mode on and off The ini...

Page 116: ...ior to the EXECUTE YES key press press the STOP button or the EXIT NO key Each time you press one of these keys the recorder returns to the previous hierarchy level of the menu and finally exits SETUP...

Page 117: ...if an optional Model 8345 TC SYNC card is installed For details refer to the APPENDIX 1 While the recorder is stopped press the SETUP key to enter SETUP mode 2 Turn the JOG dial to select Clock Sel f...

Page 118: ...m WORD IN the recorder automati cally synchronizes to the incom ing clock while the DIGITAL and EXT SYNC indicators light in the display When receiving word clock from WORD IN the recorder synchro niz...

Page 119: ...in the recorder providing the information obtained here to our nearest Fostex Service Station will be of great help in giving quick service The following items will be displayed and can be confirmed 1...

Page 120: ...e was linear In addition to Linear the display can also show Backup LP ADAC or Illegal FM This indicates that simultaneous recordable number of tracks is 16 In addition to 16 Trk the display can also...

Page 121: ...tion Setup of permission or denial of recording If power to this recorder is switched again the drive will automatically switch to current drive E IDE In order to take out the removable disk when set...

Page 122: ...g Position Common Song Select Tune System Clock Real Time Commands rem 3 Local ON OFF Aux All Notes OFF Message Active Sense Reset Notes rem 1 MMC Device ID 00 99 127 MTC Identity reply FOSTEX Exclusi...

Page 123: ...MMC Response Information Field List MMC Response Information Field List Command 01 SELECTED TIME CODE READ WRITE MOVE ADD SUBTRACT 03 REQUESTED OFFSET READ WRITE 04 ACTUAL OFFSET READ 08 GP 0 READ WRI...

Page 124: ...ip 12 4D count mmc track 32 4D edit message Move clip 12 4D count mmc track 32 4D edit message Move clip 12 4D count mmc track 32 4D edit message Move clip 12 4D count mmc track 32 4D edit message Dig...

Page 125: ...te status 22 4E or 32 4E edit message 00 Digital in ch st 23 41 33 41 channel channel Adat in status 23 41 33 41 channel 7F count mmc track Digital out ch st 23 42 33 42 channel channel Adat out statu...

Page 126: ...ce ID 06 write 40 count GP3 0B mmc time F7 Example 2 Locate memory is recalled using the read command F0 7F device ID 06 read 42 count GP3 08 mmc time F7 Example 3 On the fly registering in the punch...

Page 127: ...Indicates void data data necessary for paste does not exist 18 Indicates track select error track necessary to execute copy move or erase cut is not correctly setup 19 repeat count Indicates repeat nu...

Page 128: ...by event number do not exist at receiving the signature map request e v e n t n u m b e r e v e n t n u m b e r e v e n t n u m b e r e v e n t n u m b e r e v e n t n u m b e r When one data registe...

Page 129: ...ll be replied 12 47 count mmc track erase command When this command is received D824 D1624 will erase the data writes in 0 data in the section from the pre registered auto punch in point through auto...

Page 130: ...t will be count 0 and all channels will be inputs from Adat In If count 0 mmc track is indicates then only the tracks selected will be Adat In inputs channel 0 channel 0 indicates the normal analog in...

Page 131: ...ring execution status of copy paste edit ing When this command is received D824 D1624 will reply with either 32 46 edit message 02 mmc time or 32 46 edit message 00 mmc time indicates unprocessed time...

Page 132: ...ot permissible 32 22 on off loop on off status reply This is the reply against 22 22 loop on off status request 32 28 post locate mode post locate mode status reply This is the reply against 22 28 pos...

Page 133: ...it will be effective if inquiry is made in 40msec units 33 46 on off bar beat resolution status reply This is the reply against 23 46 bar beat resolution status request 33 47 midi sync midi sync out...

Page 134: ...Separation More than 80dB at 1kHz 0dB 24bit T H D Less than 0 004 1kHz 12dB typical INPUT OUTPUT Analog Input Connector 1 to 8 RCA pin jack Input Impedance More than 10k ohm Reference Input Level 10dB...

Page 135: ...for product improvement Adat and the OPTICAL symbol are trademarks of Alesis Corporation FDMS 3 Fostex Disk Management System 3 FDIO 1 Ver 2 Fostex Data In Out 1 Ver 2 PHYSICAL Dimensions 482 W x 148...

Page 136: ...Memo...

Reviews: