background image

FMI BRANDS INC. 

101 - 3570 194 Street  |  Surrey, B.C. Canada  V3Z 1A5  |  Toll Free  1-888-514-1663  |  Fax 1-888-797-9931

D.210.000.V1

LP Cylinder 

not included

Owner’s 

Manual

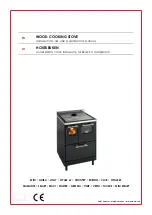
Model number FM2BS-210

® is a registered trademark of FMI Brands Inc.

The OUTLAND flame is a registered trademark of FMI Brands Inc.

PRINCETON

2 BURNER GAS STOVE

Summary of Contents for OUTLAND LIVING FM2BS-210

Page 1: ...1A5 Toll Free 1 888 514 1663 Fax 1 888 797 9931 D 210 000 V1 LP Cylinder not included Owner s Manual Model number FM2BS 210 is a registered trademark of FMI Brands Inc The OUTLAND flame is a registered trademark of FMI Brands Inc PRINCETON 2 BURNER GAS STOVE ...

Page 2: ...uctive Harm www P65Warnings ca gov WARNING HOT SURFACE The top grill area the side walls the bottom and wind break may become extremely hot during operation CAUTION HEAVY OBJECT TWO PERSON LIFT REQUIRED This instruction manual contains important information necessary for the proper assembly and safe use of this product Read and follow all warnings and instructions before assembling and using the a...

Page 3: ...enance instructions thoroughly before installing or servicing this equipment WARNING If the information in this manual is not followed exactly a fire or explosion may result causing property damage personal injury or loss of life Installation and service must be performed by a qualified installer service agency or the gas supplier DANGER Do not store grill until cool to touch Failure to do so coul...

Page 4: ...reak Leg Extension 4x SECTION 1 ASSEMBLY continued d Close the grill and set the 2x grill locking pins Ensure both 2x pin ball bearings are fully through the holes and the ball bearing engagement should be visible on the other side e Close both lids and latch the 2x lid locks STEP 2 INSTALL LEG EXTENSIONS a Lay the appliance on its back NOTE To avoid scratching or denting choose a flat non marking...

Page 5: ...t successful the first time try a few more locations LEG HEIGHT ADJUSTMENT If repositioning the stove is not successful adjust the leg height Typically one leg adjustment is all it takes 1 Assess which leg requires height adjustment 2 Loosen the leg locking thumbscrew 3 Slide the leg extension down just far enough to make contact with the ground and level the stove 4 Tighten the leg locking thubsc...

Page 6: ...n the left lid 3 Release the 2x grill locking pins and lift the grill to take out the windbreak and leg extensions SECTION 1 ASSEMBLY continued NOTE TO USER Before igniting the unit for the first time follow steps one through 5 in the below Ignition section IMPORTANT Ensure the gas hose is not contacting the appliance enclosure and the LP cylinder is stabilized Perform LEAK TEST PRIOR TO IGNITION ...

Page 7: ... COLOUR MOVE THE AIR FUEL ADJUSTMENT LEVER FOUND UNDER THE STOVE GAS VALVE ADJUST THE LEVER TO MAXIMIZE THE BLUE FLAME A FLAME WITH MORE BLUE COLOUR IS BURNING HOTTER MORE CLEANLY AND MORE EFFICIENTLY THAN A YELLOW FLAME STEP 6 Using a lighter or match ignite lighter and hold flame slightly above the burner then open the valve on the appliance slowly by turning counter clockwise until the unit ign...

Page 8: ...d It is normal that your EFV trips if you open the propane tank valve too quickly or if you leave the gas knob open before lighting or both GAS REGULATOR NIPPLE WITH EXCESS FLOW LIMITING DEVICE EFV GAS HOSE SECTION 5 IGNITION TROUBLESHOOTING APPLIANCE WON T LIGHT IGNITION PROBLEM IGNITION TROUBLESHOOTING 1 Ensure all appliance valve s are OFF and the cylinder valve is closed 2 Disconnect LP cylind...

Page 9: ... 17 2 WIDTH 235 mm 9 25 HEIGHT 366 mm 14 4 GRILL AREA DEPTH 221 mm 8 7 GRILL HEIGHT STOVE WIDTH LIDS DEPLOYED 1290 mm 50 8 GRILL AREA LENGTH 624 mm 24 5 660 mm 26 LENGTH APPLIANCE DIMENSIONS COMPACT TRANSPORT STORAGE Front TABLE TOP DEPLOYMENT Front LP Cylinder not included LP Cylinder not included SECTION 6 APPLIANCE DIMENSIONS Approximate ...

Page 10: ...inches of water column wc Max Gas Supply Pressure 250 PSI Injector Size 1 63 mm Injector size marked clearly on the gas valve orifice SECTION 7 OPERATIONAL SAFETY DANGER 1 Never leave the appliance unattended while in use The user must have a clear line of sight to the appliance at all times 2 Keep children and pets away from appliance at all times 3 The use of alcohol prescription or non prescrip...

Page 11: ...nt on the unit during use and should use caution and stay away to avoid burns or clothing ignition Carefully supervise young children in the area of this appliance Clothing or other flammable materials should not be hung from the appliance or placed on or near the appliance Any guard or other protective device removed for servicing the appliance must be replaced prior to operating the appliance In...

Page 12: ...pes of caps or plugs may result in leakage of propane Do not store an LP tank in enclosed spaces such as a carport garage porch covered patio or other building Never leave an LP tank inside a vehicle which may become overheated by the sun Do not store an LP tank in an area where children play CONNECTION 1 Ensure the LP cylinder valve is CLOSED and the appliance gas valve is off 2 Securely attach r...

Page 13: ...rt s recommended by the appliance manufacturer WARNING If the information in this manual is not followed exactly a fire or explosion may result causing property damage personal injury or loss of life SECTION 7 OPERATIONAL SAFETY continued Appliance Valve Coupling Gas Regulator LP Cylinder Coupling d If no adverse reaction is observed and the connections all seem fine then move to the ignition sequ...

Page 14: ...oap water to wipe down your appliance to keep it clean 6 Do not use flammable or corrosive cleaning products on or near this unit 7 Do not use abrasive cleaners GUIDELINES Keep appliance area clear and free from combustible materials gasoline and other flammable vapors and liquids Do not obstruct the flow of combustion and ventilation air Keep the ventilation opening s of the cylinder enclosure fr...

Page 15: ...d centre hole in the cast aluminum burner venturi port Ensure the burner mounting screws under the stove are firmly tightened 11 Close the grill Ensure both 2x grill locking pins are fully seated SECTION 8 APPLIANCE MAINTENANCE continued BURNER VENTURI INSPECTION Inspect and clean the cast aluminum burner venturi tubes often and especially if the stove has been sitting unused for a period of time ...

Page 16: ...info outlandliving com WARNING NOTES Attention The lids are not load bearing surfaces Do not place heavy objects The lids may be damaged or the stove may tip causing harm NEVER SIT ON SIDE TABLES The formulae for calculating fuel consumption gas cooking time is as follows Each burner is rated to a maximum of 30 000 BTU h A full 20lb 9 kg LP cylinder has approximately 430 000 BTU capacity Y QTY of ...

Reviews: