Fastwel CPC1302, User Manual
The Fastwel CPC1302 offers top-notch performance and reliability. With our user-friendly manual, you can effortlessly set up and operate your CPC1302. Download your free user manual from our website today and unlock the full potential of this exceptional product.
Share
Download


Reviews:
No comments
Related manuals for CPC1302
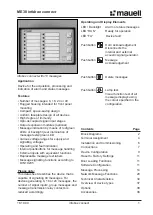
ME30 infobox connect
Brand: Mauell Pages: 40

TFP2
Brand: Toastmaster Pages: 14

InstaShow WDC10R
Brand: BenQ Pages: 31

APPH6000
Brand: AnaPico Pages: 40

R8172112K
Brand: Barco Pages: 20

486MCZ500
Brand: Navitar Pages: 1

SP 366
Brand: ECG Pages: 24

RSM 01
Brand: ECG Pages: 28

SaladXpress 70950-CN
Brand: Hamilton Beach Pages: 18

Big Mouth 70590
Brand: Hamilton Beach Pages: 36

FC11
Brand: Hamilton Beach Pages: 44

MINI BLITZ CHOPPER
Brand: SQ Professional Pages: 8

DFC40C1SSDB
Brand: Danby Pages: 22

MC2000
Brand: THORLABS Pages: 33

69561
Brand: Lacor Pages: 158

AstroBeam S110
Brand: A+K Pages: 30

MULTIDO
Brand: Overmax Home Pages: 27

FP417
Brand: Magiccos Pages: 2


