Fanbao QJY3.0-E, Instructions And Maintenance Original Manual
The Fanbao QJY3.0-E is a high-quality product that comes with original instructions and maintenance manual for easy reference. You can download the manual for free from our website. Ensure the proper care and maintenance of your Fanbao QJY3.0-E with the manual to maximize its efficiency and longevity.
Share
Download


Reviews:
No comments
Related manuals for QJY3.0-E

54386
Brand: JBM Pages: 35

SMART Series
Brand: Magmaweld Pages: 8

MMA 160
Brand: Magmate Pages: 20

LiftPlus
Brand: Magliner Pages: 20

STAGEMAKER SM1
Brand: R&M Pages: 53

40 PFC
Brand: TITANCUT Pages: 44

3154020015029
Brand: GYS Pages: 53

HOBBY WELD K1790-1
Brand: Lincoln Electric Pages: 24

Invertec V305-T AC
Brand: Lincoln Electric Pages: 2

IEC 61850
Brand: ABB Pages: 4

I-7019R
Brand: ICP DAS USA Pages: 4

MOTOWELD-EH500
Brand: YASKAWA Pages: 129

S2000-AR2
Brand: bolid Pages: 3

TH1632
Brand: PVI Pages: 12

8A-GT-125
Brand: morse Pages: 5

QK-CT219500
Brand: quiko Pages: 12
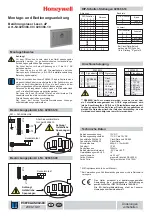
026366.00
Brand: Honeywell Pages: 4

Connected Home SPR-S8EZS
Brand: Honeywell Pages: 2


