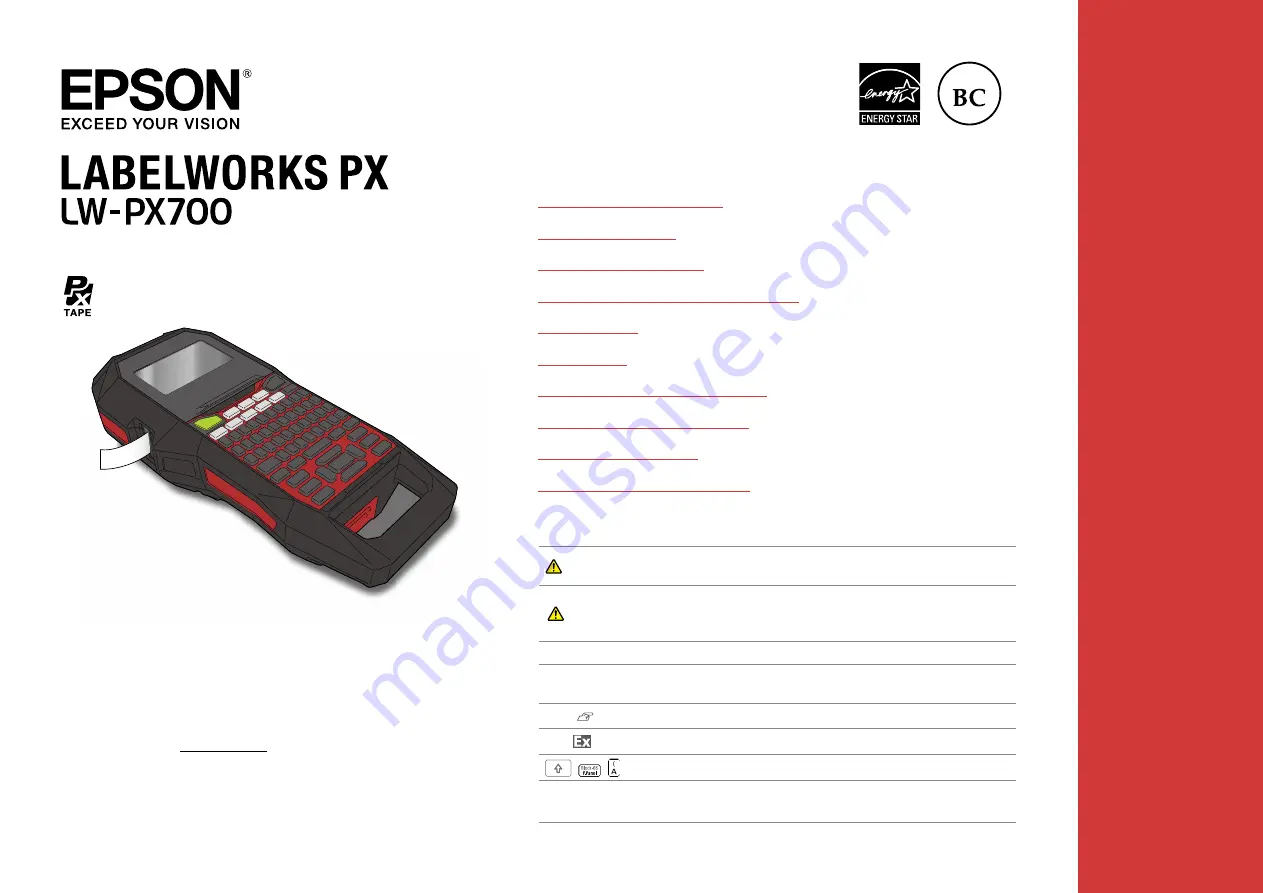
background image

User’s Guide


TOP

Ver.01

Read this document carefully to use this product safely and correctly. If your 
product is faulty, please read the included warranty card and contact the store 
you purchased it from. If you require further assistance, contact your local K-Sun  
customer support center. 

Please also visit us at www.ksun.com for help and support. You can download 
the latest version of this User’s Guide from the website.

Portions of this software are copyright 2016 The FreeType Project  
(www.freetype.org). All rights reserved.

Content menu

Safety Instructions
Specifications
Troubleshooting
Part Names and Functions
Start Here
Cleaning
Initializing the Settings
Purpose-based Index
Key Menu Index
Frame and Table Lists

Notation used in this manual


WARNING

Indicates information that, if ignored, could possibly result in serious 

personal injury or even death due to incorrect handling.


CAUTION

Indicates information that, if ignored, could possibly result in 

personal injury, physical damage, or damage to equipment due to 

incorrect handling.

Attention

Indicates important information about the printer.

MEMO

Indicates additional information and points which may be useful to 

know regarding a topic.

Indicates a place with more detailed information.

Shows an image of the label to be used as an example.

Indicates the buttons on the printer.

"Name"

Indicates the menu items, messages shown on the display, or the 

name of a manual. Example: "On", "Start print?"

Summary of Contents for LabelWorks LW-PX700

Page 1: ...t Here Cleaning Initializing the Settings Purpose based Index Key Menu Index Frame and Table Lists Notation used in this manual WARNING Indicates information that if ignored could possibly result in serious personal injury or even death due to incorrect handling CAUTION Indicates information that if ignored could possibly result in personal injury physical damage or damage to equipment due to inco...

Page 2: ...an 10 minutes and consult your doctor at once If you do not the liquid may cause loss of eyesight Never disassemble or modify the battery pack This may cause fire explosion leakage overheating or damage Do not expose the battery to fire or heat it This may cause fire explosion leakage overheating or damage WARNING When using the AC adapter and power cable The cords included with this product conta...

Page 3: ...hen handling batteries Keep the battery pack away from fire or flame if it produces a strange odor or leakage Otherwise fire or explosion may occur Should any battery liquid get on skin or clothing promptly wash it off with clean water If you do not the liquid may damage your skin Do not expose the battery to water Do not allow water to contact the terminals This may cause fire overheating or elec...

Page 4: ...he power off after use Powering off message is displayed while turning off the product Do not remove the AC adapter until the message disappears Be sure to replace batteries with the power turned off If you replace the batteries while the product is powered files or data stored on it may be deleted Recycling the Battery Contains a lithium ion battery Must be recycled or disposed of properly MEMO D...

Page 5: ...adapter Type AST1116Z2 1 Manufacturer Seiko Epson Corp Input AC100 240V 0 4A 50 60Hz dedicated adapter power cable only Output DC11V 1 64A Total output power 18 W Li ion battery specifications Ambient temperature During operation 0 to 40 degrees C Charge 0 to 40 degrees C During storage Less than 1 month 20 to 50 degrees C Less than 3 month 20 to 40 degrees C Less than 1 year 20 to 20 degrees C Ch...

Page 6: ... the following Use a wider tape Reduce the text or cell size Lower ECC Level Overheated The printhead is overheated Turn off the power and remove the tape cartridge then leave the printer until it cools down Trash at slot Remove trash Tape remains in the tape eject slot Remove the tape Remove cut tape Unable to start printing because cut tape remains in the tape eject slot Remove the tape from the...

Page 7: ... Creates a label with a sequence number Hold down and press this to create with block sequence numbers 10 Creates a barcode label 11 Enters a symbol 12 Cursor keys 13 Confirms the settings 14 Adds a block 15 Sets the margins 16 Sets the tape length Hold down and press this to change the text orientation 17 Sets the format and style 18 Changes the font size Hold down and press this to change the fo...

Page 8: ... between inch and cm inch cm 3 Symbol input mode 4 Caps Lock ON 5 Block number 6 Row number 7 Cursor 8 Color of text to be printed 9 Set tape color Tape colors and ribbon colors shown on the display 10 Remaining battery level 11 Font size 12 Label cut method 13 Set tape type Tape colors and ribbon colors shown on the display Display Color Display Color WHT White GRY Gray YEL Yellow BLK Black RED R...

Page 9: ...rinter with the Li ion battery installed Charging error Charging completed Charging Charge LED WARNING Be sure to use the dedicated Li ion battery C52CE97010 Using a battery other than the one specified may cause fire explosion leakage overheating or ohter damage CAUTION When disposing of used batteries make sure to follow the regulations 1 Open the battery cover 2 Install the Li ion battery in th...

Page 10: ... printer Transferring Cable Label Data For how to install and operate the software see Label Editor Professional User s Guide 1 Connect the USB cable to the printer 2 Connect the other connector of the USB cable to the computer Using alkaline batteries You can use alkaline batteries instead of Li ion battery When using alkaline batteries install them in the correct orientation CAUTION When you hav...

Page 11: ... firmly If you opened the top cover while a tape cartridge is installed check that the tape end is put into the tape eject slot before beginning operation Take care to keep the label for detecting the tape cartridge and the sensor of the printer clean Otherwise tape may no longer be detected correctly Do not touch the sensor directly with your fingers Label for detection Sensor 1 Rewind the ink ri...

Page 12: ...tion within five minutes the printer automatically turns off The characters you have entered in the current session are stored Furthermore if there is no key operation within an hour while connected to a computer the printer automatically turns off Feeding the tape CAUTION Be sure to feed the tape every time after you install a tape cartridge 1 Press 2 Select a function with and then press Tape fe...

Page 13: ...d restores the font size and other settings to the initial settings All Format Deletes all text and displays the General editing screen Depending on the label type you create All Format may not be displayed 4 Entering text 1 Press 2 Press 3 Press A list of characters appears For the accent marks that can be inserted Accent 4 Select a character with and press â is entered 5 Press keys Câble appears...

Page 14: ...e scrolls on the entire screen When the preview ends the editing screen reappears CAUTION Do not insert your fingers into the tape eject slot Do not pull the tape until the printing is completed Attention Insert tape will appear on the display if the tape cartridge is not loaded or not correctly set Length of the label shown on the display is a guide and may not match the length of the printed lab...

Page 15: ...ned causes 6 Attaching label 1 Peel off the backing paper 2 Attach the label and rub it firmly 7 Turning the Power Off 1 Press The characters you have entered in the current session are stored even after the printer is turned off They are displayed when it is turned on again 2 Open the battery cover and then remove the Li ion battery If the AC adapter is connected disconnect the AC adapter from th...

Page 16: ...leaning CAUTION Turn off the printer and remove the batteries before cleaning If the AC adapter is connected disconnect the AC adapter cable from the printer Exterior Wipe the dirt off with a soft cloth If it is very dirty use a cloth damp CAUTION Never use chemicals or solvents such as benzine thinner or alcohol or use a chemical duster Printhead Clean the printhead with a cotton swab ...

Page 17: ...tings if the printer does not operate normally such as the display is interrupted Attention This function initializes the settings Take extreme care before initializing it All the created text will be lost and the settings you made will be reset 1 If the power is on press to turn it off 2 Press and hold and press 3 When a message appears press The settings will be initialized MEMO To cancel initia...

Page 18: ...ck the illustration of the label you wish to create or function you wish to use to display information such as the creation procedure or setting procedure Patch Panel label Block 66 label Punch Block label Faceplate label Cable label 1 Cable label 2 Barcode label Self Lamination Overwrap Sequentially numbered label 1 Label with symbol Label Types Mirrored text label Large label Sequentially number...

Page 19: ...y Menu Index Frame and Table Lists Purpose based Index Format Style Font size Font Length Margins Text orientation Adding block Transferring Cable Label Data Transferring Original Symbol Data Printer Settings Creating Multiple Labels at Once Saving Recalling Frequently Used Labels Printing Same Label Multiple Times Customizing Labels Useful Functions ...

Page 20: ...with and then press In this example we will select Blocks Blocks Sets the length by block length Label Sets the length by label length 3 Enter the blocks length and then press Setting range 0 25 to 30 cm 4 Enter the blocks number and then press In this example we will enter 3 Setting range 1 to 50 5 Select the type of separator with and then press In this example we will select Line 6 Select the o...

Page 21: ...nd then press In this example we will select Blocks Blocks Sets the length by block length Label Sets the length by label length 3 Enter the blocks length and then press Setting range 0 25 to 30 cm 4 Enter the blocks number and then press In this example we will enter 4 Setting range 1 to 50 5 Select the type of separator with and then press In this example we will select Line 6 Select the orienta...

Page 22: ... placed at the center of a block This enables you to easily create a label suitable for the size of the area where it will be affixed Label length Blocks number Block Block 1 Press 2 Enter the label length and then press Setting range 1 to 99 9 cm 3 Enter the blocks number and then press In this example we will enter 2 Setting range 1 to 50 4 Select the orientation with and then press In this exam...

Page 23: ...pins connected to a punch block Lower count Upper count 1 Press 2 Select the blocks type with and then press In this example we will select 4pairs Blank Creates a table of two rows and one column 3 Select the text type with and then press In this example we will select Pins Pins Seri Blank 4 Enter the upper count and then press In this example we will enter 1 5 Enter the lower count and then press...

Page 24: ...he angle from which the cable is viewed Label length Tape width Margin Margin 1 Press 2 Select the length type with and then press In this example we will select Length Dia Sets the length by cable diameter Length Sets the length by label length 3 Enter the label length and then press Setting range 1 to 99 9cm 4 Select On or Off of repeat text with and then press In this example we will select On ...

Page 25: ...ength Separator Text length 1 Press 2 Select the setting method of space length with and then press In this example we will select Length Dia Sets the length by cable diameter Length Sets the length by space length 3 Enter the space length and then press Setting range 0 25 to 30 cm 4 Enter the text length and then press Setting range 0 25 to 30cm 5 Select the type of separator with and then press ...

Page 26: ... number Label length 1 Press 2 Select the label length with and then press Auto Automatically adjusts the label length depending on the length of text Set Sets the label length Setting range 1 to 99 9 cm 3 Enter the labels number and then press In this example we will enter 3 4 Select the type of margins with and then press 5 Select the orientation with and then press In this example we will selec...

Page 27: ...me and Table Lists Creating Special Labels Creating Labels with Dedicated Tape Self Lamination Overwrap Use the dedicated Self Lamination Overwrap This label tape comes with transparent film The film can be wrapped around the label to prevent it from getting dirty Label length 1 Enter the label length and then press Setting range 1 to 99 9 cm 2 Enter the text 3 Press ...

Page 28: ...ith and press 4 Press MEMO For available symbols see Symbol List on the separate sheet Creating Barcode Labels MEMO You may not be able to add a barcode depending on the label type you create Only up to two barcodes can be inserted in one label Supported barcode types EAN 8 EAN 13 CODE128 CODE39 QR CODE ITF CODABAR UPC A UPC E 1 Press 2 Select an item with and press Move on to the next options unt...

Page 29: ...we will select 2 times 4 Press 5 Select Print copies with and then press 6 Enter the number of print copies and then press In this example we will enter 6 7 Select Start print with and then press Printing starts Creating Labels with Block Sequence Numbers Assigned You can assign sequential numbers to blocks Up to four digits including numbers 0 to 9 and alphabet letters a to z and A to Z can be en...

Page 30: ... you want to apply the function with and press When Character is selected the function is applied to all characters on the right of the cursor MEMO The setting items displayed when you press differ depending on the label type you create You can decorate your label by setting the following Layout Left Center Justify Right Adjusts the layout when multiple lines are used Frame Table Decorates the tex...

Page 31: ...ic Italic Normal Bold B I Changes the text in bold or italics Length This setting is the same as when is pressed Setting the Label Length Margins This setting is the same as when is pressed Setting the Margins Orientation AB A A B Sets the orientation of the text AB A A B Font size This setting is the same as when is pressed Changing the Font Size Font This setting is the same as when is pressed C...

Page 32: ...ches between Horizontal and Vertical Horizontal Vertical When creating Patch Panel Block 66 Faceplate or Mix Len 1 Press 2 Select the orientation with and press Hori Vert 1 Vert 2 Changing the Font Size You can change the font size of text or a block line by line Among the preset setting items select one with the same number of lines as that of the text or block you want to change MEMO You may not...

Page 33: ...Length You can set the length of label or block MEMO When creating a special label you can set the length again Setting items for special label is displayed after pressing 1 Press 2 Select the setting method of the length with and press Auto Automatically adjusts the label length depending on the length of text Set Sets the label length Setting range 1 to 99 9 cm 3 Select the alignment for the tex...

Page 34: ...istration number and then press Recall the saved label 1 Press 2 Select Recall with and press 3 Select a registration number with or the number keys and then press The recall confirmation screen appears 4 Confirm the registration number and then press Deleting the saved label 1 Press 2 Select Delete with and press 3 Select a registration number with or the number keys and then press The deletion c...

Page 35: ...ess 4 Select 2 2 with and press 5 Select Start print with and press Printing starts MEMO The function remains enabled even after printing To disable the function select Off Mirror print On Off 1 Press 2 Select Mirror print with and press 3 Select On with and press 4 Select Start print with and press Printing starts MEMO The function remains enabled even after printing To disable the function selec...

Page 36: ...ixing consecutively printed labels one at a time Select On to avoid a printed label from dropping A printed label stays at the tape eject slot When printing multiple copies printing of the second or later labels starts each time you remove a printed label This function is only available when the label length is 28 mm or more Auto cut is set to On and Half cut is set to Off Backlight Sets the displ...

Page 37: ...a 3 Print from the printer Data Transfer Tool 1 Create the label for transfer 1 Start Label Editor Professional 2 Click Cable Labeling in the New Open window 3 Click OK If you transfer a label data you created to the printer you will be able to print labels for cables without connecting to a computer Operation flow MEMO For how to install and operate Label Editor Professional see Label Editor Prof...

Page 38: ...2 Click Save The label data for transfer is saved on the computer MEMO By clicking Transfer you can transfer the data immediately without saving it 3 Click Transfer Batch Files 4 Click Add Select the label data to transfer 5 Click Transfer The label data is transferred to the printer 3 Print from the printer The transferred label data can be printed from of the printer 1 Press 2 Select Recall with...

Page 39: ...ge is stored in the Downloaded category You can use it just like you can with the built in symbols Creating Labels with Symbol 1 Start Label Editor Professional 2 From the File menu select Data Transfer Tool Data Transfer Tool starts 1 Select the loaded image to be transferred 2 Click Transfer The symbol data is transferred to the printer 1 Click Transfer Images 2 Click Load and select your symbol...

Page 40: ...s Key Menu Index Click a key in the illustration to display the menu list Changes the text orientation Adds a block Deletes the text Turns the printer on and off Changes the input method Enters a symbol For available symbols see Symbol List Printing starts Previews the created label MEMO To select a setting item To confirm the setting Shift key Changes the font size Changes the font ...

Page 41: ...sts Patch Panel Block 66 Length Type Length Type Blocks num Blocks num Separator Separator Orientation Orientation Blocks length Label length Blocks length Label length Blocks Blocks Label Label Frame Frame Line Line Vert 1 Vert 1 Tic Tic Vert 2 Vert 2 Enter length Enter length Enter length Enter length Dotted Dotted None None Hori Hori Enter number of blocks Enter number of blocks ...

Page 42: ...e Settings Purpose based Index Key Menu Index Frame and Table Lists Mix Len Faceplate Label length Labels num Label length Label length Margins Orientation Blocks num Orientation Enter length Set Enter length Auto Enter number of labels Enter number of blocks Vert 1 Short Vert 1 Vert 2 Middle Vert 2 Hori Long Min Hori ...

Page 43: ...gs Purpose based Index Key Menu Index Frame and Table Lists Flag Wrap Length Type Space length Space length Text length Separator Orientation Repeat text Margins Diameter Label length Dia Length Length Enter length Enter length Dia Off Short Line Hori 2 Middle Tic Vert 1 On Min Long Enter length Enter length Vert 2 None Hori 1 ...

Page 44: ...tions Start Here Cleaning Initializing the Settings Purpose based Index Key Menu Index Frame and Table Lists Punch Block Blocks type Text type Label length Lower count Upper count Blank 3pairs Seri 4pairs Blank 5pairs 2pairs Pins Enter length Enter start value Enter start value ...

Page 45: ... press differ depending on the label type you create Edit menu Layout Border Line Frame Table Char spacing Proportional Frame Table Style Frame Table Center Underline Off Narrow Off Normal Style Justify None Shading Frame Normal Wide Char spacing Right Border Brdr mesh Shadow S O Border Line Round brdr Round mesh Char Width Length Margins Bold Italic Orientation Font size Layout Left Strikeout Tab...

Page 46: ...pose based Index Key Menu Index Frame and Table Lists Edit 2 Char Width Length Bold Italic Length Length Small Set Normal Center Narrow Bold Justify Normal Wide B I Right Smaller Auto Italic Left Enter length Edit menu Frame Table Style Char spacing Border Line Char Width Length Margins Bold Italic Orientation Font size Layout Font ...

Page 47: ... and Table Lists Edit 3 Orientation 1 Line Font size 1 4 to 4 4 Auto Edit menu Frame Table Style Char spacing Border Line Char Width Length Margins Bold Italic Orientation Font size Layout Margins Short 4mm Middle 10mm Minimum 1mm Long 18mm 1Line 4 Lines 2 Lines 5 8 Lines 3 Lines 2 Lines 1 8 to 8 8 3 Lines 1 11 to 11 11 4 Lines 1 5 to 5 5 Font Roman SansS Font AB A A B ...

Page 48: ...enu Index Frame and Table Lists Length Margins MEMO The setting items displayed when you press differ depending on the label type you create MEMO The setting items displayed when you press differ depending on the label type you create Length Length Margins Length Set Auto Enter length Short 4mm Center Middle 10mm Justify Minimum 1mm Left Long 18mm Right ...

Page 49: ...ning Initializing the Settings Purpose based Index Key Menu Index Frame and Table Lists Advanced Serialize Serialize Repetition Repetition Serialize Text Adv Seri Text 5 times 5 times 2 times 2 times 10 times 10 times 3 times 3 times 4 times 4 times 1 time 1 time Enter start value Enter start value ...

Page 50: ...k Digit Width ECC Level Ratio On Off Medium 15 2 5 Large 25 3 0 30 Small 7 2 0 EAN 8 EAN 13 CODE128 CODE39 QR CODE Enter barcode information Enter barcode information Enter barcode information Enter barcode information Enter barcode information Width Medium Large Small Width Medium Large Small Width Symbol Size Medium Medium Large Small Small Large EAN 8 CODE128 QR CODE CODABAR EAN 13 CODE39 ITF U...

Page 51: ...sts Barcode 2 Check Digit Ratio On Off 2 5 3 0 2 0 ITF CODABAR UPC A UPC E Enter barcode information Enter barcode information Enter barcode information Enter barcode information Bar code EAN 8 CODE128 QR CODE CODABAR EAN 13 CODE39 ITF UPC A UPC E Width Medium Large Small Width Medium Large Small Width Medium Large Small Width Medium Large Small Ratio 2 5 3 0 2 0 Check Digit On Off ...

Page 52: ...ions Start Here Cleaning Initializing the Settings Purpose based Index Key Menu Index Frame and Table Lists Clear File MEMO The setting items displayed when you press differ depending on the label type you create Clear Text Local File Text Setting Text Only Recall End Delete Save ...

Page 53: ...t ting items displaye d when you press differ depending on the label type you create Mirror print 4size Enlarge print 3size Special print Repeat Copies 2size 5size 6size Off On Enter number of print copies 1 2 1 4 1 5 1 6 1 5 1 6 1 6 1 4 1 5 1 6 2size 1 3 Print copies 1 2 1 4 1 5 1 6 3size 1 3 Mirror print 2 2 1 4 1 5 1 6 4size 5size 6size 1 3 Start print 4 4 5 5 6 6 Off 3 3 Enlarge print Tape fee...

Page 54: ...ns Start Here Cleaning Initializing the Settings Purpose based Index Key Menu Index Frame and Table Lists Setting 1 Preference Drop stop Half cut Auto cut Print density Backlight Print density Drop stop Backlight Language inch cm Version Auto cut Off Off Off Off On On On 3 to 3 On ...

Page 55: ...itializing the Settings Purpose based Index Key Menu Index Frame and Table Lists Setting 2 Preference Language inch cm Print density Drop stop Backlight Language inch cm Version Auto cut Português Br Deutsch Türkçe Italiano Suomi Español cm Norsk Nederlands Dansk Svenska Français Português EU English inch ...

Page 56: ... Ā Ą Ă C Ç Č Ċ Ć D Đ Ď E É È Ë Ê Œ Æ Ø Ē Ę Ė Ě G Ģ Ġ Ğ H Ħ I Í Ï Î Ì IJ Ī Į İ K Ķ L Ļ Ł Ĺ Ľ Ŀ N Ñ Ň Ņ Ń Ŋ O Ó Ô Œ Õ Ò Ö Ø Ő Ō Ơ P Þ R Ř Ŕ S Š Ś Ş T Ť Ţ Ŧ U Ú Ü Ù Û Ů Ű Ū Ų Ư W Ŵ Y Ý Ÿ Ŷ Z Ž Ż Ź Ȝ a á à â ã ä å æ ā ą ă c ç ć č ċ d ð đ ď e é è ë ê œ æ ē ę ė ě g ģ ġ ğ h ħ i í ï î ì ij ī į ı k ķ l ļ ł ĺ ľ ŀ n ñ ň ņ ń ŋ ʼn o ó ô œ õ ò ö ø ő ō ơ p þ r ř ŕ s ß š ś ş ŝ t ť ţ ŧ u ú ü ù û ů ű ū ų ư w ŵ y ý ÿ ŷ...

Page 57: ...lizing the Settings Purpose based Index Key Menu Index Frame and Table Lists Frame and Table Lists Frame 1 2 3 4 5 6 7 8 9 10 11 12 13 14 15 16 17 18 19 20 21 22 23 24 25 26 27 28 29 30 31 32 33 34 35 36 37 38 39 40 41 42 43 44 45 46 47 48 49 50 51 52 53 54 55 56 57 58 59 60 61 62 63 64 65 66 67 68 69 70 71 72 ...

Page 58: ...fety Instructions Specifications Troubleshooting Part Names and Functions Start Here Cleaning Initializing the Settings Purpose based Index Key Menu Index Frame and Table Lists Frame and Table Lists Table 1 2 3 ...

Reviews: