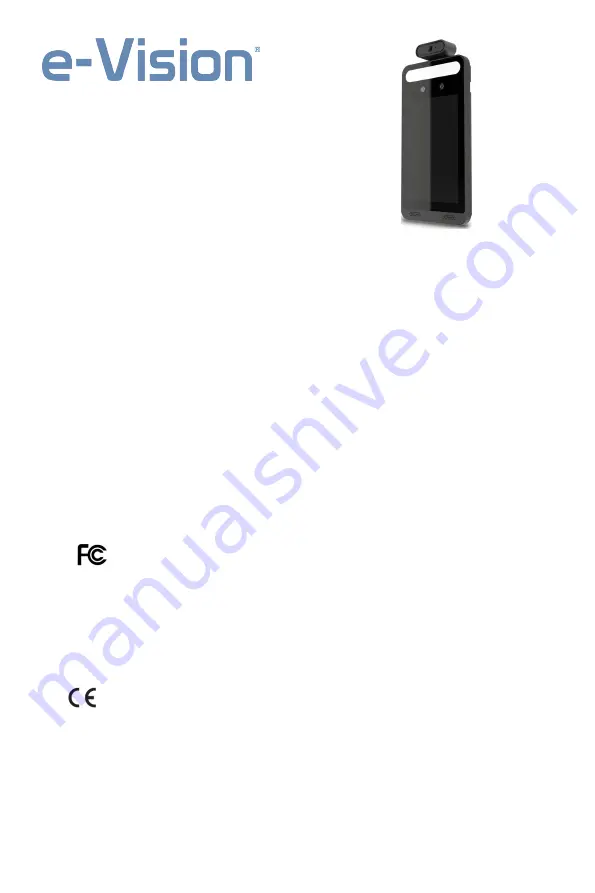
background image

USER MANUAL

PRO

IPF01TC

Temperature screening and

face recognition terminal

Disclaimer 

With  regard  to  the  product  with  internet  access,  the  use  of  product  shall  be  wholly  at
your  own  risks.  Our  company  shall  be  irresponsible  for  abnormal  operation,  privacy
leakage or other damages resulting from cyber attack, hacker attack, virus inspection, or
other  internet  security  risks;  however,  our  company  will  provide  timely  technical
support if necessary.

Surveillance  laws  vary  from  country  to  country.  Check  all  laws  in  your  local  region
before using this product for surveillance purposes. We shall not take the responsibility
for any consequences resulting from illegal operations.

Regulatory Information 

FCC Marking 


The  products  have  be  tested  and  found  in  compliance  with  the  council  FCC 

rules  and  regulations  part  15  subpart  B.  Operation  of  this  product  is  subject  the 
following two conditions: (1) this device may not cause harmful interface, and (2) this 
device  must  accept  any  interference  received,  including  interference  that  may  cause 
undesired operation. 

CE Marking 


The products have been manufactured to comply with the following directives. 

EMC Directive 2014/30/EU 

RoHS 

The  products  have  designed  and  manufactured  in  accordance  with  Directive  EU  RoHS 
Directive 2011/65/EU and its amendment Directive EU 2015/863 on the restriction of the 
use of certain hazardous substances in electrical and electronic equipment. 

Summary of Contents for e-Vision PROIPF01TC

Page 1: ...ponsibility for any consequences resulting from illegal operations Regulatory Information FCC Marking The products have be tested and found in compliance with the council FCC rules and regulations par...

Page 2: ...essary please use soft dry cloth to wipe dirt for hard contamination use neutral detergent Any cleanser for high grade furniture is applicable Avoid aiming the camera directly towards extremely bright...

Page 3: ...ements 14 4 1 2 Temperature Screening Face Recognition View 15 4 2 Live View via Web 16 5 Access Control Settings 19 5 1 Door Lock Settings 19 5 2 Wiegand Settings 19 5 3 Tampering Alarm Settings 20 6...

Page 4: ...S 41 6 4 10 P2P Optional 43 6 5 Security Configuration 43 6 5 1 User Configuration 43 6 5 2 Online User 45 6 5 3 Block and Allow Lists 45 6 5 4 Security Management 45 6 6 Maintenance Configuration 46...

Page 5: ...ce alarm when abnormal normal body temperature and no mask are detected Support liveness detection avoiding picture and video cheating Deep learning algorithm high face recognition accuracy rate Suppo...

Page 6: ...e sure the PC and IP Cam are connected to the LAN and the IP Tool is installed in the PC from the CD Double click the IP Tool icon on the desktop to run this software as shown below Modify the IP addr...

Page 7: ...ification please enter the password of the administrator and click the Modify button to modify the setting Double click the IP address and then the system will pop up the IE browser to connect IP CAM...

Page 8: ...s through IE The default network settings are as shown below IP address 192 168 226 201 Subnet Mask 255 255 255 0 Gateway 192 168 226 1 HTTP 80 Data port 9008 Use the above default settings when loggi...

Page 9: ...r example IPv4 Next click the Properties button to set the network of the PC Open the IE browser and enter the default address of IP CAM and confirm Follow directions to download and install the Activ...

Page 10: ...twork and then log in the camera via LAN and go to Config Network Port menu to set the port number Port Setup Go to Config Network TCP IP menu to modify the IP address IP Setup Go to the router s mana...

Page 11: ...ection Access the camera through PPPoE auto dial up The setup steps are as follow Go to Config Network Port menu to set the port number Go to Config Network TCP IP PPPoE Config menu Enable PPPoE and t...

Page 12: ...on The setup steps are as follow Go to Config Network Port menu to set the port number Go to Config Network TCP IP menu to set the IP address Check Use the following IP address and then enter the stat...

Page 13: ...value it will trigger alarms 2 Set the alarm holding time 3 Set the alarm trigger options Trigger Alarm Out If enabled the alarm output device will be triggered when detecting abnormal temperature Tr...

Page 14: ...e refer to FTP configuration chapter for more details 4 Click Save to save the settings 3 2 Face Match Configuration The setting steps are as follows 1 Go to Config Face Face Match Config interface 2...

Page 15: ...owing interface There are four ways to add face pictures Adding face pictures one by one Click to pop up an adding user box Then click to select a face picture saved on the local PC Please select the...

Page 16: ...After adding face pictures you can search them by name gender ID number and so on Click Modify to change people information and click Delete to delete this face picture 3 4 Mask Detection Click Confi...

Page 17: ...enabled alarm output will be triggered when the detected person doesn t wear a mask Trigger Audio Alarm If enabled the alarm voice will be broadcasted when the detected person doesn t wear a mask The...

Page 18: ...he Temp zone make the green plus stay in the middle of the Temp zone The detected face shall be 30cm 40cm away from the temperature measurement sensor 2 Please remove the hat cap helmet hair covering...

Page 19: ...he height of the detected people 4 1 2 Temperature Screening Face Recognition View After configuring temperature screening and face match the device can measure the body temperature and compare faces...

Page 20: ...o the face database or the similarity is lower than the pre defined value it will display Match Failure and the box will turn red If the mask detection and Trigger Audio Alarm are selected warning voi...

Page 21: ...rt stop live view Sensor alarm indicator Start stop two way audio Motion alarm indicator Enable disable audio Face detection indicator Snapshot Face match Those smart alarm indicators will flash only...

Page 22: ...face picture to bring up the following window In this interface you can view the detailed comparison information Add captured face pictures to the face database Click a captured picture in area This...

Page 23: ...g the correct password The time range is from 0 to 10 seconds For example By Password is selected and the delay time is set to 2 seconds the door will be opened 2 seconds later after entering the corr...

Page 24: ...5 3 Tampering Alarm Settings In order to avoid the removal or damage by the external force the tampering alarm can be set for the terminal Click Config Access Control Tampering Alarm Setting to go to...

Page 25: ...stem Settings 6 1 1 Basic Information In the Basic Information interface the system information of the device is listed Some versions may support device ID and QR code If P2P is enabled see Network Co...

Page 26: ...to Config System Local Config to set up the storage path of captured pictures and recorded videos on the local PC There is also an option to enable or disable the bitrate display in the recorded files...

Page 27: ...safely Snapshot Quota Set the capacity proportion of captured pictures on the SD card Video Quota Set the capacity proportion of record files on the SD card Schedule Recording Settings 1 Go to Config...

Page 28: ...rag the mouse to set the time on the timeline Erase Delete the schedule Drag the mouse to erase the time on the timeline Manual Input Click it for a specific day to enter specific start and end times...

Page 29: ...is less than the set quantity of snapshots Timing Snapshot Enable timing snapshot first and then set the snapshot interval and schedule The setup steps of schedule are the same as the schedule record...

Page 30: ...HWDR WDR can adjust the camera to provide a better image when there are both very bright and very dark areas simultaneously in the field of the view by lowering the brightness of the bright area and...

Page 31: ...t mode and specified time schedule for day and night Choose Timing in the drop down box of schedule as shown below Drag icons to set the time of day and night Blue means day time and blank means night...

Page 32: ...group of pictures When a new scene begins in a video until that scene ends the entire group of frames or pictures can be considered as a group of pictures If there is not much movement in the scene se...

Page 33: ...ontent1 choose Picture Overlay and click Browse to select the overlap picture Then click Upload to upload the overlap picture The pixel of the image shall not exceed 200 200 or it cannot be uploaded 6...

Page 34: ...re To enable and set face exposure please go to Config Image Face Exposure interface When the brightness of the captured face is not enough it can be enabled 6 3 Alarm Configuration 6 3 1 Exception Th...

Page 35: ...r options are the same as temperature screening settings Please refer to temperature screening settings chapter for details 3 Click Save button to save the settings 4 Set the sensitivity of the except...

Page 36: ...ll 1 Go to Config Alarm Anomaly SD Card Full 2 Click Enable and set the alarm holding time 3 Set alarm trigger options The setup steps are the same as temperature screening settings Please refer to te...

Page 37: ...own below 2 Click Enable alarm and set the alarm holding time 3 Trigger alarm out When the IP address of the camera is in conflict with the IP address of other devices the system will trigger the alar...

Page 38: ...hedule are the same as the schedule recording setup See Schedule Recording Click Apply settings to to quickly apply the settings to the other alarm input 6 3 7 Alarm Out Go to Config Alarm Alarm Out A...

Page 39: ...ght mode Timing Select the alarm type Then click Add and drag the mouse on the timeline to set the schedule of alarm out click Erase and drag the mouse on the timeline to erase the set time schedule A...

Page 40: ...en enter the user name and password from your ISP Either method of network connection can be used If PPPoE is used to connect internet the camera will get a dynamic WAN IP address This IP address will...

Page 41: ...3 Server Configuration This function is mainly used for connecting network video management system 1 Check Enable 2 Check the IP address and port of the transfer media server in the ECMS NVMS Then en...

Page 42: ...or example Enter www dvrdydns com in the IE address bar to visit its website Then Click the Registration button Create domain name After the domain name is successfully applied for the domain name wil...

Page 43: ...ing entered the main sub stream in a VLC player the video and audio will play automatically If Allow anonymous login is checked there is no need to enter the username and password to view the video If...

Page 44: ...h the LAN Go to Config Network UPnP Enable UPNP and then enter UPnP name 6 4 7 Email If you need to trigger Email when an alarm happens or IP address is changed please set the Email here first Go to C...

Page 45: ...triggered at the same time multiple emails will be sent separately Click the Test button to test the connection of the account Recipient Address receiver s e mail address 6 4 8 FTP After an FTP server...

Page 46: ...ete to cancel the default certificate Then the following interface will be displayed If there is a signed certificate click Browse to select it and then click Install to install it Click Create a priv...

Page 47: ...ate import the certificate to the device 6 4 10 P2P Optional If this function is enabled the network camera can be quickly accessed by adding the device ID in mobile surveillance client or CMS NVMS cl...

Page 48: ...factory reset and upgrading the firmware 5 Enter the MAC address of the PC in the Bind MAC textbox If this option is enabled only the PC with the specified MAC address can access the camera for that...

Page 49: ...sts as shown below The setup steps are as follows Check the Enable address filtering check box Select Block Allow the following address IPv4 IPv6 MAC and then enter IP address or MAC address in the ad...

Page 50: ...n of them when setting the password Medium Level 9 15 characters including at least two of the following categories numbers special characters upper case letters lower case letters Strong Level 9 15 c...

Page 51: ...t Settings Click the Load Default button to restore all system settings to the default factory settings except those you want to keep 6 6 2 Reboot Go to Config Maintenance Reboot Click the Reboot butt...

Page 52: ...ng the firmware 3 The device will restart automatically Caution Do not close the browser or disconnect the camera from the network during the upgrade 6 6 4 Operation Log To query and export log 1 Go t...

Page 53: ...go to the interface as shown below Images that are saved on the SD card can be found here Local Image Search 1 Choose Picture Local 2 Set time Select date and choose the start and end time 3 Click to...

Page 54: ...ose Picture SD Card 2 Set time Select date and choose the start and end time 3 Choose the alarm events at the bottom of the interface 4 Click to search the images 5 Double click a file name in the lis...

Page 55: ...n to display the actual size of the image Zoom in Click this button to digitally zoom in Zoom out Click this button to digitally zoom out Slide show play Click this button to start the slide show mode...

Page 56: ...Speed down Speed up Watermark display Enable disable audio drag the slider to adjust the volume after enabling audio 7 2 2 SD Card Video Search Click Search to go to the interface as shown below Vide...

Page 57: ...playback The time table can be shown in 24H 12H 2H 1H format by clicking the corresponding buttons Video clip and downloading 1 Search the video files according to the above mentioned steps 2 Select t...

Page 58: ...Face Recognition Terminal User Manual Click Set up to set the storage directory of the video files Click Open to play the video Click Clear List to clear the downloading list Click Close to close the...

Page 59: ...recognition result search interface Set the start time and end time and click Search to view the face recognition result Red time tag means no comparison result Green time tag means there is a compar...

Page 60: ...mber has been changed contact administrator to get the correct port number D Exclude the above reasons Restore to default setting by IP Tool IP tool cannot search devices It may be caused by the anti...

Page 61: ...g Face Recognition Terminal User Manual No sound can be heard A Audio input device is not connected Please connect and try again B Audio function is not enabled at the corresponding channel Please ena...

Page 62: ...2 7 Lens 2MP dual lens f 3 97mm F1 6 Lens Mount M12 WDR 120db Height Range of Face Recognition 1 2m 2 2m the recommended installation height is 1 45m Face Recognition Distance 0 3m 2m Recognition Mode...

Page 63: ...slot up to 128G USB Interface USB x1 Anti Tamper Interface 1 button Exit Button 1 Reset Button 1 Others Power 12V 1A Power Management Screen sleep screen protection Power Consumption 12W Weight Appro...

Page 64: ...safely so as to prevent any accidents It is vital that systems be installed in accordance with cur rent legislation The internal parts of certain equipment are connected to the power grid and therefo...

Reviews: