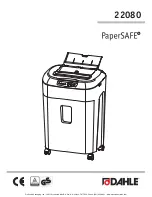
background image

GQS 2540; EX; UK

Electric Silent Shredder

Artikel-Nr.: 3430596

Ident-Nr.: 

11013

Komponenten / Ersatzteile

Position

Artikel-Nr.

Beschreibung

Position

Artikel-Nr.

Beschreibung

1

343059101008

feeding barrel 
 

4

343058001014

feeding inlet 
 

5

343058001015

shell 
 

6

343058001016

quadrate buna 
 

7

343058001017

capacitor 42.5uf/450v 
 

8

343058001018

lock washer 8 
 

9

343058001019

washer 
 

10

343058001020

2nd inner gear 
 

11

343058001021

diaphragm plate 
 

12

343058001022

2nd planetary gear 
 

13

343058001023

blade shaft 
 

14

343058001024

flat key 10x60 10 x 60
 

16

343058001026

bushing 8x12x12 8 x 12 x 12
 

17

343058001027

blade frame 
 

21

343059101006

knob zur Gegenmesser-Einstellung
 

24

343058001034

retainer block für Messerwalze
 

Summary of Contents for gardenline GQS 2540

Page 1: ...343058001016 quadrate buna 7 343058001017 capacitor 42 5uf 450v 8 343058001018 lock washer 8 9 343058001019 washer 10 343058001020 2nd inner gear 11 343058001021 diaphragm plate 12 343058001022 2nd planetary gear 13 343058001023 blade shaft 14 343058001024 flat key 10x60 10 x 60 16 343058001026 bushing 8x12x12 8 x 12 x 12 17 343058001027 blade frame 21 343059101006 knob zur Gegenmesser Einstellung...

Page 2: ...43058001078 hex head bolt M8x85 M8x85 für Rad 69 343058001079 self locked nut M8 für Rad 75 343058001085 screw M6x25 M6 x 25 76 343059101003 fixing base 79 343058501089 output barrel 80 343058001090 interlock switch JR01 15 2 81 343058001091 safety cover für Sicherheitsschalter 90 343058001100 fan 97 343059601097 power cord GB plug 3m 98 343058001108 impact circle 100 343058001110 over current 101...

Page 3: ... the collection box is not locked in place the unit WILL NOT OPERATE 4 Now you are ready to use the unit please check the cable is securely connected to the unit Please remember max size of branches is 40 mm The Cutter Counter blade setting is pre set at factory and should not need any initial adjustment However please ensure that the Cutter blade Counter blade gap setting is correct at all times ...

Page 4: ...nowledge that as well as your 3 year parts and labour guarantee you have the added peace of mind of dedicated helplines and web support www einhell co uk www einhell co uk Now you have purchased a Gardenline Now you have purchased a Gardenline product you can rest assured in the product you can rest assured in the 3 year parts and labour guarantee 3 year parts and labour guarantee 56525_34 305 96_...

Page 5: ...00 1890 946 244 www einhell co uk 2 Contents Page 3 Welcome 4 General Information and Safety Instructions 9 Assembly and Parts List 13 Features 15 Instructions 22 Useful information 26 FAQ 27 Warranty Card 56525_34 305 96_11013_ug indd 2 10 04 2013 10 53 ...

Page 6: ...edicated Helpline We hope you will enjoy using your purchase for many years to come If you require technical support or in the unlikely event that your purchase is faulty please telephone our Helpline for immediate assistance Faulty product claims made within the 3 year warranty period will be repaired or replaced free of charge provided that you have satisfactory proof of purchase keep your till ...

Page 7: ...ty precautions must be observed to avoid injuries and damage Please read the complete operating manual with due care Keep this manual in a safe place so that the information is available at all times If you give the equipment to any other person give them these operating instructions as well We accept no liability for damage or accidents which arise due to non observance of these instructions and ...

Page 8: ...ly be performed when the motor is at a standstill and the power plug has been pulled out The safety devices supplied with the shredder e g the ejector must be used The shredder must be assembled correctly before it is put into operation Examine the shredder each time before you use it Do not use the shredder if any safety devices are damaged or worn Never put safety devices out of operation Use th...

Page 9: ...ting plate Power cables used with the shredder must not be of a lighter duty class than HO7RN F rubber insulated flexible cables according to DIN 57282 VDE 0282 with a minimum cross sectional area of 1 5 mm2 Plug connectors must be equipped with earthing contacts and the coupling must be rain water protected If the Power Cord or plug is damaged do not use the machine Have the cable replaced with a...

Page 10: ... for transporting be sure to switch off the motor first and wait for the cutter to come to a standstill Each time before you leave the machine switch off the motor and pull out the power plug Before you connect the machine to the power supply make sure that the loading funnel is properly connected to the motor housing and the release screw tightened If the garden refuse shredder vibrates excessive...

Page 11: ...must only be used outdoors in a clear open space Damaged or illegible labels must be replaced Allow the tool to cool before carrying out any maintenance work adjustments etc Never use the machine while other people or animals are nearby When inserting material take special care to ensure that it does not contain any metal stones bottles cans or other foreign bodies Do not allow processed material ...

Page 12: ...e motor unit 13 3x washers for fitting the motor unit 14 2x sets of screws for fitting the wheels including wheel sleeves washers and nuts 15 2x open ended spanners 10 13 mm 16 1x Philips Screwdriver 17 Funnel Assembling the shredder Items supplied Open the packaging and take out the equipment with care Remove the packaging material and any packaging and or transportation braces if available Check...

Page 13: ...10 Assembly and Parts List 3 GB Ire MODEL GQS 2540 After SAles Support 0151 649 1500 1890 946 244 www einhell co uk Fig 1 Fig 3 Fig 2 56525_34 305 96_11013_ug indd 10 10 04 2013 10 53 ...

Page 14: ...ne screw with one washer through each sleeve Fig 7 and screw the wheels to the base frame Fig 8 To do so fit one washer in front of the tubular rod and one behind it Press the wheel caps onto the wheels Fig 9 3 Fit the legs Fig 10 Item 11 to the base frame as shown in Fig 10 4 Slide the shredded material debris box into the mount with the safety switch Fig 12 Item A at the front as shown in Fig 11...

Page 15: ...12 Assembly and Parts List 3 GB Ire MODEL GQS 2540 After SAles Support 0151 649 1500 1890 946 244 www einhell co uk Fig 11 Fig 10 Fig 8 Fig 9 Fig 12 56525_34 305 96_11013_ug indd 12 10 04 2013 10 53 ...

Page 16: ...e power plug out of the socket outlet before doing any work on the shredder e g cleaning the shredder and making adjustments or if the power cable becomes damaged 7 Explanation of the safety switch on the debris box The switch is in the Lock is closed position The shredded material debris box is locked The shredder can be switched on The switch is in the Lock is open position The shredded material...

Page 17: ...les Support 0151 649 1500 1890 946 244 www einhell co uk Caution The cutters continue to run for a few seconds after the motor is switched off Fig 17 Disconnect mains plug before working on blade 56525_34 305 96_11013_ug indd 14 10 04 2013 10 53 ...

Page 18: ...or for equivalent purposes Operation Please observe the statutory regulations governing noise abatement during operating times which may differ from town to town Mains connection Connect the 13A plug on the mains cable to a suitable 13A socket of the mains electricity supply Be sure to observe the relevant information in the safety instructions ON OFF switch Fig 13 Item B Press the green button 1 ...

Page 19: ...e the ON OFF switch the shredder will stop automatically Important Always wait until the shredder has reached a standstill before you switch it on again Note If the switch for selecting the direction of rotation is in its centre position the motor will not start CAUTION Large items or pieces of wood will be discharged both in the cutting and in the release direction after the blade has been starte...

Page 20: ...g out of the funnel inlet may whiplash when it is drawn in keep a safe distance between yourself and the machine Judge the quantity of material which you put into the funnel inlet so that the funnel does not clog If you want to shred withered damp material that has been lying in the garden for several days alternate between putting in this material and dry branches This will help to prevent the lo...

Page 21: ...usting the counter blade Fig 14 The counter blade and cutting unit are perfectly adjusted at the factory Only if it suffers wear does the counter blade require adjustment switch the machine on for this purpose To ensure the best possible results from your shredder the gap between the counter blade item B and the shredding blade item A should be approx 0 50 mm There is an adjustment device on the r...

Page 22: ...ade correctly as described on page 18 Replacing the power cable If the power cable for this equipment is damaged it must be replaced by an electrician or similarly trained person to avoid danger Cleaning maintenance and ordering of spare parts Always pull out the mains power plug before starting any cleaning work Maintenance and storage Clean the machine regularly This will help to keep the machin...

Page 23: ...PORTANT Wear work gloves Remove the plug from the mains Unlock and remove the shredded material debris box Loosen the knob Fig 15a Item 6 anticlockwise by 5 turns to release the cutter counter blade Fully loosen the 4 Allen screws Fig 15a Item K Note The Allen screws can only be loosened and not removed Fig 15b Fig 15a Fig 16 56525_34 305 96_11013_ug indd 20 10 04 2013 10 53 ...

Page 24: ... oil before installing everything again At the beginning of the new season the counter blade must be correctly adjusted as described on page 18 To assemble proceed in the reverse order making sure that the cutting blade is properly aligned note the curvature of the blade teeth Ensure all the screws are tight and then re adjust the counter blade as described on page 18 Ordering replacement parts Pl...

Page 25: ...tion Set the direction of rotation on the switch Material is not drawn in by the shredder The shredding blade is running in reverse Change the direction of rotation Material blockage in the filling funnel Change the direction of rotation and pull the material out of the funnel Feed in thick branches again so that the blade does not immediately engage again in the notches it previously cut The shre...

Page 26: ...is electric power tool in accordance with instructions certain residual risks cannot be ruled out The following hazards may arise in connection with the equipment s construction and layout 1 Damage to hearing if no suitable ear protection is used 2 Health damage caused by hand arm vibrations if the equipment is used over a prolonged period or is not properly guided and maintained Technical data Vo...

Page 27: ...o the accessories and auxiliary equipment which are included with the used device The reprinting or reproduction by any other means in whole or in part of documentation and papers accompanying products is permitted only with the express consent of Einhell UK Ltd Disposal and recycling The unit is supplied in packaging to prevent it being damaged in transit This packaging is raw material and can th...

Page 28: ...2540 GB 0844 801 8701 Ire 1890 946 244 www einhell co uk Useful Information 6 GB Ire MODEL GQS 2540 After SAleS Support 0151 649 1500 1890 946 244 www einhell co uk 56525_34 305 96_11013_ug indd 25 10 04 2013 10 53 ...

Page 29: ...ct Einhell UK Ltd using one of the Telephone numbers for AFTER SALES SUPPORT and choose the option for Spare Parts 2 Or contact via the Einhell UK Ltd website where spares information prices are available What do I do if I accidentally cut the mains cable To avoid danger immediately unplug from the mains supply and get an electrician or suitably qualified person to 1 Fit a waterproof connector to ...

Page 30: ...obiles may vary Return your completed warranty card to Einhell UK Ltd Unit 9 Stadium Court Wirral International Business Park Plantation Road Bromborough CH62 3QG www einhell co uk warranty AFTER SALES SUPPORT YEAR WARRANTY IMPORTANT KEEP THIS FORM SAFE Only complete and return this form to the address below in the unlikely event of a warranty claim if you are requested by the manufacturer to retu...

Page 31: ...56525_34 305 96_11013_ug indd 28 10 04 2013 10 53 ...

Reviews: