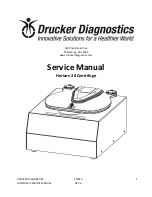
background image

DRUCKER DIAGNOSTICS 
HORIZON 24 SERVICE MANUAL 

SM016 

REV A 


200 Shadylane Drive 

Philipsburg, PA 16866 

www.druckerdiagnostics.com 


Service Manual 

Horizon 24 Centrifuge 


Summary of Contents for Horizon 24

Page 1: ...DRUCKER DIAGNOSTICS HORIZON 24 SERVICE MANUAL SM016 REV A 1 200 Shadylane Drive Philipsburg PA 16866 www druckerdiagnostics com Service Manual Horizon 24 Centrifuge ...

Page 2: ...ICE MANUAL SM016 REV A 2 Contents 1 PREFACE 3 2 INTENDED USE 3 3 GENERAL DESCRIPTION OF MAJOR COMPONENTS 3 4 WARRANTY INFORMATION 3 5 SPECIFICATIONS 4 6 TROUBLESHOOTING 4 7 SERVICE INSTRUCTIONS 5 8 WIRING DIAGRAM 11 9 SPARE PARTS LIST 12 ...

Page 3: ...ntainers filled with chemicals non flammable non explosive non volatile and non highly reactive only environmental samples and other non human body samples This centrifuge should be operated by trained personnel only This centrifuge is an IVD accessory and therefore subject to the former EU IVD Directive 98 79 EC and the current EU IVD Regulation 2017 746 Any use other than those intended by the M...

Page 4: ...Rotor improperly loaded Load equally filled tubes symmetrically in the rotor All carriers and or tube holders must be present in the rotor whether loaded or empty Debris lodged within the rotor or tube carriers Carefully inspect all rotor pockets tube holders and crevasses for debris Centrifuge housing is loose Requires service Missing damaged feet Requires service Motor failure Requires service R...

Page 5: ...ilure Replace PCB 7 SERVICE INSTRUCTIONS 7 1 Cleaning The cabinet rotor and accessories can be cleaned using soap and water isopropyl alcohol or a 10 5500 PPM bleach solution Apply cleaning solutions with a towel or cloth Do not submerge the centrifuge in water or other cleaning solutions as this will cause damage and void the warranty Under no circumstances should any of the following be used TBQ...

Page 6: ...n place with two 6 Nylok nuts Use a 5 16 nut driver to remove the nuts The tray will slide off the threaded studs To install the lid tray slide it onto the studs and secure it with two 6 Nylok nuts hand tight Complete the installation by gently plugging the wire harness into the PCB header J2 The header and connector are keyed for proper orientation 7 8 Replacing the PCB The PCB is accessible once...

Page 7: ...ce with six 8 screws Remove them with a 2 Phillips driver Lift the base assembly off the guard bowl and set it aside The motor assembly is held in place with 3 8 Nylok nuts and fender washers Remove the nuts with an 11 32 nut driver Remove the three fender washers Lift the motor assembly up and off the studs The motor is secured to the mounting plate with 4 8 screws Use a 2 Philips driver to remov...

Page 8: ...DRUCKER DIAGNOSTICS HORIZON 24 SERVICE MANUAL SM016 REV A 8 Fig 3 Fig 4 Fig 5 Insert the Elastomer bushings into the motor mount plate as shown fig 4 Push the grommets onto the bushings as shown fig 5 ...

Page 9: ... of the guard bowl splice fig 7 Install one fender washer onto each stud fig 8 Finish the assembly with one Nylok nut on each stud and tighten to 13 in lbs Fig 9 Fig 10 Place the base assembly onto the guard bowl assembly 02 003 0 0052 with the guard bowl splice positioned as shown fig 9 Feed the motor wire harness into the base passthrough so that the wire harness is not pinched between the base ...

Page 10: ...ed to 10 in lbs fig 12 7 11 Power Connections and Final Assembly Plug the power harness into J17 Plug the motor harness into J10 Hall Sensors and J14 Motor power Plug the lid lock harness into J2 Plug the cycle counter harness into J3 Carefully place the cabinet onto the base taking care not to pinch any wires between the two Complete the assembly by replacing the eight 8 screws with a 3 32 hex ke...

Page 11: ...DRUCKER DIAGNOSTICS HORIZON 24 SERVICE MANUAL SM016 REV A 11 8 WIRING DIAGRAM ...

Page 12: ...DRUCKER DIAGNOSTICS HORIZON 24 SERVICE MANUAL SM016 REV A 12 9 SPARE PARTS LIST ...

Reviews: