DiaSys O-Classic, Operator'S Manual
The DiaSys O-Classic Operator's Manual is an essential resource for users of this remarkable product. Packed with comprehensive instructions and insightful tips, this manual is available for free download at manualshive.com. Obtain the expertise needed to maximize the potential of your DiaSys O-Classic with this valuable manual.
Share
Download


Reviews:
No comments
Related manuals for O-Classic

Nano UF
Brand: BMB Technology Pages: 9

AP101
Brand: 3M Purification Pages: 12

PERMAQ PRO 1810
Brand: BWT Pages: 32

Hallett
Brand: UV Pure Technologies Pages: 12

Snip-n-Spray
Brand: Gardeners Pages: 2
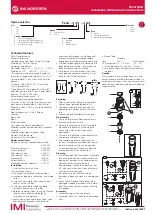
F64G
Brand: IMI NORGREN Pages: 2

Stinger Hornet
Brand: First Power Pages: 16

EasyClean free NS 25
Brand: Kessel Pages: 108

FAST
Brand: BIO-MICROBICS Pages: 12

MP-MCA Series
Brand: Master Water Conditioning Pages: 33

NSVS1104
Brand: JRC Pages: 4

WH-105-4
Brand: Clayton Pages: 16

Pantera II Series
Brand: onga Pages: 24

HYPRO WATER
Brand: HYTECON Pages: 52

1538-27
Brand: Gardena Pages: 7

KPT
Brand: Komet Pages: 2

Pantera PCFII-075
Brand: onga Pages: 16

BIFLUX
Brand: Laica Pages: 2


