Det-Tronics Eagle Quantum 95-8470-05, Instructions Manual
The Det-Tronics Eagle Quantum 95-8470-05 is a high-quality safety system designed for industrial applications. For proper installation and operation, make sure to refer to the Instructions Manual available for free download at manualshive.com. Stay informed and keep your facility safe with this essential manual.
Share
Download


Reviews:
No comments
Related manuals for Eagle Quantum 95-8470-05

Junior
Brand: National Geographic Pages: 44
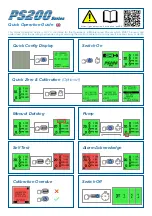
GMI PS200 Series
Brand: 3M Pages: 2
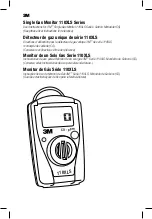
110XLS Series
Brand: 3M Pages: 33
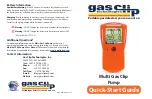
Multi Gas Clip
Brand: Gas Clip Technologies Pages: 2

AirWatch Mk 1.0
Brand: WatchGas Pages: 4

120225
Brand: Shelly Pages: 11

Sensepoint XCL
Brand: VESDA Pages: 10

Metal Detectors GTAx 550
Brand: Garrett Pages: 60

GTI 1500
Brand: Garrett Pages: 88

Goldmaster 24k
Brand: Whites Pages: 3

Coinmaster 2900 Series 3
Brand: Whites Pages: 18

T2
Brand: Teknetics Pages: 36

Metadec
Brand: C-SCOPE Pages: 18

6000/DI PRO SL
Brand: White’s Electronics Pages: 36

GS101
Brand: Milesight Pages: 21

Dixell XLH210
Brand: Emerson Pages: 2

PASSPORT S55
Brand: Escort Pages: 2

AGM 55
Brand: Crowcon Pages: 2


