


Dell™ Workgroup Laser Printer M5200 User's
Guide
Click the links to the left for information on the features, options, and operation of your printer. For
information on other documentation included with your printer, see
Finding information
.
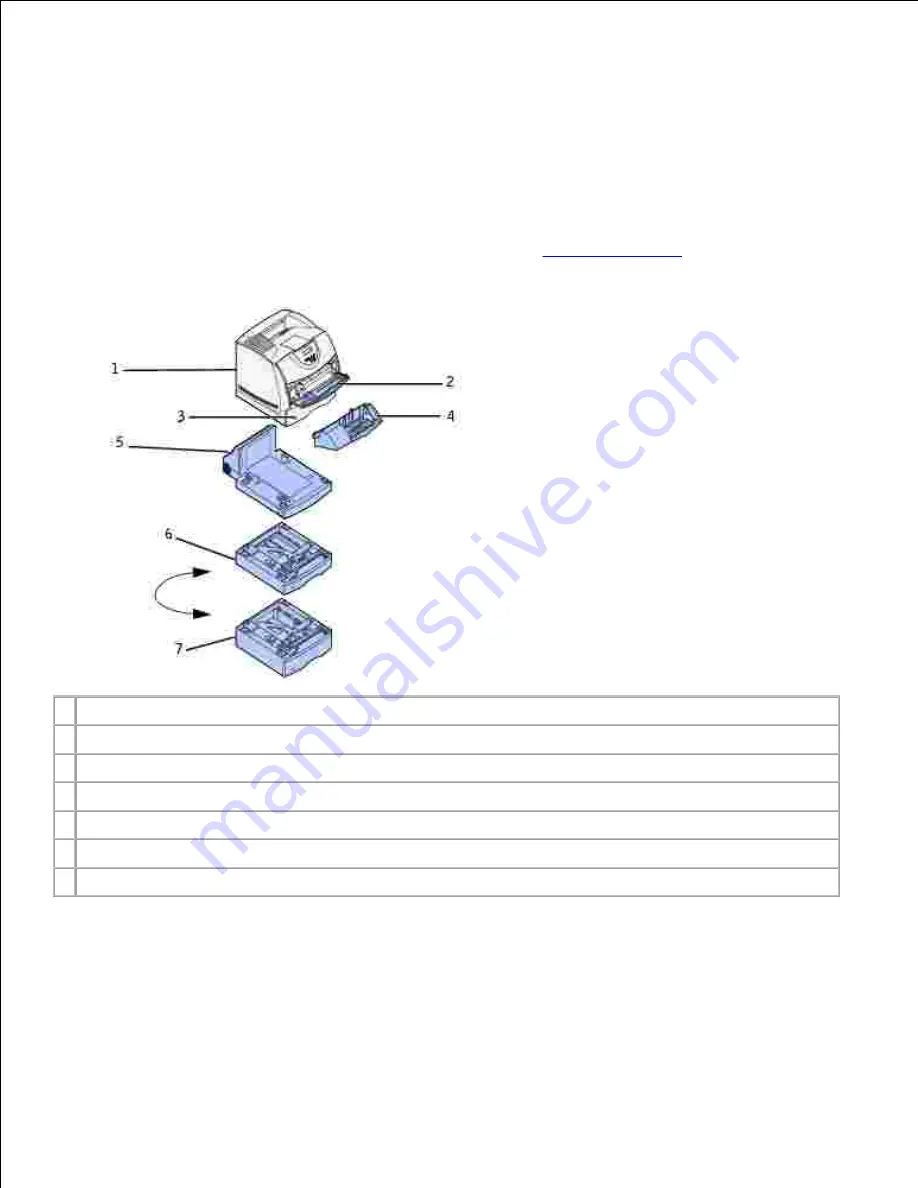
1 Printer
2 Multipurpose feeder
3 Standard 500-sheet tray
4 Optional envelope feeder
5 Optional duplex unit
6 Optional 250-sheet drawer with tray
7 Optional 500-sheet drawer with tray
To order replacement toner cartridges or supplies from Dell:
Double-click the icon on your desktop.
1.


