background image

Purger soigneusement les canalisations 

avant la pose et la mise en service du produit.
Thoroughly flush the pipes to remove any impurities 

before installing and commissioning the product.
Vor Montage und Inbetriebnahme des Produkts 

die Anschlussleitungen regelkonform spülen.
Dokładnie wypłukać instalację przed 

montażem i uruchomieniem produktu.
Spoel zorgvuldig de leidingen alvorens 

tot installatie of ingebruikname van de kraan over te gaan.

Перед установкой и подключением устройства тщательно 

промыть канализационные трубы напором воды.

Mitigeur temporisé à déclenchement 

souple pour lavabo
Soft-touch, time flow mixer  

for washbasins
Selbstschluss-Mischbatterie  

mit besonders leichter Betätigung  

für Waschtisch

Bateria czasowa z delikatnym 

uruchamianiem do umywalki
Zelfsluitende mengkraan met soepele 

bediening voor wastafel

Порционный смеситель для 

раковины с мягким пуском

DE

FR

EN

PL

NL

RU

RU

FR

EN

DE

PL

NL

NT 794

Indice D

TEMPOMIX 3

Summary of Contents for NT 794

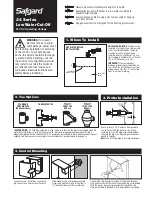
Page 1: ...ngen alvorens tot installatie of ingebruikname van de kraan over te gaan Перед установкой и подключением устройства тщательно промыть канализационные трубы напором воды Mitigeur temporisé à déclenchement souple pour lavabo Soft touch time flow mixer for washbasins Selbstschluss Mischbatterie mit besonders leichter Betätigung für Waschtisch Bateria czasowa z delikatnym uruchamianiem do umywalki Zel...

Page 2: ...A 150 B C 150 2100 1 2 2100 1 2 ...

Page 3: ...E F G H D ...

Page 4: ...à la main contre le mur sur les raccords excentrés Raccorder la robinetterie Version ensemble de douche fig C Positionner le diffuseur de douche f à 2 10 m du sol Assembler les colonnes g avec le collier h Emmancher à fond l ensemble dans le trou situé sous la pomme Recouper si nécessaire les colonnes g au niveau du raccord central i Positionner le collier h sur le raccord i Pointer puis fixer ave...

Page 5: ...ins une fois par an et aussi souvent que nécessaire ENTRETIEN NETTOYAGE Nettoyage du chrome ne jamais utiliser d abrasifs ou tout autre produit à base de chlore ou d acide Nettoyez à l eau légèrement savonneuse avec un chiffon ou une éponge Mise hors gel purgez les canalisations et actionnez plusieurs fois la robinetterie pour la vider de son contenu d eau MAINTENANCE Pour démonter le mécanisme fi...

Page 6: ...o fit Tighten the cover plates on to the offset connectors by hand Connect the mixer Shower assembly Fig C Position the shower nozzle f at 2 10m from the floor Assemble the shower column g with the collar h Fully insert the column assembly into the hole beneath the shower head If necessary cut the column assembly g to size at the central connection i Position the collar h over the connection i Mar...

Page 7: ...he mixer to facilitate maintenance The pipe work stopcocks bib taps and all sanitary fittings should be checked at least once a year and more frequently if necessary MAINTENANCE CLEANING Cleaning chrome do not use abrasive chlorine or any other acid based cleaning products Clean with mild soapy water using a cloth or a sponge Frost protection drain the pipes and operate the mixer several times to ...

Page 8: ...schkombination Abb C Düse f 2 10 m über OKFFB montieren Brauserohre g an der Schelle h befestigen Brauserohr in die Öffnung unterhalb des Brausekopf schieben und vollständig abdichten Falls erforderlich die Brauserohre g auf Höhe des mittigen Anschlusses i zuschneiden Schelle h in Höhe des mittigen Anschlusses i positionieren Bohren und mit den 2 mitgelieferten Schrauben befestigen geeignete Dübel...

Page 9: ... nötig mindestens einmal jährlich überprüft werden INSTANDHALTUNG REINIGUNG Reinigung der Chromteile niemals scheuernde chlor oder säurehaltige Produkte verwenden Mit leichter Seifenlauge und einem weichen Tuch oder Schwamm reinigen Frostschutz Rohrleitungen absperren und Armatur zur Entleerung mehrmals betätigen WARTUNG Zur Demontage des Mechanismus Abb D Seitliche Schraube k mit Inbusschlüssel 2...

Page 10: ...aturę Zestaw natryskowy rys C Zamocować wylewkę natryskową tak aby dyfuzor f znajdował się na wysokości 2 10 m nad posadzką Połączyć kolumny g obręczą mocującą h Całość osadzić w otworze znajdującym się pod spodem wylewki natryskowej Jeśli jest to konieczne skrócić kolumny g na wysokości środkowego łączenia i Ustawić obręcz mocującą h na wysokości środkowego łączenia i Zamocować za pomocą 2 dostar...

Page 11: ...rpalne oraz każde urządzenie sanitarne muszą być sprawdzane tyle razy ile potrzeba jednak nie mniej niż raz w roku OBSŁUGA I CZYSZCZENIE Czyszczenie chromu nigdy nie używać środków żrących lub na bazie chloru lub kwasu Czyszczenie wodą z mydłem za pomocą miękkiej szmatki lub gąbki Ochrona przed mrozem opróżnić instalację wielokrotnie uruchomić armaturę celem ewakuacji wody KONSERWACJA Aby zdemonto...

Page 12: ... kraan aan Doucheset fig C Positioneer de douchekop f op 2 10 m van de vloer Plaats de muurkraag g op de stang h Duw het geheel zo ver mogelijk in de opening aan de onderkant van de douchekop Indien nodig de stang g inkorten ter hoogte van de centrale koppeling i Plaats de muurkraag h op de koppeling i Punt af en installeer vervolgens met de 2 meegeleverde schroeven gebruik de juiste muurpluggen a...

Page 13: ...roleerd te worden of toch minstens 1x per jaar ONDERHOUD EN REINIGING Reinigen van chroom gebruik nooit schuurmiddelen en chloorhoudende of andere chemische producten reinig met zeepwater en een zachte doek of spons Vorstvrij stellen spoel de leidingen en stel de kraan enkele keren na elkaar in werking zodat ze volledig geledigd wordt SERVICE Om het mechanisme los te maken fig D Draai de inbusschr...

Page 14: ...и e к стене на соединения эксцентриков Подключить смеситель Версия для душевого набора Схема C Установить рассекатель воды для душа f на расстоянии 2 10 м от пола Соедините трубки g с соединительным кольцом h Проденьте комплект в отверстие расположенное в душевой головке При необходимости отрежьте трубки g в месте центрального соединения Поместите соединительное кольцо h на коннектор Наметьте а за...

Page 15: ...е продукты на основе хлора или кислот Мойте тряпкой или губкой в слегка мыльной воде Защита от замораживания Ополосните канализационные трубы напором воды и нажмите несколько раз на кнопку крана чтобы опорожнить от содержащейся в нем воды ТЕХНИЧЕСКОЕ ОБСЛУЖИВАНИЕ Чтобы демонтировать механизм схема D Отвинтить боковой винт k не вытаскивая его шестигранной отверткой 2 5 мм Ослабить головку l на 2 об...

Page 16: ......

Reviews: