background image


C

C

h

h

e

e

c

c

k

k


Y

Y

o

o

u

u

r

r


P

P

a

a

c

c

k

k

a

a

g

g

e

e


C

C

o

o

n

n

t

t

e

e

n

n

t

t

s

s


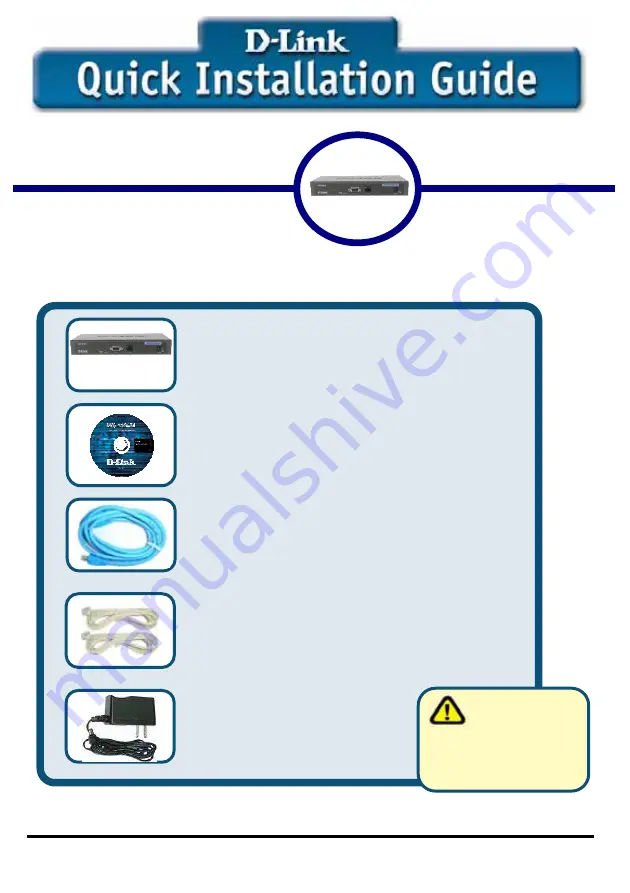
These are the items included with your DVG-2004S VoIP Gateway purchase


If any of the above items are missing, please contact your reseller. 

©2005 D-Link Systems, Inc. All rights reserved. Trademarks or registered trademarks are the property of their respective 

holders. Software and specifications subject to change without notice. DVG-2004S 

This product can be set up using Remote
IP configuration tool and Web browser,
such as IE (Internet Explorer). 

D

D

V

V

G

G

-

-

2

2

0

0

0

0

4

4

S

S


G

G

a

a

t

t

e

e

w

w

a

a

y

y


• DVG-2004S VoIP Gateway 


• CD-ROM (containing Manual and 

Installation program) 


• Ethernet cable 


• Phone cable


• Power cord


       Using a power 

        supply with a 
different voltage rating 
will damage and void the 
warranty for this product. 


Summary of Contents for DVG-2004S

Page 1: ...arks are the property of their respective holders Software and specifications subject to change without notice DVG 2004S This product can be set up using Remote IP configuration tool and Web browser such as IE Internet Explorer D DV VG G 2 20 00 04 4S S G Ga at te ew wa ay y DVG 2004S VoIP Gateway CD ROM containing Manual and Installation program Ethernet cable Phone cable Power cord Using a power...

Page 2: ...power strip The ready LED will turn ON to indicate proper operation B 1 Connect an Ethernet cable to the Ethernet jack located on the Cable DSL modem 2 Insert the other end of the Ethernet cable to the LAN PORT on the front panel of DVG 2004S The LAN LED light will illuminate to indicate proper connection If the LAN LED is not illuminated please go back and step B and repeat its instructions ...

Page 3: ...C Insert a phone cord to FXS port on the back panel of the DVG 2004S ...

Page 4: ... Label Color Display Status 1 FXS 1 4 Green On The phone line is active On Power on Flash System is rebooting 2 Ready Green Off Power off On Network connected 3 LAN Left 100M Amber Flash Packet is through this port On Network connected 4 LAN Right 10M Green Flash Packet is through this port 1 2 3 4 ...

Page 5: ...When you have connected all the line to the DVG 2004S it will look similar to this ...

Page 6: ...nfig software will be installed on your computer Setup with VoIP Remoteconfig exe Once you finish installing a new icon is created on your desktop Double click this icon Click on the empty field and enter the MAC address printed on the back of DVG 2004S If you cannot find the MAC address click Search to view all the available MAC addresses in the LAN You will see the following window ...

Page 7: ...installed in the LAN This window contains 3 buttons Refresh Refresh the information on the Device List Config Configure the device Exit Exit VoIP Device Remote Config After you click the Config button you will see the following window ...

Page 8: ...ore you can save these settings please enter the password on the Remote Password field Remote Password Default password is 1234 After you enter the correct password you may select Default Setting Reboot or Save Web Setting Link user directly to the web setting interface Default setting Restore to factory default settings Reboot Restart the system Save Save any changes and restart the system Status...

Page 9: ...Login to the Browser After choosing your Network environment click Web Setting Click Web Setting Type admin for the username and password Click OK ...

Page 10: ...You will see the following screen Select General Setting from the Dialing Plan menu Click Submit Select Dialing through SIP Server ...

Page 11: ...Select SIP Setting from the Administrator Setting menu The following fields with are required Then click submit ...

Page 12: ...ver Register Server IP Address SIP Register Server IP address Register Server IP Address Port Port number of SIP Register Server Outbound Proxy Outbound Proxy server IP address Outbound Proxy Port Port number of Outbound Proxy Server Please click the hyperlink character System Reboot on the bottom left of the menu to reboot Your setup is complete ...

Page 13: ......

Reviews: