

DO
GUIDE
DO
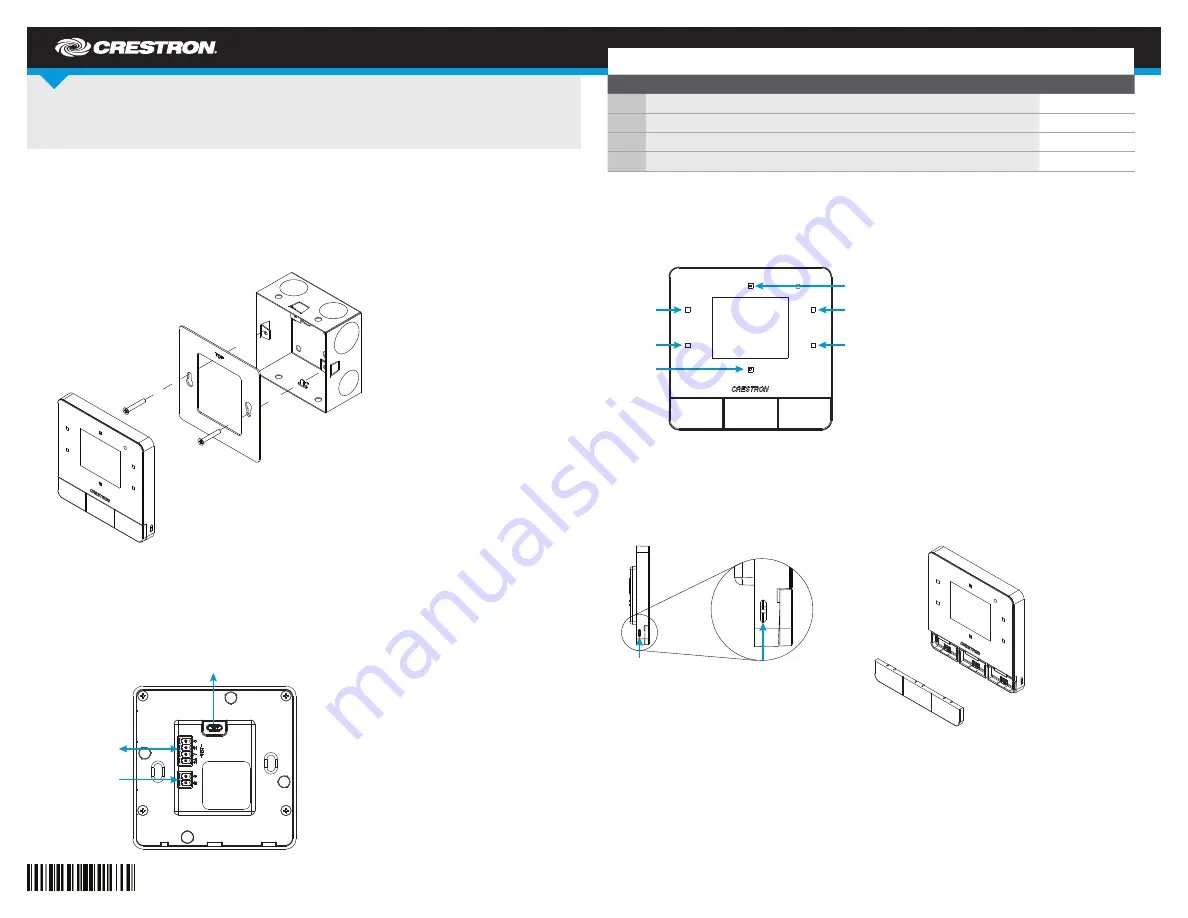
Configure the Device
The setup screens enable basic configuration prior to regular operation of the C2N-LCDB3. Access
the setup screens by tapping buttons 1, 2, 5, and 6 in sequence, twice (tap 1, 2, 5, 6, 1, 2, 5, 6)
within a 5-second period. Refer to the illustration below for button information.
DO
Change Button Assembly
To remove the button assembly, insert a mini flat-blade screwdriver into the slot on the left side of the
keypad and pry the button assembly up. Once the side of the button assembly is elevated, pull up on
the assembly to remove it.
To install the new button assembly, place it on the keypad and press it into place from right to left. All
three sections of the button assembly should snap into place. Do not snap the two ends in first.
C2N-LCDB3
Multipurpose LCD Keypad
DO
Install the Device
The Crestron
®
C2N-LCDB3 is mounted to a 35 mm UK square electrical box.
1. Using the two included screws, secure the metal mounting plate to the electrical box.
2. Place the C2N-LCDB3 on the mounting plate. The magnetic base of the device securely holds
the keypad to the mounting plate.
DO
Connect the Device
Make the Cresnet
®
connection, and, optionally, the remote temperature sensor connection.
NOTE:
The C2N-LCDB3 is supported only by 3-Series Control System
®
processors.
DO
Check the Box
QTY PRODUCT
PART NUM.
1
Connector, 2-Pin
2003574
1
Connector, 4-Pin
2003576
1
Plate, Metal, Mounting, 3.2" x 3.20" x 0.47"
2045388
2
Screw, 4B x 3/4", Flat Head, Phillips
2019088
To Control System
To Computer
From Temperature
Sensor
Button 1
Button 2
Button 5
Button 6
Button 3
Button 4
Insert a mini flat-blade
screwdriver into the slot
and pry up to remove
the button assembly.


