manualshive.com logo in svg
background image

1

TOOL TIPS

for the precision hair clipper  

for professional at-home hair cutting. 

VSM7476A

SUPER 

CLIP

XTP

Содержание VS Sassoon For Men SUPER CLIP XTP

Страница 1: ...1 TOOL TIPS for the precision hair clipper for professional at home hair cutting VSM7476A SUPER CLIPXTP ...

Страница 2: ... JUST MADE A QUALITY PURCHASE WITH THIS NEW GROOMING TOOL WE KNOW YOU VE GOT THIS BUT BEFORE YOU JUMP INTO USING YOUR NEW SIDE KICK HERE S A FEW TIPS TRICKS TO KNOW BEFORE LETTING YOUR CREATIVITY RUN LOOSE HIT UP VSFORMEN COM AU FOR MORE GROOMING INSPIRATION ...

Страница 3: ...SUPER CLIP XTP TOOL TIPS 3 ...

Страница 4: ...g into a basin or other vessels containing water Keep the appliance dry unless it otherwise specified Do not use this appliance in or near bathtubs showers basins or other vessels containing water Do not immerse appliance in water or other liquids Do not reach for an appliance that has fallen into water Unplug immediately Take care to avoid contact between the moving blades of the unit and the ski...

Страница 5: ...er cord Do not use an extension cord with this appliance After use do not wrap the cord around the appliance as in time this may cause the cord to fracture Coil cord loosely by the side of the appliance in storage Do not use outdoors or operate where aerosol spray products are being used or where oxygen is being administered Do not use the appliance if it is damaged In the event of damage disconti...

Страница 6: ...g comb guides for the finishing touches around the ears 7 Fade comb guide 8 5 position taper control 9 Travel pouch 10 Barber comb 11 Scissors 12 Blade guard 13 Cleaning brush 14 Oil 15 Adapter SUPER CLIP XTP BRAVO YOU VE MADE A QUALITY PURCHASE The Super Clip XTP is the precision hair clipper for professional at home hair cutting 1 2 4 3 11 13 14 9 8 5 12 10 6 7 15 SUPER CLIP XTP TOOL TIPS ...

Страница 7: ...bottom of your new tool Plug the charging adaptor into a suitable mains power socket and switch on The red charging LED indicator light on your new tool will remain on when correctly connected to the mains power When the battery is fully charged the LED indicator light will stop flashing but remain on A full charge of 3 hours will supply 75 minutes cordless runtime A quick charge of 15 minutes wil...

Страница 8: ...Plug the charging adaptor into a suitable mains power socket and switch on The red LED charging light will flash when the adapter is correctly inserted into the appliance and connected to an outlet Switch the clipper on NOTE if the battery is weak and low on battery charge wait approx 1min before switching the clipper on NOTE The clipper should not be used for longer than 20 minutes when operated ...

Страница 9: ... across each of the blades Switch off the tool remove any excess oil by gently dabbing with a cloth BEFORE USING Always inspect the clipper blades for noticeable signs of damage Ensure the clipper blades are well oiled before using Always inspect the clipper blades before use to ensure they are free from hair debris etc Ensure the clipper is sufficiently charged before use For best performance use...

Страница 10: ...28mm 9 32mm 10 Ear taper Left Ear taper Right To attach a comb guide ensure the appliance is switched off Position the comb guide over the front of the clipper blade and slide over the head Push and click the rear of the comb guide into position To remove the comb guide ensure the appliance is switched off Push the tab on the rear of the comb guide away from the head and lift off To attach the ear...

Страница 11: ...longer length comb guide to clip the top of the faded style then attach the fade comb guide for a more seamless faded look Easy To attach the fade comb guide ensure the appliance is switched off Position the comb guide over the front of the clipper blade and slide over the head Push and click the rear of the comb guide into position To remove the comb guide ensure the appliance is switched off Pus...

Страница 12: ...the head 5 Slowly move the clipper upwards and outwards through the hair towards your crown against the direction of the hair growth The comb guide will help to lift the hair and the blades will cut the hair to the length as shown on the comb guide 6 Once the desired length is achieved at the back of the hair start clipping the top and sides 7 Hold the clipper to the front of your hair with the te...

Страница 13: ...length switch off the appliance and attach a shorter comb guide 6 Start cutting at the nape of the neck and with the comb guide flat against the head move the clipper upwards and outwards over the area you want to take shorter 7 Repeat on the sides of the hair starting with the teeth of the clipper pointing upwards and comb guide flat against the area above the ear again moving the clipper upwards...

Страница 14: ...nd other debris from the interior of the cutting head and blades 6 Re assembly is simply the reverse of the above instructions 7 Finally before fully tightening the two screws in the large blade to avoid injury ensure that the blades are correctly aligned With the taper control lever fully forward the tips of the small blade must be parallel with and 1mm below the tips of the large blade Also chec...

Страница 15: ... a switch A suitable plug adaptor will be required please refer to the chart below Plug adaptor required Voltage and plug adaptors Country Voltage setting British plug 240V Ireland Great Britain Singapore South America Hong Kong parts only Africa parts only 240V European plug 240V Asia Europe Middle East Noumea Scandinavia South America Hong Kong parts only 240V Australian and New Zealand plug 240...

Страница 16: ...afely at the end of its useful life Please take the appliance to a recycling centre where the internal rechargeable battery should be removed by a professional and recycled separately For more information about the recycling of electrical and battery operated appliances please contact your local council office or your household waste disposal service LI ION ...

Страница 17: ...t amount to a major failure In New Zealand our goods come with a guarantee that cannot be excluded under the Consumer Guarantee Act 1993 Conair Australia Pty Ltd will repair or replace at our option your appliance free of charge for thirty six months from the date of purchase if the appliance is defective in workmanship or materials This warranty is an additional benefit and does not affect your l...

Страница 18: ...SUPER CLIP XTP TOOL TIPS 18 ...

Страница 19: ... Suite 101 18 Rodborough Rd Frenchs Forest NSW 2086 Australia Conair New Zealand Limited PO BOX 251159 Pakuranga Auckland 1706 New Zealand CONTACT US For advice tips on your new VS product email us on aus_info conair com CUSTOMER SERVICE Australia 1800 650 263 New Zealand 0800 266 247 Visit VSFORMEN COM AU for grooming tips inspiration ...

Страница 20: ...SUPER CLIP XTP TOOL TIPS 20 YOU WERE BORN TO BE REAL NOT TO BE PERFECT IB 17 268 ...
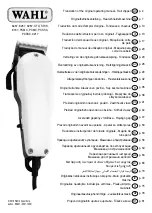
Отзывы: