


MagicQ Mini Wing Installation
www.chamsys.co.uk
MagicQ Mini Wing Installation
PLEASE NOTE: Users need to run MagicQ version v1.7.9.7 or higher to enable DMX Output.
To use the MagicQ Mini Wing with a PC follow the instructions below. Exact sequence of events
may vary according to version of Windows running on the PC.
•
Download the latest version of MagicQ PC from the ChamSys website (
) and
install it on your computer.
•
Connect the MagicQ Mini Wing to a USB port on your computer - the blue LEDs should come on
in turn and then flash. Some computers are not able to supply enough current required by the
USB Specification to power the Mini Wing so an active (powered) USB hub may be required.
•
Windows should detect the MagicQ Mini Wing and ask for drivers. Point it at the drivers folder
under the MagicQ program directory, usually C:\Program Files\ChamSys Ltd\MagicQ PC\
•
If Windows does not ask you for drivers but installs them itself then you may need to force it to
install the correct drivers - see below.
•
Start-up the MagicQ PC software. The blue flashing LEDs on the MagicQ Mini wing should stop
flashing and the faders should have control.
•
To output DMX from the MagicQ Mini Wing, configure Universes 1 in SETUP, VIEW DMX I/O to
'MQ Wing' and enable it (press ENTER to change options).
Installing the correct drivers
The MagicQ PC Mini Wing should normally be Plug & Play, if MagicQ does not recognise the wing
then a manual update of the products drivers will be required as instructed below.
•
Once connected, locate the computers device manager by either: searching for “Device
Manager” wit
hin the start menu
or
navigating to Control Panel > Device Manager.
•
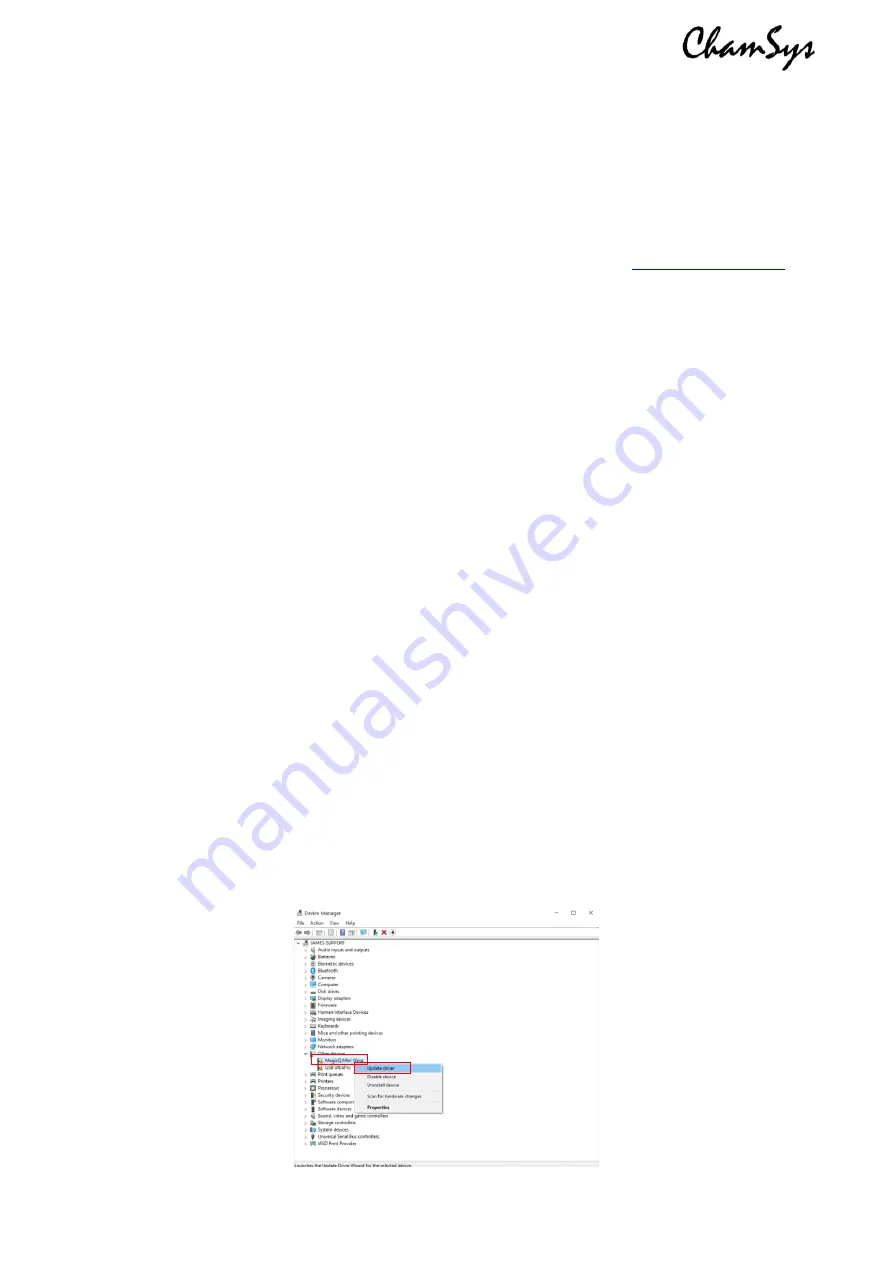
The Mini Wing may be recognised under
‘
other devices
’
in the device manager window, Right
click on the item and select “Update Driver Software”.
(See Image Below)


