


MODEL TM22 DIGITAL TIMER & CLOCK
OPERATION INSTRUCTIONS
FEATURES:
This rugged and water-resistant unit offers several features that make it ideal for kitchen and
household use!
•
Operates as a clock, alarm clock, count-up timer, and count down timer. All functions
operate independently or simultaneously.
•
Clock operates in 12-hour or 24-hour mode.
•
Count-up and Count-down timers count from 1 second to 24 hours.
•
4-way holder allows unit to clip to pocket, attach magnetically to steel surface, hang from
hook, or stand on counter.
•
Frequently used count-down timer settings can be stored in memory for easy recall in
repeat timing operations: cookies, medication, sports, games, homework, etc.
•
Nap Timer feature programs the count-down timer in 15-minute increments with the push
of a button.
•
When activated, clock and timer alarms sound every 45-seconds until turned off so it’s
impossible to miss the signal.
BATTERY INSTALLATION:
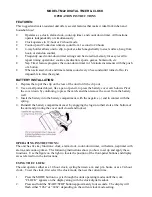
1. Depress the top of the clip on the rear of the unit to tilt the clip out.
2. Use a small pointed object, like a pen or pencil, to press the battery cover catch down. Pivot
the cover down by continuing to press the catch, and then remove the cover from the battery
well.
3. Insert the battery into the battery compartment, with the negative (-) end in contact with the
spring.
4. Reinstall the battery compartment cover by engaging the lugs into their slots at the bottom of
the unit and pivoting the cover until closed and locked.
OPERATING INSTRUCTIONS:
The unit has five key functions: clock, alarm clock, count-down timer, with alarm, nap timer with
alarm, and count-up timer. The following instructions show you how to set up and apply these
functions. Use the figure on the right to locate the position of the front-panel buttons and display
areas referred to in the instructions.
USING THE CLOCK:
The unit operates either as a 12-hour clock, cycling between a.m. and p.m. hours, or as a 24-hour
clock. To set the clock, first select the clock mode, then set the current time.
1.
Press the MODE button to cycle through the units operating modes until the work
“CLOCK” appears on the display along with the clock digital readout.
2.
Press and hold the START/STOP button approximately four seconds. The display will
flash either “12hr” or “24hr”, depending on the current clock mode setting.


