Carson 50 020 4020, Instruction Manual
The Carson 50 020 4020 Instruction Manual is available for free download from manualshive.com, giving you all the information you need to set up and operate your Carson 50 020 4020 effortlessly. This comprehensive manual provides step-by-step instructions and helpful tips, ensuring you make the most of your product.
Share
Download


Reviews:
No comments
Related manuals for 50 020 4020
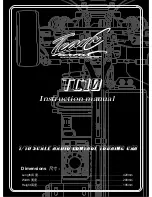
TC10
Brand: Team C Pages: 36

ZIPZaps
Brand: Radio Shack Pages: 2

Cobra SRX8 PRO
Brand: Serpent Pages: 54

Shogun 8385
Brand: DHK Pages: 28

LIGHTNING 12M
Brand: VBC Racing Pages: 19

Lowrider '58 Impala 60-4351
Brand: Radio Shack Pages: 2

370-204V90
Brand: HOMCOM Pages: 29

PINEWOOD DERBY SKATEBOARD RACER SET
Brand: REVELL Pages: 2

Sauber Mercedes C-9
Brand: REVELL Pages: 12

KIT 2022
Brand: REVELL Pages: 8

HAWAIIAN 1969 Dodge Charger
NHRA Funny CAR
Brand: REVELL Pages: 8

Peterbilt 353 Western Life
Brand: REVELL Pages: 20

83 HURST OLDSMOBILE Series
Brand: REVELL Pages: 12

2574
Brand: REVELL Pages: 8

M1 ride-on Go Kart 4
Brand: McLaren Pages: 10

RAIDER
Brand: Arrma Pages: 14

VADER XB
Brand: Maverick Pages: 40

Strada EVO S
Brand: Maverick Pages: 40


