Car Solutions IW04VW-T, Instruction Manual
The Car Solutions IW04VW-T Instruction Manual is a comprehensive guide that provides step-by-step instructions for operating and troubleshooting this reliable car accessory. You can easily download the free manual from our website, ensuring you have all the necessary information to make the most of your IW04VW-T product.
Share
Download


Reviews:
No comments
Related manuals for IW04VW-T

DT400
Brand: Eaton Pages: 12

NZM2-4-XKA
Brand: Eaton Pages: 3

16BV-GS Series
Brand: Staubli Pages: 20

Mic Cable WMKPVC
Brand: Whirlwind Pages: 1

1974-00
Brand: Torqeedo Pages: 2

CS1000
Brand: Meltric Pages: 6

884
Brand: Nederman Pages: 61

FlarmACL
Brand: LXNAV Pages: 8

VEP-1
Brand: Enerpac Pages: 3

VLHDMISP1X2
Brand: VivoLink Pages: 15
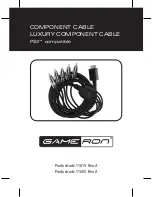
COMPONENT CABLE
Brand: GAMERON Pages: 32

Raychem WinterGard H311100
Brand: Pentair Pages: 3

SX-SP248-HD3D
Brand: Shunxun Pages: 7

RF-HG100F18
Brand: RocketFish Pages: 2

RF-G1300
Brand: RocketFish Pages: 2

Raychem FrostGuard 240 V
Brand: Pentair Pages: 4

G579/12
Brand: Stahl Pages: 12

HDTVDA0104N01
Brand: HDTV Supply Pages: 9


