Canyon CNP-WF514A, User Manual
The Canyon CNP-WF514A user manual is available for free download from manualshive.com. This comprehensive guide provides step-by-step instructions to set up and configure your CNP-WF514A router, ensuring smooth network connectivity. Download the manual now to maximize your product's performance and explore all its amazing features.
Share
Download


Reviews:
No comments
Related manuals for CNP-WF514A
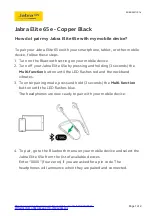
Elite 65e
Brand: Jabra Pages: 2
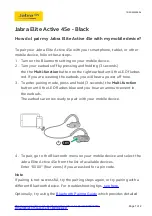
Elite Active 45e
Brand: Jabra Pages: 2
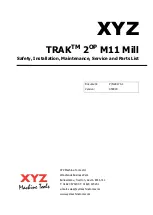
TRAK 2OP M11 Mill
Brand: XYZ Machine Tools Pages: 203

BN-T10
Brand: Bonein Pages: 6

HSBT3031-08
Brand: HANSONG Pages: 34

PRT7010L
Brand: PROLiNK Pages: 28

SoundSurge 60
Brand: TaoTronics Pages: 8

LAPAC1750
Brand: Linksys Pages: 125

MAX-STREAM MR6350
Brand: Linksys Pages: 28

AirBox Series
Brand: Acksys Pages: 36

KVB-311
Brand: KTI Networks Pages: 101

NWAR3670
Brand: ADDON Pages: 8

RTA 1046VW ADSL1
Brand: Dynalink Pages: 5

Wireless LAN Client PCMCIA WLC030
Brand: Dynalink Pages: 10

ENH202
Brand: EnGenius Pages: 2

KB3050
Brand: Kingbird Pages: 9

WA540G
Brand: ConnectGear Pages: 40

GR-104
Brand: ConnectGear Pages: 77


