background image

(QJOLVK

(QJOLVK

)UDQoDLV

(VSDxRO

38%',0

176&

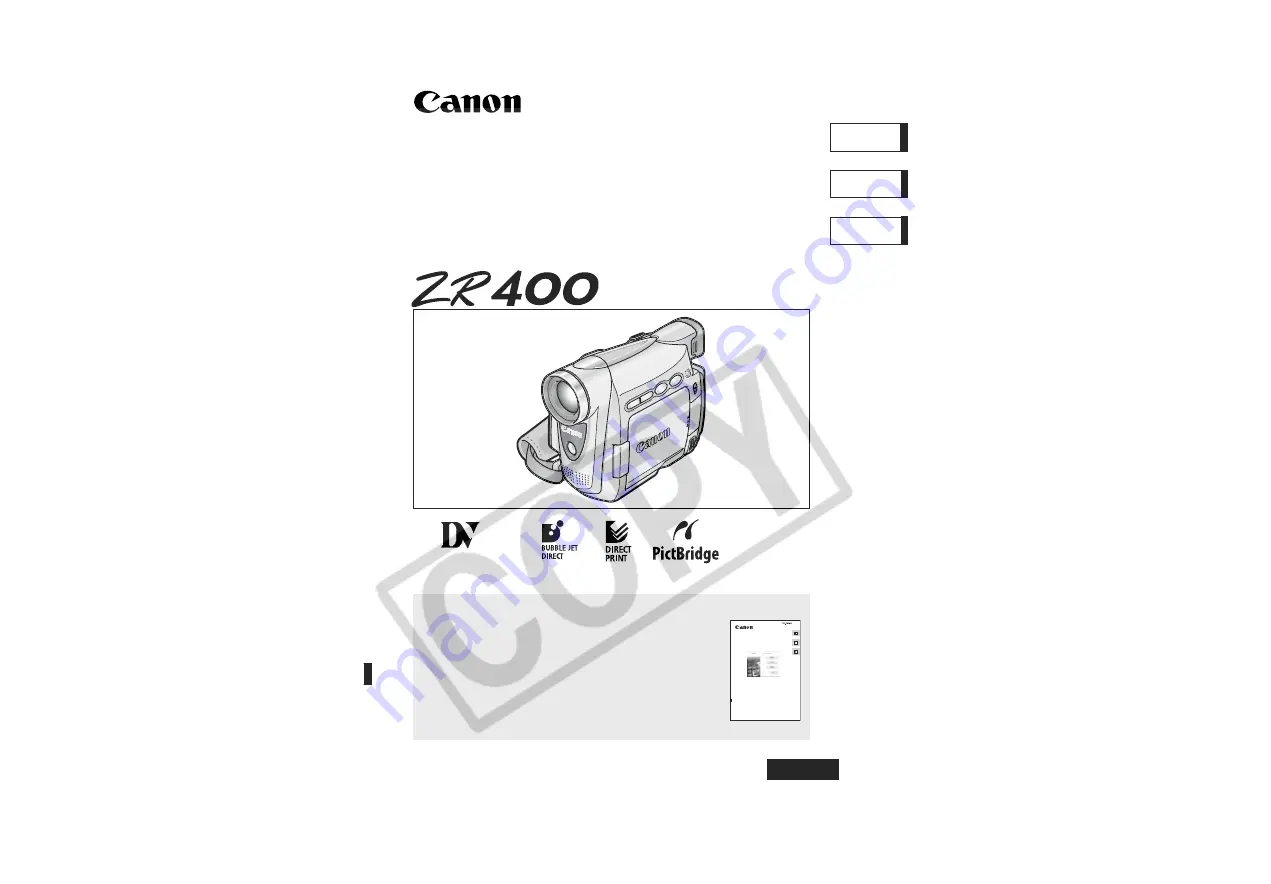
'LJLWDO9LGHR&DPFRUGHU

,QVWUXFWLRQ0DQXDO

&DPHVFRSHQXPpULTXH

0DQXHOG¶LQVWUXFWLRQ

9LGHRFiPDUDGLJLWDO

0DQXDOGH,QVWUXFFLRQHV

3OHDVHUHDGDOVRWKHIROORZLQJLQVWUXFWLRQPDQXDO

9HXLOOH]OLUHDXVVLOHPDQXDOG¶LQVWUXFWLRQVXLYDQW
/HDWDPELpQHOPDQXDOGHLQVWUXFFLRQHVVLJXLHQWH

‡'LJLWDO9LGHR6RIWZDUH

0LQL

'LJLWDO
9LGHR
&DVVHWWH

'LJLWDO9LGHR6RIWZDUH
,QVWUXFWLRQ0DQXDO
0DQXHOG¶LQVWUXFWLRQ
0DQXDOGH,QVWUXFFLRQHV

9HUVLRQ

7KLVLQVWUXFWLRQPDQXDOH[SODLQVKRZWRLQVWDOOWKHVRIWZDUHFRQQHFWWKHFDPFRUGHUWRD

FRPSXWHUDQGGRZQORDGLPDJHVIURPDPHPRU\FDUGWRDFRPSXWHU)RUPRUHGHWDLOHG

RSHUDWLRQDOLQVWUXFWLRQVUHIHUWRWKH3')IRUPDWPDQXDOSURYLGHGRQWKH',*,7$/9,'(2

62/87,21',6.

&HPDQXHOG¶LQVWUXFWLRQH[SOLTXHFRPPHQWLQVWDOOHUOHORJLFLHOFRQQHFWHUOHFDPHVFRSHD

O¶RUGLQDWHXUHWWHOHFKDUJHUGHVLPDJHVDSDUWLUG¶XQHFDUWHPHPRLUHVXUXQRUGLQDWHXU

3RXUGHVLQVWUXFWLRQVGHIRQFWLRQQHPHQWSOXVGHWDLOOHHVUHSRUWH]YRXVDXPDQXHODX

IRUPDW3')IRXUQLHVXUOHGLVTXH',*,7$/9,'(262/87,21',6.

(QHVWHPDQXDOGHLQVWUXFFLRQHVVHH[SOLFDFRPRLQVWDODUHOVRIWZDUHFRQHFWDUOD

YLGHRFDPDUDDXQRUGHQDGRU\GHVFDUJDULPDJHQHVGHXQDWDUMHWDGHPHPRULDDXQ

RUGHQDGRU6LGHVHDLQVWUXFFLRQHVPDVGHWDOODGDVVREUHHOIXQFLRQDPLHQWRFRQVXOWHHO

PDQXDOGHIRUPDWR3')VXPLQLVWUDGRFRQHOGLVFR',*,7$/9,'(262/87,21',6.

Summary of Contents for ZR400

Page 1: ...ZQORDG LPDJHV IURP D PHPRU FDUG WR D FRPSXWHU RU PRUH GHWDLOHG RSHUDWLRQDO LQVWUXFWLRQV UHIHU WR WKH 3 IRUPDW PDQXDO SURYLGHG RQ WKH 7 9 2 62 87 21 6 H PDQXHO G LQVWUXFWLRQ H SOLTXH FRPPHQW LQVWDOOHU OH ORJLFLHO FRQQHFWHU OH FDPHVFRSH D O RUGLQDWHXU HW WHOHFKDUJHU GHV LPDJHV D SDUWLU G XQH FDUWH PHPRLUH VXU XQ RUGLQDWHXU 3RXU GHV LQVWUXFWLRQV GH IRQFWLRQQHPHQW SOXV GHWDLOOHHV UHSRUWH YRXV DX PDQXH...

Page 2: ...SWLRQ ZKLFK FDQ EH GHWHUPLQHG E WXUQLQJ WKH HTXLSPHQW RII DQG RQ WKH XVHU LV HQFRXUDJHG WR WU WR FRUUHFW WKH LQWHUIHUHQFH E RQH RU PRUH RI WKH IROORZLQJ PHDVXUHV 5HRULHQW RU UHORFDWH WKH UHFHLYLQJ DQWHQQD QFUHDVH WKH VHSDUDWLRQ EHWZHHQ WKH HTXLSPHQW DQG UHFHLYHU RQQHFW WKH HTXLSPHQW LQWR DQ RXWOHW RQ D FLUFXLW GLIIHUHQW IURP WKDW WR ZKLFK WKH UHFHLYHU LV FRQQHFWHG RQVXOW WKH GHDOHU RU DQ H SHULHQF...

Page 3: ... cart combination to overturn 10 Power Sources The CA 570 Compact Power Adapter should be operated only from the type of power source indicated on the marking label If you are not sure of the type of power supply to your home consult your product dealer or local power company Regarding other power sources such as battery power refer to instructions in this manual 11 Polarization The CA 570 Compact...

Page 4: ...ll often require extensive work by a qualified technician to restore the product to its normal operation e If the product has been dropped or the cabinet has been damaged f When the product exhibits a distinct change in performance This indicates a need for service 19 Replacement Parts When replacement parts are required be sure the service technician has used replacement parts that are specified ...

Page 5: ...he operating modes are determined by the position of the POWER switch and the TAPE CARD switch Function can be used in this mode Function cannot be used in this mode Trademark Acknowledgments is a trademark is a trademark Windows is either a registered trademark or trademark of Microsoft Corporation in the United States and or other countries Macintosh and Mac OS are trademarks of Apple Computer I...

Page 6: ...Adjusting the Volume 34 Playing Back on a TV Screen 35 Advanced Functions Menus and Settings 37 Recording Using the Recording Programs 45 Using the Night Modes 48 Skin Detail Function 49 Adjusting the AE Shift 50 Adjusting the Focus Manually 51 Setting the White Balance 53 Setting the Shutter Speed 55 Using the Self Timer 57 Changing the Recording Mode SP LP 58 Audio Recording 59 Using Digital Eff...

Page 7: ...Recording Movies on a Memory Card 96 Selecting the Focusing Point 98 Recording Panoramic Images Stitch Assist Mode 99 Playing Back a Memory Card 101 Protecting Images 103 Erasing Images 104 Combining Images Card Mix 105 Formatting a Memory Card 109 Creating a Start up Image 110 Direct Printing Printing Still Images 111 Selecting the Print Settings 114 Printing with Print Order Settings 119 Transfe...

Page 8: ... DISK MMC 16M MultiMediaCard WA 28 Wide Attachment The serial number of this product can be found at the battery attachment unit of the camcorder Write down the number and other information here and retain this book as a permanent record of your purchase to aid identification in case of theft Date of Purchase Model Name ZR400 A Purchased From Serial No Dealer Address Dealer Phone No LAMP S INSIDE ...

Page 9: ... print share button 112 122 FOCUS button 51 play pause button 32 DIGITAL EFFECTS ON OFF button 60 AE SHIFT button 50 END SEARCH button 69 CARD MIX button 105 stitch assist button 99 REC PAUSE button 78 SLIDE SHOW button 102 Speaker 34 LCD screen 21 SET dial 37 CHARGE indicator 13 Card access indicator 91 Program selector 45 EASY Easy recording Program AE Backup battery compartment 17 Memory card s...

Page 10: ...TT button 13 Power switch 5 Cassette compartment cover 16 Cassette compartment 16 OPEN EJECT switch 16 Zoom lever 29 Finger rest TAPE CARD switch 5 Using a tape Using a memory card PHOTO button 91 Strap mount 143 Grip belt 18 Start stop button 25 96 ...

Page 11: ...11 Introduction E Terminal cover Remote sensor 20 Assist lamp 48 Stereo microphone AV terminal 35 DV terminal 76 USB terminal 111 121 Tripod socket 31 ...

Page 12: ...om buttons 29 DATE SEARCH buttons 71 PLAY button 32 REW button 32 FF button 32 button 33 STOP button 32 PAUSE button 33 button 33 SLOW button 33 x 2 button 33 AUDIO DUB button 83 TV SCREEN button 125 WIRELESS CONTROLLER WL D85 START STOP PHOTO ZOOM CARD DATE SEARCH REW PLAY FF STOP PAUSE SLOW AUDIO DUB ZERO SET MEMORY TV SCREEN ...

Page 13: ...rging the Battery Pack 1 Connect the power cord to the adapter 2 Plug the power cord into a power outlet 3 Connect the power adapter to the camcorder s DC IN terminal The CHARGE indicator starts flashing It glows steadily when charging is complete 4 When charging is complete disconnect the power adapter from the camcorder Unplug the power cord from the power outlet and disconnect it from the adapt...

Page 14: ... any products that are not expressly recommended to the camcorder s DC IN terminal or to the power adapter You may hear some noise from the power adapter during use This is not a malfunction Do not disconnect and reconnect the power cord while charging a battery pack Charging may stop The battery pack may not be charged correctly even if the CHARGE indicator glows steady The battery pack may also ...

Page 15: ...n be charged at any charge state Unlike conventional battery packs you do not need to completely use or discharge it before charging We recommend that you prepare battery packs 2 to 3 times longer than you think you might need To conserve battery power turn off the camcorder instead of leaving it in record pause mode Battery Pack NB 2LH NB 2L BP 2L12 BP 2L14 Charging Time 130 min 115 min 205 min 2...

Page 16: ...k on the cassette compartment until it clicks 4 Wait for the cassette compartment to retract automatically and close the cassette compartment cover Do not interfere with the cassette compartment while it is opening or closing automatically or attempt to close the cover before the cassette compartment has fully retracted Be careful not to get your fingers caught in the cassette compartment cover If...

Page 17: ...amcorder settings while the power source is disconnected Connect a power source to the camcorder when replacing the backup battery to retain the settings 1 Open the backup battery cover 2 Insert the backup battery with the side facing outward 3 Close the cover The backup battery has a life span of about a year flashes in red to inform you that it needs to be replaced ...

Page 18: ...rd to the lens cap 2 Pass the grip belt through the loop on the cord Press the buttons on the lens cap when attaching removing it Hook the lens cap on the grip belt while you are recording and place it over the lens when you have finished Fastening the Grip Belt Hold the camcorder with your right hand and adjust the belt with your left Adjust the grip belt so that you can reach the zoom lever with...

Page 19: ...achment It could damage your eyesight If you zoom to telephoto the picture will not be in focus The wide attachment may obstruct the remote sensor the range of the wireless controller narrows or may cause a shadow to appear on the picture when recording with the assist lamp Filters cannot be used with the wide attachment If dust accumulates on the wide attachment or on the camcorder lens clean bot...

Page 20: ...der 2 Place the lithium button battery with the side facing up 3 Insert the battery holder The wireless controller may not work properly when the remote sensor is subjected to strong light sources or direct sunlight If the wireless controller does not work check if the remote sensor is set to OFF 74 When the camcorder cannot be operated with the wireless controller or when it can only be operated ...

Page 21: ...htness of the LCD screen between normal and bright by pressing the LCD BACKLIGHT button This is useful for outdoor recordings Press the LCD BACKLIGHT button This setting does not affect the brightness of the recording or the viewfinder screen When using a battery pack the camcorder retains the setting even if you change the position of the POWER switch The battery usage time shortens when the LCD ...

Page 22: ...etting is New York 4 Turn the SET dial to select the setting option that represents your time zone and press the SET dial To adjust for daylight saving time select the time zone with the next to the area Setting the Date and Time 5 Turn the SET dial to select D TIME SET and press the SET dial The year display starts to flash 6 Turn the SET dial to select the year and press the SET dial The next pa...

Page 23: ...atically adjusts the clock No Time zone No Time zone LONDON WELLGTN Wellington PARIS SAMOA CAIRO HONOLU Honolulu MOSCOW ANCHOR Anchorage DUBAI L A Los Angeles KARACHI DENVER DACCA CHICAGO BANGKOK N Y New York H KONG Hong Kong CARACAS TOKYO RIO Rio de Janeiro SYDNEY FERNAN Fernando de Noronha SOLOMON AZORES 1 24 1 2 3 4 5 6 7 8 9 10 11 12 13 14 15 16 17 18 19 20 21 22 23 2 3 5 6 7 9 8 10 4 12 11 13...

Page 24: ...Press the MENU button to open the menu 2 Turn the SET dial to select DISPLAY SETUP and press the SET dial 3 Turn the SET dial to select D T DISPLAY and press the SET dial 4 Turn the SET dial to select ON 5 Press the MENU button to close the menu CAMERA PLAY VCR CARD CAMERA CARD PLAY MENU 37 DISPLAY SETUP D T DISPLAY OFF ...

Page 25: ...ss the start stop button to begin recording Press the start stop button again to pause recording When You Have Finished Recording 1 Turn the POWER switch to OFF 2 Close the LCD panel 3 Replace the lens cap 4 Unload the cassette 5 Disconnect the power source Before You Begin Recording Make a test recording first to check if the camcorder operates correctly If necessary clean the video heads 132 PLA...

Page 26: ...en the recordings even if you turn the camcorder off Bright light may make it difficult to use the LCD screen In such case use the viewfinder instead When recording near loud sounds such as fireworks drums or concerts sound may become distorted or may be recorded not in the actual sound level This is not a malfunction Allowing the Subject to Monitor the LCD Screen You can rotate the LCD panel so t...

Page 27: ...g on the type of the tape the indication may not be displayed correctly Remaining battery charge The battery symbol indicates the charge status of the battery pack starts flashing in red when the battery pack is empty When you attach an empty battery pack the power may turn off without displaying The actual battery charge may not be indicated accurately depending on the condition under which batte...

Page 28: ...econds and returns to record pause mode Record Search In record pause mode this function allows you to play back the tape forward or reverse to locate the point where you wish to begin recording Press and hold the REC SEARCH button forward or button reverse Release the button at the point you wish to begin recording The camcorder returns to record pause mode CAMERA PLAY VCR CARD CAMERA CARD PLAY C...

Page 29: ...Press the zoom lever slightly for a slow zoom Press harder for a faster zoom You can also use the T and W buttons on the wireless controller However you cannot control the zoom speed Keep at least 1 m 3 3 ft to the subject At wide angle you can focus on a subject as close as 1 cm 0 39 in The zoom speed is slightly faster in record pause mode CAMERA PLAY VCR CARD CAMERA CARD PLAY Zoom in Zoom out Z...

Page 30: ... CAMERA SETUP and press the SET dial 3 Turn the SET dial to select D ZOOM and press the SET dial 4 Turn the SET dial to select a setting option 5 Press the MENU button to close the menu Digital zoom cannot be used in the night modes Digital zoom cannot be used when the multi image screen is selected A zoom indicator appears for 4 seconds It extends in light blue when the digital zoom is set to 56x...

Page 31: ...ngers do not touch the microphone or lens For More Stability Lighting When recording outdoors we recommend recording with the sun at your back When using a tripod do not leave the viewfinder exposed to direct sunlight as it may melt due to concentration of the light by the lens Do not use tripods with fastening screws longer than 5 5 mm 0 2 in as it may damage the camcorder Lean against a wall Put...

Page 32: ...Press the button to begin playback 5 Press the button to stop playback To use the viewfinder close the LCD panel About the screen display During playback the time code gives the hours minutes seconds and frames The remaining tape time may not appear when the time left is less than 15 seconds If the playback picture is distorted clean the video heads using a Canon Head Cleaning Cassette or a commer...

Page 33: ...ng playback pause Press and hold it to play back continuous frame advance frame reverse SLOW Slow Forward Slow Reverse Plays back at about 1 3 normal speed Press the button on the wireless controller during normal or reverse playback Press the play button to return to normal playback x2 Forward x2 Playback Reverse x2 Playback Plays back at 2 times normal speed Press the button on the wireless cont...

Page 34: ... not sound when you close the LCD panel Turn the SET dial up to increase the volume and down to lower the volume A volume bar appears for 2 seconds You can turn off the volume completely by turning the SET dial down until OFF appears Turn the SET dial up to increase the volume again CAMERA PLAY VCR CARD CAMERA CARD PLAY SET dial Speaker ...

Page 35: ...ct the white plug to the white audio terminal L left the red plug to the red audio terminal R right and the yellow plug to the yellow video terminal VIDEO 3 If connecting to a TV set the input selector to VIDEO If connecting to a VCR set the input selector to LINE We recommend powering the camcorder from a household power source TVs with Video ID 1 system Recordings made in the widescreen mode wil...

Page 36: ...ess the SET dial 3 Turn the SET dial to select OUTPUT CH and press the SET dial 4 Turn the SET dial to select a setting option L R Stereo L R channels Bilingual Main Sub L L Stereo L channel Bilingual Main R R Stereo R channel Bilingual Sub 5 Press the MENU button to close the menu The setting resets to the L R setting when you turn the camcorder off CAMERA PLAY VCR CARD CAMERA CARD PLAY MENU 37 A...

Page 37: ...ET dial to select a submenu and press the SET dial 3 Turn the SET dial to select a menu item and press the SET dial 4 Turn the SET dial to select a setting option 5 Press the MENU button to close the menu When setting the white balance shutter speed or language press the SET dial first before pressing the MENU button Pressing the MENU button at any time closes the menu Items that are not available...

Page 38: ...YPE ART BLACK WHITE SEPIA MOSAIC BALL CUBE WAVE COLOR MASK MIRROR M S SPEED MANUAL FAST MODERATE SLOW M S SPLIT 4 9 16 CAMERA SETUP SHUTTER AUTO 1 60 1 100 1 250 1 500 1 1000 1 2000 55 A SL SHUTTER ON OFF 56 D ZOOM OFF 56x 280x 30 IMG STAB ON OFF 75 WHITE BAL AUTO SET INDOOR OUTDOOR 53 NIGHT MODE NIGHT NIGHT S NIGHT 48 SELF TIMER ON OFF 57 SKIN DETAIL SOFT NORMAL 49 STILL I REC OFF FINE NORMAL 92 ...

Page 39: ... T DISPLAY ON OFF 24 LANGUAGE See list of languages 73 DATE FORMAT 73 DEMO MODE ON OFF 75 SYSTEM WL REMOTE ON OFF 74 BEEP ON OFF 74 T ZONE DST See list of time zones 22 D TIME SET 22 MY CAMERA S UP SOUND OFF DEFAULT MY SOUND 72 SHTR SOUND OPER SOUND SELF T SOUND Submenu Menu Item Setting Options ...

Page 40: ...EC MODE SP LP 58 AV DV ON OFF 81 AUDIO SETUP OUTPUT CH L R L L R R 36 AUDIO DUB AUDIO IN MIC IN 83 WIND SCREEN AUTO OFF 59 AUDIO MODE 16bit 12bit 59 12bit AUDIO STEREO1 STEREO2 MIX FIXED MIX VARI 85 MIX BALANCE 85 CARD SETUP IMG QUALITY SUPER FINE FINE NORMAL 88 MOVIE SIZE 320x240 160x120 89 FILE NOS RESET CONTINUOUS 90 DISPLAY SETUP BRIGHTNESS 74 TV SCREEN ON OFF 125 DISPLAYS ON OFF PLAYBK 125 6S...

Page 41: ...nctions E SYSTEM WL REMOTE ON OFF 74 BEEP ON OFF 74 T ZONE DST See list of time zones 22 D TIME SET 22 MY CAMERA S UP SOUND OFF DEFAULT MY SOUND 72 SHTR SOUND OPER SOUND SELF T SOUND Submenu Menu Item Setting Options ...

Page 42: ... OFF 57 SKIN DETAIL SOFT NORMAL 49 REVIEW OFF 2sec 4sec 6sec 8sec 10sec 95 CARD SETUP IMG QUALITY SUPER FINE FINE NORMAL 88 IMAGE SIZE 1152x864 640x480 88 MOVIE SIZE 320x240 160x120 89 FILE NOS RESET CONTINUOUS 90 AUDIO SETUP WIND SCREEN AUTO OFF 59 DISPLAY SETUP BRIGHTNESS 74 LCD MIRROR ON OFF 26 TV SCREEN ON OFF 125 D T DISPLAY ON OFF 24 LANGUAGE See list of languages 73 DATE FORMAT 73 DEMO MODE...

Page 43: ...43 Advanced Functions E MY CAMERA S UP SOUND OFF DEFAULT MY SOUND 72 SHTR SOUND OPER SOUND SELF T SOUND Submenu Menu Item Setting Options ...

Page 44: ... ORDER 119 TRANSFER ORDER 124 DISPLAY SETUP BRIGHTNESS 74 TV SCREEN ON OFF 125 DISPLAYS ON OFF PLAYBK 125 D TIME SEL DATE TIME DATE TIME 67 LANGUAGE See list of languages 73 DATE FORMAT 73 SYSTEM WL REMOTE ON OFF 74 BEEP ON OFF 74 T ZONE DST See list of time zones 22 D TIME SET 22 MY CAMERA CREATE START UP IMAGE 110 SEL S UP IMG NO IMAGE CANON LOGO MY IMAGE 72 S UP SOUND OFF DEFAULT MY SOUND 72 SH...

Page 45: ...usting the settings manually Sports Use this mode to record sports scenes such as tennis or golf or moving objects such as roller coasters Portrait Use this mode to give accent to your subject by blurring the background or foreground The blur effect increases the more you zoom to telephoto Spotlight Use this mode to record spotlit scenes or fireworks Sand Snow Use this mode in bright places such a...

Page 46: ...nly in CAMERA mode Selecting the Easy Recording Program Set the program selector to EASY EASY appears Recording Program Image Stabilizer on Focus A White Balance A Wind screen A Shutter Speed A A AE Shift Digital Effects Card Mix CAMERA PLAY VCR CARD CAMERA CARD PLAY Program selector Shaded area ...

Page 47: ...gram selector Do not change the mode during recording as the brightness of the image may change abruptly Sports Portrait mode The picture may not appear smooth when played back Sand Snow mode The subject may become overexposed in dark surroundings Check the image on the screen The picture may not appear smooth when played back Low Light mode Moving subjects may leave a trailing afterimage Picture ...

Page 48: ...ase adjust the focus manually Digital zoom and multi image screen cannot be used while a night mode is activated The program AE mode cannot be changed while a night mode is activated NIGHT Allows you to record in dark places where lights cannot be used without sacrificing color NIGHT The assist lamp lights up and stays on allowing you to record in dark places without sacrificing color S NIGHT Allo...

Page 49: ...UP Select SKIN DETAIL set it to SOFT and close the menu Skin detail function cannot be used when the program selector is set to EASY SKIN DETAIL resets to NORMAL when you change the position of the POWER switch or the program selector To obtain the best effect use this function when recording a person in close up Note that areas similar to the skin color may lack in detail CAMERA PLAY VCR CARD CAM...

Page 50: ...er than the Easy Recording Spotlight or Sand Snow mode 3 Press the AE SHIFT button AE 0 appears in light blue 4 Turn the SET dial to adjust the AE shift level Turn the SET dial up to lighten the image and down to darken the image If MF is displayed in light blue AE shift cannot be adjusted Press the AE SHIFT button again to display AE 0 in light blue The camcorder retains the setting even if you t...

Page 51: ...CUS button MF appears 4 Turn the SET dial to adjust the focus Turn the SET dial up or down until the image appears focused Press the FOCUS button to return to autofocus The setting resets to autofocus when you switch the program selector to EASY Readjust the focus when you have turned off the camcorder CAMERA PLAY VCR CARD CAMERA CARD PLAY Reflective surfaces Subjects with low contrast or without ...

Page 52: ...focus on faraway subjects such as mountains or fireworks Press the FOCUS button more than 2 seconds after step 2 in Adjusting the Focus Manually MF appears When you operate the zoom or turn the SET dial disappears and the camcorder changes to manual focus ...

Page 53: ...enu and select CAMERA SETUP Select WHITE BAL select a setting option and close the menu When you have selected SET flashes and stops flashing when settings is complete AUTO Auto white balance SET Use the custom white balance setting to make white subjects appear white under colored lighting INDOOR Use this mode for recording under changing lighting condition video lights or sodium lamps OUTDOOR Us...

Page 54: ...TAPE CARD switch When you have set the custom white balance Depending on the light source may keep flashing The result will still be better than with the auto setting Reset the white balance when the lighting condition changes Turn off the digital zoom Custom white balance may provide better results in the following cases Changing lighting conditions Close ups Subjects in a single color sky sea or...

Page 55: ...g with high shutter speeds Recording under fluorescent lights CAMERA mode In Easy Recording Auto mode or the night modes the camcorder automatically detects the flicker of fluorescent lighting and adjusts the shutter speed accordingly However if the screen starts to flicker select AUTO mode and set the shutter speed to 1 100 The setting resets to the auto setting when you switch the program select...

Page 56: ...der not to use a slow shutter speed Open the menu and select CAMERA SETUP Select A SL SHUTTER set it to OFF and close the menu When set to ON moving subjects may leave a trailing afterimage The camcorder retains the setting separately in CAMERA and CARD CAMERA mode If camcorder shake warning appears in CARD CAMERA mode stabilize the camcorder for example by mounting it on a tripod or placing it on...

Page 57: ... seconds when using the wireless controller The count down appears on the screen To record a still image press the PHOTO button 91 To cancel the self timer set SELF TIMER to OFF Once the countdown has begun you can also press the start stop button when recording movies or the PHOTO button when recording still image to cancel the self timer The self timer will be canceled when you turn off the camc...

Page 58: ...ture and usage condition of the tape picture and sound recorded in LP mode may be distorted We recommend using the SP mode for important recordings If you record in both SP and LP modes on the same tape the playback picture may become distorted and the time code may not be written correctly If you play back a tape that has been recorded in LP mode with another digital device on this camcorder or v...

Page 59: ...and close the menu 16bit appears for approximately 4 seconds Wind Screen The camcorder reduces wind noise automatically However you can turn off the wind screen when recording indoors or when you want the microphone to be as sensitive as possible Only when AUDIO DUB is set to MIC IN Open the menu and select AUDIO SETUP Select WIND SCREEN set it to OFF and close the menu WS appears when you turn th...

Page 60: ...60 Using Digital Effects Faders 62 Begin or end scenes with a fade to or from black Fade Trigger FADE T Wipe WIPE Corner Wipe CORNER Jump JUMP Flip FLIP Puzzle PUZZLE Zigzag ZIGZAG Beam BEAM Tide TIDE ...

Page 61: ... 64 Captures moving subjects in 4 9 or 16 sequences of still images and displays them at one time Sound will be recorded normally Art ART Black and White BLACK WHITE Sepia SEPIA Mosaic MOSAIC Ball BALL Cube CUBE Wave WAVE Color Mask COLOR MASK Mirror MIRROR 4 Sequences 9 Sequences 16 Sequences ...

Page 62: ...t stop button Fade out During recording press the DIGITAL EFFECTS ON OFF button and pause recording by pressing the start stop button The fader can be activated deactivated by pressing the DIGITAL EFFECTS ON OFF button PLAY VCR mode 4 Fade in In playback pause mode press the DIGITAL EFFECTS ON OFF button and begin playback by pressing the button Fade out During playback press the DIGITAL EFFECTS O...

Page 63: ... button The name of the selected effect stops flashing The effect can be activated deactivated by pressing the DIGITAL EFFECTS ON OFF button Selecting an Effect in CARD CAMERA Mode 1 Open the menu and select D EFFECT SETUP Select EFFECT set it to BLACK WHITE and close the menu BLK WHT flashes 2 Press the DIGITAL EFFECTS ON OFF button BLK WHT stops flashing The effect can be activated deactivated b...

Page 64: ... the last image Pressing the DIGITAL EFFECTS ON OFF button for more than 1 second cancels the images one after another FAST MODERATE SLOW The set number of images will be captured at the set speed To cancel the multi image screen press the DIGITAL EFFECTS ON OFF button 6 Press the start stop button to begin recording The multi image screen is recorded on the tape Turn off the digital effect when y...

Page 65: ...picture on the viewfinder appears horizontally squeezed The multi image screen cannot be used when the widescreen mode is selected Simultaneous recording on a memory card cannot be used when the widescreen mode is selected If you play back a widescreen recording on a normal TV the image appears horizontally squeezed If you connect the camcorder to a TV with Video ID 1 system recordings made in the...

Page 66: ... toward T To shrink the image below 2 times magnification move the zoom lever toward W 2 Select the magnified area with the SET dial Turn the SET dial to move the image to the right and left or up and down Pressing the SET dial switches between the directions To cancel the magnification move the zoom lever toward W until the frame disappears Movies played back from a memory card cannot be magnifie...

Page 67: ...isplay Selecting the Date Time Display Combination Open the menu and select DISPLAY SETUP Select D TIME SEL set it to DATE or TIME and close the menu Selecting the Data Code Display Combination Open the menu and select DISPLAY SETUP Select DATA CODE set it to CAMERA DATA or CAM D T and close the menu CAMERA PLAY VCR CARD CAMERA CARD PLAY MENU 37 DISPLAY SETUP D TIME SEL DATE TIME CAMERA PLAY VCR C...

Page 68: ...ar in CARD PLAY mode Six Second Auto Date Date and time appear for 6 seconds when you begin playback or to indicate that date or time zone has changed Open the menu and select DISPLAY SETUP Select 6SEC DATE set it to ON and close the menu CAMERA PLAY VCR CARD CAMERA CARD PLAY CAMERA PLAY VCR CARD CAMERA CARD PLAY MENU 37 DISPLAY SETUP 6SEC DATE OFF ...

Page 69: ... The camcorder rewinds fast forwards the tape plays back the last few seconds of the recording and stops the tape Pressing the button again cancels the search End search cannot be used once you unload the cassette End search may not work properly if a blank section exists on the tape You cannot use end search to locate the editing end of audio dubbing CAMERA PLAY VCR CARD CAMERA CARD PLAY END SEAR...

Page 70: ...at the point you wish to return to later 0 00 00 appears To cancel press the ZERO SET MEMORY button again 2 When you have finished playback rewind the tape RTN appears The tape stops automatically at 0 00 00 The tape counter changes to time code The zero set memory may not function correctly when the time code has not been recorded consecutively CAMERA PLAY VCR CARD CAMERA CARD PLAY REW button PLA...

Page 71: ...s the or button to begin searching Press more than once to search for further date changes up to 10 times Press the STOP button to stop searching A recording of longer than a minute per date area is required Date search may not function if the data code is not correctly displayed CAMERA PLAY VCR CARD CAMERA CARD PLAY STOP button DATE SEARCH buttons CARD DATE SEARCH REW PLAY FF STOP ...

Page 72: ... up image set the camcorder to CARD PLAY mode 3 Select a setting option and close the menu You can save your original images or the images and sounds contained in the supplied software ZoomBrowser EX for Windows or ImageBrowser for Macintosh to the setting options MY IMAGE and MY SOUND For details refer to the Digital Video Software Instruction Manual You can also create original start up images 1...

Page 73: ...ange the setting The displays and at the bottom of the screen refer to the button names on the camcorder and will not change when you change the language Changing the Date Format You can select between three date formats For example JAN 1 2005 1 JAN 2005 and 2005 1 1 Open the menu and select DISPLAY SETUP Select DATE FORMAT select a format and close the menu Language Set A e g USA Canada Language ...

Page 74: ... the menu Adjusting the Brightness of the LCD Screen Open the menu and select DISPLAY SETUP Select BRIGHTNESS adjust the brightness level and close the menu Changing the brightness of the LCD screen does not affect that of the viewfinder or the recordings Turning the Remote Sensor Off Open the menu and select SYSTEM Select WL REMOTE set it to OFF and close the menu appears CAMERA PLAY VCR CARD CAM...

Page 75: ...l degree of camcorder shake The image stabilizer might not be as effective when using the night modes Demonstration Mode The demonstration mode displays the camcorder s main features It starts automatically when you leave the camcorder turned on without loading a recording media for more than 5 minutes However you can set the camcorder not to start the demonstration mode Open the menu and select D...

Page 76: ... Digital Video Device Refer also to the instruction manual of the digital video device Recording 1 Set the camcorder to PLAY VCR mode and load a recorded cassette 2 Connected device Load a blank cassette and set the device to record pause mode 3 Locate the scene you wish to copy and pause playback shortly before the scene 4 Play back the tape 5 Connected device Begin recording when the scene you w...

Page 77: ...g a digital video device If the picture does not appear reconnect the DV cable or turn the camcorder off and back on again Proper operation cannot be guaranteed for all digital video devices equipped with a DV terminal If operation does not work use the AV terminal We recommend powering the camcorder from a household power source ...

Page 78: ...uring recording you can check the picture on the screen 5 Connected device Play back the tape 6 Press the button when the scene you wish to record appears Recording starts 7 Press the button to stop recording Press the button to pause recording Press the button again to restart recording 8 Connected device Stop playback Depending on the signal sent from the connected device dubbing may not work pr...

Page 79: ... picture on the screen 5 Connected Device Play back the tape 6 Press the button when the scene you wish to record appears Recording starts 7 Press the button to stop recording Press the button to pause recording Press the button again to restart recording 8 Connected Device Stop playback Blank sections may be recorded as anomalous picture If the picture does not appear reconnect the DV cable or tu...

Page 80: ... back such tape COPYRIGHT PROTECTED PLAYBACK IS RESTRICTED appears and you will not be able to view the contents of the tape If you attempt to record from such tape via the DV terminal COPYRIGHT PROTECTED DUBBING RESTRICTED appears and you will not be able to record the contents of the tape ...

Page 81: ...utput terminal only Connecting the Devices Turn off all devices before starting the connections Unload the tape from the camcorder Refer also to the instruction manual of the connected device Turning On the Analog Digital Converter Open the menu and select VCR SETUP Select AV DV set it to ON and close the menu CAMERA PLAY VCR CARD CAMERA CARD PLAY MENU 37 VCR SETUP AV DV OFF AUDIO VIDEO R L Signal...

Page 82: ...ive signals or anomalous signals such as ghost signals For normal use set AV DV to OFF If it is set to ON digital signals cannot be input via the camcorder s DV terminal Depending on the software and the specifications of your computer you may not be able to transfer converted signals via the DV terminal We recommend powering the camcorder from a household power source ...

Page 83: ...load a recorded cassette Use a tape recorded in SP 12 bit mode with this camcorder 2 Open the menu and select AUDIO SETUP Select AUDIO DUB set it to AUDIO IN or MIC IN and close the menu 3 Locate the scene you wish to start audio dubbing 4 Press the PAUSE button on the wireless controller CAMERA PLAY VCR CARD CAMERA CARD PLAY MENU 37 AUDIO SETUP AUDIO DUB AUDIO IN R L AUDIO OUTPUT Signal flow STV ...

Page 84: ...ng If you add sound to a tape not recorded with this camcorder sound quality may decrease Sound quality may decrease when you add sound to the same scene for more than 3 times When you connect an audio device check the picture on the LCD screen and the sound via built in speaker or audio device When you use the microphone you can check the picture on a TV connected via the AV terminal and the soun...

Page 85: ...reo 2 in the same level MIX VARI Plays back Stereo 1 and Stereo 2 The mix balance can be adjusted 2 If you have selected MIX VARI adjust the mix level Open the menu and select AUDIO SETUP Select MIX BALANCE adjust the balance with the SET dial and close the menu Turn the SET dial down to increase the volume of Stereo 1 and up to increase the volume of Stereo 2 The camcorder resets to STEREO1 when ...

Page 86: ...order disconnect and reconnect the DV cable If the problem persists disconnect the interface cable turn off camcorder and computer turn camcorder and computer back on and reconnect them Make sure that camcorder and computer are not connected with a USB cable before connecting the camcorder to the computer using the DV cable Otherwise the computer may not operate properly We recommend powering the ...

Page 87: ...fully remove the memory card without first pushing it in 1 Turn off the camcorder Make sure that the card access indicator is not flashing before you turn off the camcorder 2 Open the cover 3 Push the memory card to release it Remove the memory card 4 Close the cover This camcorder is compatible with MultiMediaCards or SD Memory Cards only Do not use any other types of memory cards Proper operatio...

Page 88: ... compression The number of still images that can be recorded on a memory card vary according to the recording condition The estimated figures are as follows 128 MB 512 MB Using a SD Memory Card Number of still images that can be recorded on a memory card CAMERA PLAY VCR CARD CAMERA CARD PLAY MENU 37 CARD SETUP IMG QUALITY FINE CAMERA PLAY VCR CARD CAMERA CARD PLAY MENU 37 CARD SETUP IMAGE SIZE 115...

Page 89: ...rd vary according to the recording condition The estimated figures are as follows 128 MB 512 MB Using a SD Memory Card Maximum recording time of a movie on a memory card The recording times specified above are the total amount of recording times with the supplied MultiMediaCard CAMERA PLAY VCR CARD CAMERA CARD PLAY MENU 37 CARD SETUP MOVIE SIZE 320x240 Image Size Recording Time File Size per Secon...

Page 90: ...ry card is inserted starting with 101 0101 If the memory card already contains image files the consecutive file number will be assigned CONTINUOUS The camcorder memorizes the file number of the last image and assigns the consecutive file number to the next image even when a new memory card is inserted If a higher file number already exists on the memory card the consecutive number will be assigned...

Page 91: ...wice The picture may appear out of focus for a moment while the camcorder is focusing Exposure is locked When you press the PHOTO button on the wireless controller recording starts immediately 3 Press the PHOTO button fully and focusing frame disappear and you hear a shutter sound The card access indicator flashes and the card access display appears The still image shown on the screen will be reco...

Page 92: ...ial When the Focus Priority mode is set to OFF No focusing frame appears In step 2 turns green and focus and exposure are locked The camcorder shuts off when you do not operate it for 5 minutes to save power AUTO POWER OFF appears 20 seconds before shutoff To continue recording turn the POWER switch to OFF and then back to CAMERA Recording a Still Image on a Memory Card While Recording Movies on a...

Page 93: ...stopped When recording via the AV terminal make sure that AV DV is displayed on the screen When recording via the DV terminal make sure that AV DV is not displayed Change the setting as necessary 81 2 Connected device Load a recorded cassette and play back the tape 3 Press the PHOTO button halfway when the scene you wish to record appears The still image remaining image capacity and other informat...

Page 94: ... card in green 6 or more images in yellow 1 to 5 images in red No more images The indication may not decrease even though a recording has been made or may decrease by 2 images at once All indicators are displayed in green when a memory card is played back Card Access Display Indicates that the camcorder is writing on the memory card Image Size Indicates the still image size ...

Page 95: ...ect REVIEW select a setting option and close the menu A still image is displayed as long as you hold the PHOTO button after recording The FILE OPER menu appears when you press the SET dial while you are reviewing a still image or when you press the SET dial right after recording In this menu you can protect 103 or erase 104 the image CAMERA PLAY VCR CARD CAMERA CARD PLAY MENU 37 CAMERA SETUP REVIE...

Page 96: ...cassette during recording When you use a SD Memory Card we recommend using a Canon SD Memory Card or a SD Memory Card with a transfer rate of more than 2 MB sec right after you have formatted it with this camcorder With memory cards not formatted with this camcorder or when recording erasing has been repeatedly performed the writing speed may be lower and recording may stop You can select the focu...

Page 97: ...ing from a tape in the camcorder or other video devices A movie recorded from an image in widescreen mode will be vertically compressed The data code of the movie will reflect the date and time it has been recorded on the memory card Recording stops at blank sections or recordings in different audio mode 12bit 16bit Screen Displays during Movie Recording CAMERA PLAY VCR CARD CAMERA CARD PLAY Card ...

Page 98: ... frame gives an indication of the focusing point Depending on the size of the subject or the distance the camcorder may focus outside the frame When you operate the zoom lever the frames other than the selected one disappear The focusing point can be selected only when Focus Priority is set to ON in CARD CAMERA mode The focusing point returns to the center if you turn off the camcorder change from...

Page 99: ... include a distinctive item landmark etc in the overlapping portion 1 Press the button 2 Select the direction with the CARD button CARD button clockwise CARD button counterclockwise 3 Select the program AE mode and zoom on the subject Adjust focus and exposure manually as necessary Once the sequence has started you cannot change the program AE mode exposure zoom or focus 4 Press the PHOTO button t...

Page 100: ...of 26 images can be recorded 6 Press the button after the last image For details on how to merge these images refer to the Digital Video Software Instruction Manual Compose each image so that it overlaps 30 to 50 of the adjoining image Try to keep the vertical misalignment within 10 Do not include a moving subject in the overlapping portion Do not try to stitch images that include both distant and...

Page 101: ...n to restart playback Pressing the button displays the first scene of the movie Press the CARD button or the REW FF button on the wireless controller for 8x fast forward fast rewind playback Images not recorded with this camcorder uploaded from a computer except the sample images 108 edited on a computer and images whose file names have been changed may not be played back correctly Do not turn off...

Page 102: ...or CARD button 3 Move the zoom lever toward T The index screen is cancelled and the selected image is displayed Card Jump Function You can locate images without displaying them one by one The number in the upper right of the screen indicates the image number of the current image by the total number of images Press and hold the CARD or CARD button When you release the button the image of the displa...

Page 103: ... when you press the SET dial while you are reviewing a still image or when you press the SET dial right after recording 3 Select PROTECT appears and now the image cannot be erased To cancel the protection press the SET dial 4 Select RETURN to close the menu Protecting during Index Screen Display 1 Move the zoom lever toward W Up to 6 images appear Select the image you wish to protect 2 Open the me...

Page 104: ... 4 Select YES The image is erased and the previous image appears 5 Select RETURN to close the menu Erasing a Single Image All Images 1 Open the menu and select CARD OPERATIONS 2 Select IMAGE ERASE 3 Select SINGLE or ALL When erasing a single image ERASE THIS IMAGE NO and YES appears If an image is protected YES appears in purple When erasing all images ERASE ALL IMAGES EXCEPT FOR IMAGES NO and YES...

Page 105: ...of the card mix image Mix level adjustment blue area of the still image Card Luminance Key CARD LUMI Combines illustrations or title with your recordings The live video recording will appear in place of the light area of the card mix image Mix level adjustment light area of the still image Camera Chroma Key CAM CHROMA Combines backgrounds with your recordings Record your subject in front of a blue...

Page 106: ... Selecting the Card Mix Effect 1 Upload a sample image from the DIGITAL VIDEO SOLUTION DISK to the memory card in the camcorder Refer to Saving Still Images from Your Computer to the Memory Card in the Digital Video Software Instruction Manual 2 Set the program selector to 3 Open the menu and select D EFFECT SETUP 4 Select CARD MIX The card mix menu appears 5 Select the image you wish to combine w...

Page 107: ...selected C ANIMATION select ANIMAT TYPE and select between CORNER STRAIGHT and RANDOM 8 To adjust the mix level select MIX LEVEL and adjust it with the SET dial 9 Close the menu CARD MIX flashes 10 Press the CARD MIX button CARD MIX stops flashing The combined image appears Card mix cannot be used when STILL I REC is set to FINE or NORMAL Movies recorded on a memory card cannot be combined with ca...

Page 108: ...re intended only for the personal use with this camcorder Do not use these sample images for other purposes PhotoEssentials Royalty Free Stock Photography The PhotoEssentials suite of royalty free images on CD ROM features premium quality assignment photography and is ideally suited for use in advertising brochures reports multimedia websites books packaging and more For more information please vi...

Page 109: ...Images erased by formatting cannot be recovered If you use a memory card other than the supplied one format it with the camcorder 1 Open the menu and select CARD OPERATIONS 2 Select FORMAT CANCEL and EXECUTE appears 3 Select EXECUTE ALL DATA WILL BE ERASED FORMAT THIS CARD NO and YES appears 4 Select YES and close the menu Formatting starts Selecting NO brings you back to step 3 CAMERA PLAY VCR CA...

Page 110: ...E START UP IMAGE SET THIS AS START UP IMAGE YES and NO appears 4 Select YES OVERWRITE MY IMAGE NO and YES appears 5 Select YES The still image will be saved and the image that was saved to MY IMAGE is erased Retain the original data of the still image you have set as the start up image on your computer or removable disk CAMERA PLAY VCR CARD CAMERA CARD PLAY MENU 37 MY CAMERA CREATE START UP IMAGE ...

Page 111: ...Set the camcorder to CARD PLAY mode 4 Connect the camcorder to the printer using the cable appears and changes to or when the printer is properly connected to the camcorder Does not appear with movies or still images that cannot be played back with the camcorder The print share button lights up and the current print setting will be displayed for approx 6 seconds Canon Printers PictBridge compliant...

Page 112: ...ng menu may differ slightly depending on the connected printer Printing with the Print Share Button You can print an image without changing the settings by simply pressing the print share button 1 Select the still image you wish to print with the CARD button 2 Press the print share button Printing starts The button flashes and glows steadily when printing is complete If you wish to continue printi...

Page 113: ...nd press the SET dial Canon Printer Printing stops even if it is incomplete and the paper is fed through Canon CP Printer CP 10 CP 100 A print in progress cannot be stopped Printing stops when the current print is finished and the remaining prints are canceled Printing Errors If an error occurs during the printing process an error message appears 129 Canon Printer Resolve the error When printing d...

Page 114: ...rinter model For details refer to the instruction manual of your printer BORDERED The image area remains relatively unchanged from the recorded image when it is printed BORDERLESS 8 UP The center portion of the recorded image is printed at an enlarged size The image s top bottom and sides may be cropped slightly 8 UP can be selected when using card size paper 5 3 x 8 6 cm with CP Printers VIVID VI...

Page 115: ...of the paper set in your printer 3 Turn the SET dial to select the paper type and press the SET dial Select the paper type of the paper set in your printer 4 Turn the SET dial to select a layout option and press the SET dial Including the Date in the Print 1 In the print setting menu turn the SET dial to select date and press the SET dial 2 Turn the SET dial to select a date print option and press...

Page 116: ...ERED The image area remains relatively unchanged from the recorded image when it is printed BORDERLESS The center portion of the recorded image is printed at an enlarged size The image s top bottom and sides may be cropped slightly 1 In the print setting menu turn the SET dial to select STYLE and press the SET dial 2 Make sure that PAPER is selected and press the SET dial PAPER CARD 1 CARD 2 CARD ...

Page 117: ...DERED The image area remains relatively unchanged from the recorded image when it is printed BORDERLESS MULTIPLE The center portion of the recorded image is printed at an enlarged size The image s top bottom and sides may be cropped slightly MULTIPLE can only be selected when printing on card size paper BORDERS can only be selected when IMAGE is set to STANDARD 1 In the print setting menu turn the...

Page 118: ...image style and press the SET dial Pressing the MENU button brings you back to the print settings menu Selecting the Borders 2 Turn the SET dial to select BORDERS and press the SET dial 3 Turn the SET dial to select a borders option and press the SET dial Pressing the MENU button brings you back to the print settings menu ...

Page 119: ...ou wish to print 2 Press the SET dial to open the FILE OPER menu 3 Select PRINT ORDR 4 Select the number of copies appears on the image To cancel the print order set the number of copies to 0 5 Select RETURN to close the menu Selecting in Index Screen Display 1 Move the zoom lever toward W Up to 6 images appear Select the image you wish to print 2 Open the menu and select CARD OPERATIONS Select PR...

Page 120: ...d and press the SET dial Printing starts The print setting menu disappears when printing is complete Depending on the connected printer you can select style or paper settings before step 3 Cancel Printing Printing Errors 113 Restarting Printing Open the CARD PLAY menu and select PRINT Select RESUME in the print setting menu and press the SET dial The remaining images will be printed Printing canno...

Page 121: ... on the software and the specifications settings of your computer The image files on your memory card and the image files saved on the hard disk drive of your computer are valuable original data files If you wish to use image files on your computer make copies of them first and use the copied file retaining the original Make sure that camcorder and computer are not connected with a DV cable before...

Page 122: ... menu appears on the camcorder screen and the button lights up From the second time on you only need to connect the camcorder to the computer to transfer images Transferring All Images New Images or Images with Transfer Orders To transfer images with transfer order you need to set the transfer orders 124 1 Turn the SET dial to select ALL IMAGES NEW IMAGES or TRANSFER ORDERS ALL IMAGES Transfers al...

Page 123: ...he button 3 Select the still image you wish to transfer as wallpaper with the CARD button 4 Press the button The selected image is transferred to the computer and displayed on the desktop Pressing the MENU button brings you back to the transfer menu You can press the SET dial in place of the button With ALL IMAGES NEW IMAGES or TRANSFER ORDERS a confirmation message appears Turn the SET dial to se...

Page 124: ... Select RETURN to close the menu Selecting in Index Screen Display 1 Move the zoom lever toward W Up to 6 images appear 2 Open the menu and select CARD OPERATIONS Select TRANSFER ORDER 3 Press the SET dial on the image you wish to transfer appears on the image To cancel the transfer order press the SET dial again 4 Close the menu Erasing All Transfer Orders 1 Open the menu and select CARD OPERATIO...

Page 125: ...den on the index screen Hiding Showing the Displays on the TV Screen When you connect a TV for recording you can select to hide the camcorder displays on the TV screen For playback you can show the camcorder displays on the TV screen Open the menu and select DISPLAY SETUP Select TV SCREEN set it to OFF and close the menu The displays disappear from the TV screen Open the menu and select DISPLAY SE...

Page 126: ...E Shift 50 Wind screen 59 Shutter speed 55 Audio mode 59 Manual focus 51 Widescreen mode 65 White balance 53 Remaining card capacity for still images 92 Card mix 105 12 bit audio 85 End search 69 Date search 71 Audio dubbing 83 Data code 67 Volume level of speaker 34 REC PAUSE STOP EJECT FF REW Fast forward playback rewind playback 33 x2 x2 x2 playback 33 x1 x1 x1 playback 33 Slow playback 33 Fram...

Page 127: ...on E CARD CAMERA Mode see also 97 CARD PLAY Mode Focusing frame 98 Stitch assist 99 Camcorder shake warning 56 Slide show 102 Data code 67 Lap time Length of the movie Current image total images File number 90 Protect mark 103 ...

Page 128: ...orm audio dubbing on a tape with a blank section 83 CHECK THE CASSETTE WRONG FORMAT You attempted to perform audio dubbing on a tape recorded in HD format WRONG FORMAT PLAYBACK NOT POSSIBLE You attempted to play back a tape recorded in HD format COPYRIGHT PROTECTED PLAYBACK IS RESTRICTED You attempted to play back a copyright protected tape 80 COPYRIGHT PROTECTED DUBBING RESTRICTED You attempted t...

Page 129: ... selected paper NO PAPER Paper is not correctly inserted or there is no paper PAPER JAM The paper jammed during printing PAPER HAS BEEN CHANGED Paper size has been changed between print setting and start of printing MEDIA TYPE ERROR You attempted to use a paper size type that is not supported by the printer INCOMPATIBLE PAPER SIZE You attempted to print on paper that cannot be used with the camcor...

Page 130: ... the printer After a while turn the printer back on and reconnect the USB cable When you are printing using the button check the print settings Or you attempted to print from a memory card that contains a large number of images Reduce the number of images CHECK PRINT SETTINGS The print setting cannot be used for printing with the button PRINTER IN USE The printer is in use Check the printer status...

Page 131: ...operly consult qualified service personnel Handle the camcorder with care Do not subject the camcorder to shocks or vibration as this may cause damage Avoid sudden changes in temperature Moving the camcorder rapidly between hot and cold temperatures may cause condensation to form on its internal surfaces 132 Storage If you do not intend to use the camcorder for a long time store it in a place free...

Page 132: ...wet type cleaning cassettes as this may damage the camcorder Condensation Moving the camcorder rapidly between hot and cold temperature may cause condensation water droplets to form on its internal surfaces Stop using the camcorder if condensation is detected Continued use may damage the camcorder Condensation may form in the following cases How to avoid condensation Unload the cassette place the ...

Page 133: ... a poor contact between the battery pack and the camcorder Wipe the terminals with a soft cloth Since storing a charged battery pack for a long time about 1 year can shorten its lifecycle or affect performance we recommend to discharge the battery pack fully and to store it in a dry place at temperatures no higher than 30 C 86 F If you do not use the battery pack for long periods charge and discha...

Page 134: ...cassettes in the case and store them upright Do not leave the cassette in the camcorder after use Do not use spliced tapes or nonstandard cassettes as they may damage the camcorder Do not use tapes that have been jammed as video heads may become dirty Do not insert anything into the small holes of the cassette or cover them with cellophane tape Handle cassettes with care Do not drop or subject the...

Page 135: ...r external memory device Image data may be corrupted or lost due to memory card defects or exposure to static electricity Canon Inc makes no warranties for corrupted or lost data Do not turn off the camcorder disconnect the power source open the memory card cover or remove the memory card while the card access indicator is flashing Do not use memory cards in places subject to strong magnetic field...

Page 136: ...reen You can only play back your recordings on TVs with NTSC system The NTSC system is used in the following countries areas American Samoa Antigua Aruba Bahamas Barbados Bermuda Bolivia Canada Chile Columbia Costa Rica Cuba Ecuador El Salvador Guam Guatemala Greenland Haiti Honduras Jamaica Japan Korea Mexico Micronesia Myanmar Nicaragua Panama Peru Philippines Puerto Rico Saint Kitts and Nevis S...

Page 137: ...ter LCD viewfinder switches on and off Battery pack is exhausted Replace or charge the battery pack 13 Battery pack will not charge Battery packs will not charge outside the temperature range of 0 C and 40 C 32 F and 104 F Charge the battery pack in temperatures between 0 C and 40 C 32 F and 104 F Battery packs become hot with use and may not charge Wait until the battery pack temperature is below...

Page 138: ...replace the cassette 16 Cassette is protected flashes on the screen Change the position of the protect switch 135 Camcorder is set to a mode other than the CAMERA mode Set the camcorder to CAMERA mode 25 Camcorder will not focus Autofocus does not work on that subject Focus manually 51 Viewfinder is not adjusted Adjust the viewfinder with the dioptric adjustment lever 18 Lens is dirty Clean the le...

Page 139: ... DV is set to ON Set AV DV to OFF 81 Tape is running but image will not appear on the TV screen TV VIDEO selector on the TV is not set to VIDEO Set the selector to VIDEO 35 Video heads are dirty Clean the video heads 132 You attempted to play back or dub copyright protected tape Stop playback dubbing No sound from the built in speaker Speaker volume is turned off Adjust the volume with the SET dia...

Page 140: ...hed maximum value Set FILE NUMBERS to RESET and insert a new memory card 90 SD Memory Card is protected Change the position of the protect switch 87 Memory card cannot be played back Camcorder is not set to CARD PLAY mode Set the camcorder to CARD PLAY mode 101 Memory card is not inserted Insert a memory card 87 Image cannot be erased Image is protected Cancel the protection 103 SD memory card is ...

Page 141: ...dapter Commercially available DV Cable SC 2000 Soft Carrying Case SC 1000 Soft Carrying Case WS 20 Wrist Strap Shoulder Strap MultiMediaCard SDC 128M SD Memory Card FS 28U Filter Set NB 2L NB 2LH BP 2L12 BP 2L14 Battery Pack TV Computer VCR Digital Device MiniDV Video Cassette WL D85 Wireless Controller PC Card Adapter USB Reader Writer Canon printers with direct print function PictBridge complian...

Page 142: ...ery cable plugs into your car s cigarette lighter and runs off a 12 24 V DC negative ground battery FS 28U Filter Set Neutral density and MC protector filters help you to control difficult lighting conditions Use of genuine Canon accessories is recommended This product is designed to achieve excellent performance when used with genuine Canon accessories Canon shall not be liable for any damage to ...

Page 143: ...st the length of the strap SC 1000 SC 2000 Soft Carrying Case A handy camcorder bag with padded compartments and plenty of space for accessories SC A50 Soft Carrying Case This lightweight bag keeps the camcorder within easy reach without weighing you down or getting in the way This mark identifies genuine Canon video accessories When you use Canon video equipment we recommend Canon brand accessori...

Page 144: ...ents in 8 groups Filter Diameter 28 mm AF System TTL autofocus manual focusing possible Minimum Focusing Distance 1 m 3 3 ft 1 cm 0 39 in on maximum wide angle White Balance Auto white balance pre set white balance indoor outdoor or custom white balance Minimum Illumination 1 8 lx using the Night mode Recommended Illumination More than 100 lx Image Stabilization Electronic Memory Card Recording Me...

Page 145: ... 5 1 in excluding protrusions Weight camcorder body only 430 g 15 2 oz Power supply 100 240 V AC 50 60 Hz Power consumption 17W Rated output 8 4 V DC 1 5 A Operating temperature 0 40 C 32 104 F Dimensions 52 x 90 x 29 mm 2 1 x 3 5 x 1 1 in Weight 135 g 4 8 oz Battery type Rechargeable Lithium Ion Battery Rated voltage 7 4 V DC Operating temperature 0 40 C 32 104 F Battery capacity 720 mAh Dimensio...

Page 146: ...e Attachment D55 0270 000 Optional Accessories BP 2L12 Battery Pack 7871A002AA BP 2L14 Battery Pack 9582A002AA NB 2L Battery Pack 7302A001AA CB 2LT Battery Charger 7303A001AA CBC NB2 Car Battery Charger 7873A002AA FS 28U Filter Set 7952A001AA WS 20 Wrist Strap 3118A002AA D81 0190 202 SC 2000 Soft Carrying Case 9389A001AA SC 1000 Soft Carrying Case 3083A002AA D81 1200 201 SC A50 Soft Carrying Case ...

Page 147: ... Date and time 22 Date format 73 Date search 71 Demo mode 75 Digital effects 60 Digital zoom 30 Direct print function 111 Direct transfer 122 DV dubbing 79 DV terminal 76 86 E Easy recording 45 Effects 61 End search 69 Erasing images 104 F Faders 60 Fast forward 33 File numbers 90 Focusing 51 Focusing point 98 Focus Priority 98 Formatting 109 G Grip belt 18 I Image quality 88 Image stabilizer 75 I...

Page 148: ...le images 108 Sand Snow mode 45 Screen displays 125 SD Memory Card 87 Self timer 57 Shoulder strap 143 Shutter speed 55 Skin detail 49 Slide show 102 SP mode 58 Speaker 34 Sports mode 45 Spotlight mode 45 Still image quality 88 Still image size 88 Stitch Assist mode 99 Super Night mode 48 T Tape protection 135 Time code 27 Time zone 22 Transfer order 124 Tripod 31 Troubleshooting 137 TV Screen 125...

Page 149: ... or failure to follow operating instructions B If the equipment is defective as a result of leaking batteries sand dirt or water damage C If defects or damages are caused by the use of unauthorized parts or by service other than our authorized agent D If the equipment is used for commercial or industrial use This Limited Warranty does not cover cabinet exterior finish video cassette tape head clea...

Page 150: ... equipment is used for commercial professional or industrial purposes This limited warranty does not cover the cabinet exterior finish of the digital video equipment video cassette tapes head cleanings nor does it apply to digital video equipment purchased outside Canada TO OBTAIN WARRANTY SERVICE Ship your Canon digital video equipment in its original carton box or equivalent properly packed full...

Page 151: ......

Page 152: ...LHVVH 4XHEHF 7 9 Q I RX KDYH DQ TXHVWLRQV FDOO WKH DQRQ DQDGD QIRUPDWLRQ HQWHU WROO IUHH DW 1 RQO Q 6L YRXV DYH GHV TXHVWLRQV YHXLOOH WpOpSKRQHU VDQG IUDLV DX DQDGD 1 VHXOHPHQW 0 2 121 0 1 6 5 9 3HULIHULFR 6XU 1R RO 5DQFKR GH Q DOGR 3 0p LFR 0p LFR 121 8 6 1 1 56 2 DPHVEXUJ 5RDG DPHVEXUJ 1 86 175 685 0e5 121 7 1 0 5 1 DWHUIRUG D 6XLWH 0LDPL 86 6 121 21 21 203 1 7 7KH 0HWURSROLV 7RZHU 0HWURSROLV UL...

Reviews: