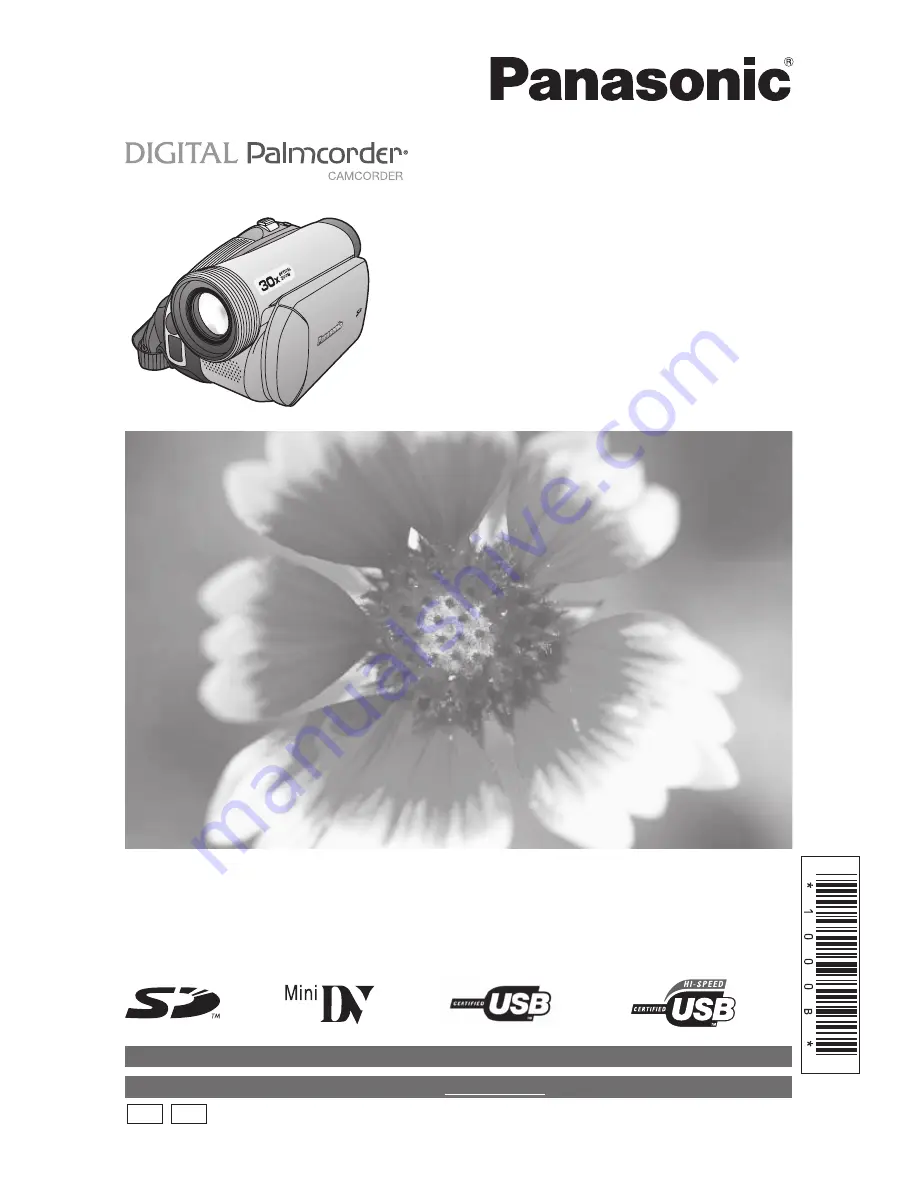
background image

Before attempting to connect, operate or adjust this product, please 
read these instructions thoroughly.

LSQT1000 B

PV-GS59

PV-GS39

PV-GS29

Digital Video Camcorder

Operating Instructions

Models No.

Spanish Quick Use Guide is included.
Guía para rápida consulta en español está incluida.

For assistance, please call : 1-800-211-PANA(7262) or, contact us via the web at: http://www.panasonic.com/contactinfo

(PV-GS59 Shown)

For assistance, please call : 1-800-561-5505 or visit us at www.panasonic.ca

P

PC

Summary of Contents for DIGITAL Palmcorder PV-GS59

Page 1: ...tal Video Camcorder Operating Instructions Models No Spanish Quick Use Guide is included Guía para rápida consulta en español está incluida For assistance please call 1 800 211 PANA 7262 or contact us via the web at http www panasonic com contactinfo PV GS59 Shown For assistance please call 1 800 561 5505 or visit us at www panasonic ca P PC ...

Page 2: ...ttom cover Your Camcorder is designed to record and play back in Standard Play SP mode and Long LP mode It is recommended that only cassette tapes that have been tested and inspected for use in Camcorders with the mark be used Thank you for choosing Panasonic This symbol warns the user that uninsulated voltage within the unit may have sufficient magnitude to cause electric shock Therefore it is da...

Page 3: ...ll not occur in a particular installation If this equipment does cause harmful interference to radio or television reception which can be determined by turning the equipment off and on the user is encouraged to try to correct the interference by one or more of the following measures Reorient or relocate the receiving antenna Increase the separation between the equipment and receiver Connect the eq...

Page 4: ...t consult an electrician for replacement of the obsolete outlet 10 Protect the power cord from being walked on or pinched particularly at plugs convenience receptacles and the point where they exit from the apparatus 11 Only use attachments accessories specified by the manufacturer 12 Use only with the cart stand tripod bracket or the table specified by the manufacturer or sold with the apparatus ...

Page 5: ...LY AT THE SUN AS THIS MAY CAUSE DAMAGE TO THE INTERNAL PARTS OF THE EVF DO NOT EXPOSE YOUR CAMCORDER TO EXTENDED HIGH TEMPERATURE Such as in direct sunlight inside a closed car next to a heater etc This action could permanently damage the internal parts of your Camcorder AVOID SUDDEN CHANGES IN TEMPERATURE If the unit is suddenly moved from a cold place to a warm place moisture may form on the tap...

Page 6: ...to the extent either of them is permitted under law or regulation of the country where Licensee resides Matsushita or its distributors or dealers will not be responsible for any defects in the Software or damage to Licensee caused by Licensee s reverse engineering decompiling or disassembly of the Software Article 6 Limitation of Liability The Software is provided AS IS without warranty of any kin...

Page 7: ...pplied LSFT0648 USB Cable For U S A customers For Canada customers Supplied K1HA05CD0014 Supplied K1HA05CD0014 Card Feature No Yes Yes Monitor 2 5 inch LCD 2 7 inch Wide LCD 2 7 inch Wide LCD USB Jack No Yes Full Speed Yes High Speed Audio Dubbing No No Yes Recording a Still Picture on a Tape Yes No No Cinema Function Yes No No Wide 4 3 Function No Yes Yes Remote Control Sensor No No Yes How to Tu...

Page 8: ...or later PV GS59 Windows 2000 Yes Yes SP4 or later Yes SP4 or later Windows XP Yes Yes SP1 or later Yes SP2 or later Model Number Macintosh OS Built in SD Drive Web Camera MotionDV STUDIO Quick Movie Magic PV GS29 X v 10 1 v 10 4 PV GS39 X v 10 1 v 10 4 Yes PV GS59 X v 10 1 v 10 4 Yes The USB equipment operates with the driver installed standard on your OS For Windows For Macintosh Model Number Ma...

Page 9: ...54 PC Connection With DV Interface Cable 55 Using Camcorder with a PC 56 Using the USB Function 56 To disconnect USB cable safely 59 Using as a Web Camera 60 Using the Motion Picture Editing Software PV GS59 Only 64 If you no longer need software or driver Uninstall 67 Transferring Motion DV Tape Pictures Camcorder Macintosh via DV Cable iMovie iMovie HD 67 Notes 68 Indications 70 Warning Alarm In...

Page 10: ...used close the Cassette Compartment Cover by pressing the mark 3 2 1 Inserting a Card 2 Open the Card Slot Cover 3 3 While holding the Memory Card with its cut corner facing right 4 insert it into the Card Slot 5 4 Close the Card Slot Cover 3 securely 3 1 Place your Thumb on the OPEN 1 Knob and pull the LCD Monitor 2 out in the direction of the arrow 1 2 3 Quick Guide Inserting a Cassette Before u...

Page 11: ... Joystick Control 1 to rewind the tape 3 Move the Joystick Control 2 to start playback 4 Move the Joystick Control 3 to stop playback Playing Back a Tape 1 Set the Mode Dial to Picture Playback Mode The CARD PLAYBACK MODE is displayed on the screen The One Touch Navigation icon is displayed on the lower right of the screen Joystick Control Starting the Slide Show Stop the Slide Show Joystick Contr...

Page 12: ...DB4ZE00001 in an area which has special AC outlets Parts Identification and Handling Camcorder 1 LCD Monitor Open Knob OPEN p 22 2 LCD Monitor pp 20 22 75 Due to limitations in LCD production technology there may be some tiny bright or dark spots on the LCD Monitor screen However this is not a malfunction and does not affect the recorded picture 3 Card Access Lamp p 20 4 Reset Button RESET pp 76 7...

Page 13: ...ional tripod Please carefully read the Operating Instructions for how to attach the tripod to the Camcorder You cannot open the Card Slot Cover when the tripod is used Insert the card first and then attach the tripod 36 Battery Eject Switch BATTERY RELEASE p 16 36 34 35 24 25 26 27 29 33 30 23 31 Remote Control PV GS59 Only Optional Using the Remote Control with the Camcorder most of the Camcorder...

Page 14: ...on type battery Use Battery with Panasonic type CR2025 only Use of another battery may present a risk of fire or explosion Battery may explode if mistreated As with any small object this type of Battery can be swallowed by young children Do not allow children to handle this Battery Dispose of used battery promptly Do not recharge disassemble or dispose of in fire 1 WARNING CAUTION Inserting the Bu...

Page 15: ...er and that of the Remote Control do not match with each other REMOTE will appear When the Remote Control is operated for the first time after the Camcorder is turned on CHECK REMOTE MODE p 71 will appear and operation is impossible Set the same Remote Control Mode Setup on the Camcorder Set REMOTE on the SETUP Sub Menu to the desired Remote Control Mode pp 27 28 Setup on the Remote Control 15 15 ...

Page 16: ... min 4 h 15 min C 2 h 45 min 2 h 10 min The intermittent recordable time refers to recordable time when the recording and stopping operations are repeated C Notes When the Camcorder has been used for a long time the Camera body becomes warm but this is not a malfunction If the CHARGE Lamp does not light up although the Battery is attached to the AC Adaptor detach the Battery and reattach it Since ...

Page 17: ...ding time becomes shorter if you use both of Viewfinder and LCD Monitor simultaneously when rotating the LCD Monitor forward to record yourself The batteries heat up after use or charging The Camcorder being used will also heat up This is normal Along with the reduction of the battery capacity the display will change If the battery discharges then will flash Re attaching the Lens Cap To protect th...

Page 18: ...MCLA and use when HEAD CLOG message appears on the LCD EVF of your Camcorder When inserting a cassette orient it as shown in the above and then securely insert it as far as it goes When removing pull it straight out 1 Fit the AC Adaptor or the Battery and turn on the Power 2 Slide the OPEN EJECT Lever toward the front and pull up to fully open the Cassette Compartment Cover To protect the tape if ...

Page 19: ...to find the position where you want to continue recording If you overwrite record on a previously recorded cassette be sure to find the position where you want to continue recording If a new Cassette is inserted rewind to the beginning of the tape before starting recording When inserting the cassette make sure it faces in the right direction and then push it in until it stops When the Cassette Hol...

Page 20: ... SD Memory Card The memory capacity indicated on the SD Memory Card label corresponds to the total amount of capacity to protect and manage the copyright and the capacity available as conventional memory for a Camcorder personal computer or other equipment 2 Open the LCD Monitor or extend the Viewfinder to use The STATUS Indicator lights Red and turn on the power The LCD Monitor or Viewfinder will...

Page 21: ... or to set the desired value Year will cycle in the order shown below 2000 2001 2089 2000 About Date Time The Date and Time function are driven by a built in lithium battery Make sure to check the time before recording because the built in clock is not very accurate Recharging the built in lithium battery If or is appears when the Camcorder is turned on then the built in lithium battery has run do...

Page 22: ...n the LCD screen LCD SET LCD Color Level Adjusts the color saturation of the image on the LCD screen and the Viewfinder EVF SET Brightness of the Viewfinder Adjusts the brightness of the image in the Viewfinder To Adjust Move the Joystick Control or and select the item to be adjusted and then move the Joystick Control or to raise or lower the number of vertical bars in the Bar Indication More vert...

Page 23: ...e the Mode Dial Set your desired mode to 1 Tape Recording Mode Use this mode when recording pictures on a tape Tape Playback Mode Use this mode when playing back the recorded scene on a tape Card Recording Mode For PV GS39 PV GS59 Use this mode when recording still pictures on a card Picture Playback Mode For PV GS39 PV GS59 Use this mode when playing back the recorded still picture on a card PC M...

Page 24: ...ode p 43 Manual Shutter Speed Adjustment Mode pp 42 43 Manual White Balance Adjustment Mode pp 41 42 Go to next page Tape Recording Mode When the AUTO MANUAL FOCUS Switch is set to MANUAL 5 5 NEXT IRIS SHTR WB 1 5 NEXT 2 2 NEXT IRIS SHTR WB 1 2 NEXT 2 5 NEXT 3 5 NEXT 4 5 NEXT 5 5 Manual Iris Adjustment Mode p 43 Manual Shutter Speed Adjustment Mode pp 42 43 Manual White Balance Adjustment Mode pp ...

Page 25: ...selected icon is displayed on the screen Each time the Joystick Control is moved down the indication changes Tape Playback Mode Playback Pause p 45 Fast Cue Playback p 46 Rewind Review Playback p 46 Stop p 45 Picture Playback Mode For PV GS39 PV GS59 Start the Slide Show Stop the Slide Show pp 47 48 Playback the next picture p 47 Playback the previous picture p 47 Erase the picture p 49 Card Recor...

Page 26: ...select the desired language 1 Set LANGUAGE English Français or Español LANGUAGE English Español Français SETUP ENTER EXIT 3 Move the Joystick Control or press it to set the selection 4 Move the Joystick Control or to select the Sub Menu BASIC SCENE MODE REC SPEED WIND CUT ASPECT CLOCK SET OFF SP ON 16 9 NO SETUP ENTER EXIT 5 Move the Joystick Control or press it to set the selection 6 Move the Joy...

Page 27: ...ent p 22 INITIAL SET Initial Setting Mode p 29 DEMO MODE Demonstration Mode p 29 LANGUAGE Language Setup Sub menu p 26 ADVANCED Advance Setup Sub Menu REC SPEED Recording Speed Mode p 29 REC STDBY Recording Standby Mode p 54 PICT QUALITY For PV GS39 PV GS59 Picture Quality p 32 REPEAT PLAY Repeat Play Mode p 45 SETUP Setup Sub Menu 12bit AUDIO Audio Selector p 45 AUDIO OUT Audio Output Mode p 29 D...

Page 28: ... When the unit goes from Quick Start standby mode to recording pause 2 Beeps When you pause recording When you turn off the power When the unit goes into Quick Start standby mode 2 Beeps 4 times When a cassette with its erasure prevention tab set to SAVE is inserted condensation occurs p 73 and at other times Check the sentence displayed on the screen p 71 SETUP Setup Sub Menu DISPLAY Display Mode...

Page 29: ...age setting cannot be back to the initial shipping condition DEMO MODE Set to Tape Recording Mode If you set SETUP DEMO MODE ON without inserting a cassette or a card the Camcorder is automatically set to the demonstration mode for introducing its functions If any button is pressed or operated the demonstration mode is canceled If no operations take place for approx 10 minutes the demonstration mo...

Page 30: ...ality of still pictures 6 Number of recordable still pictures When no picture can be recorded this indication will flash in red On screen Display in the Tape Recording Mode 1 3 4 5 6 2 For the recording time on a tape refer to page 16 Carry out a recording check p 31 to verify that the image is recorded properly In order to find the unrecorded section carry out the blank search p 31 Concerning the...

Page 31: ...Move the Joystick Control or to select YES and press the Joystick Control YES NO SETUP ENTER EXIT PERFORM BLANK SEARCH The indication and the One Touch Navigation icon appears during the Blank Search The Blank Search Function aids you in locating the end of the recording on the Cassette quickly unused part of the tape Set to Tape Recording Playback Mode 1 Press the Joystick Control to display the ...

Page 32: ...an add a shutter operation simulating sound 1 Set ADVANCED SHTR EFFECT ON 2 Set the Mode Dial to Card Recording Mode The CARD RECORDING MODE is displayed on the screen 3 Press the PHOTO SHOT Button The Indication lights up in red Recording a Still Picture on a Card Photoshot For PV GS39 PV GS59 Still pictures can be recorded on the Memory Card from the Camcorder Open the LCD Monitor or extend the ...

Page 33: ...ntinuously Intervals between recording pictures may become longer depending on the card We recommend using a Panasonic SD Memory Card When using the card formatted by other equipment or a card that was recorded and erased repeatedly the intervals between recording pictures may become longer If so back up your important data on a PC and format your card with this Camcorder Recording Yourself You ca...

Page 34: ...ing Mode will not cancel Quick Start When the Camcorder is Quick Started with the White Balance on automatic it may take some time until the White Balance is adjusted if the scene being recorded has a light source different from the scene last recorded When the MagicPix Function is used however the White Balance of the scene last recorded is retained If the power is turned on in Quick Start standb...

Page 35: ...tically Set to Tape Card Recording Mode 1 For wide angle shots zoom out Push the W T Lever towards W For close ups zoom in Push the W T Lever towards T Zoom Magnification Indication is displayed for a few seconds S P 3 h 5 9 m 5 9 s 2 9 f 5 X w T 1 2 3 4 5 6 A M J A N 2 2 0 0 6 1 0 0 S P 3 h 5 9 m 5 9 s 2 9 f 1 5 X w T S P 3 h 5 9 m 5 9 s 2 9 f 2 5 X w T Notes When zooming in and taking a picture ...

Page 36: ...ever The Variable Speed Zoom Function cannot be used with the Remote Control PV GS59 Only About the Variable Speed Zoom Function Notes The larger the digital zoom magnification the more the image quality is degraded When the Card Recording mode is used the Digital Zoom Function cannot be used White Balance cannot be set in the Digital Zoom range S P 3 h 5 9 m 5 9 s 2 9 f R 2 0 0 1 2 3 4 5 6 A M J ...

Page 37: ... image audio gradually disappears After the image audio completely disappears recording stops Note While the Fade in Fade out function is selected it takes several seconds to display the image when you start recording images Besides it also takes several seconds to pause recording 1 Press the Joystick Control to display the One Touch Navigation icon on the lower right of the screen 2 Move the Joys...

Page 38: ...o obtain the best effect we recommend framing the subject as shown above in the picture To Cancel the Soft Skin Mode Move the Joystick Control to select again The SOFT SKIN MODE OFF is displayed 3 Move the Joystick Control to select The SOFT SKIN MODE ON is displayed The Indication flashes and then is displayed Notes If set in a bright place the screen may become whitish for a while The MagicPix F...

Page 39: ...ported picture may not be displayed correctly depending on the software in used Notes In the wide screen mode the menu screens operation icons and other screen displays appear horizontally oriented When images are played back on a TV screen the Date Time Indication may be erased in some cases Depending on the TV the picture quality may deteriorate If the 4 3 Function is set the menus screen appear...

Page 40: ...ts Mode does not function The Indication flashes If this mode is used indoors the screen may flicker Sports Mode Portrait Mode If you record a still picture in Progressive Photoshot Mode the brightness and hue of the recorded still picture may become unstable If this mode is used for indoors the screen may flicker If so change the SCENE MODE setting to OFF Low Light Mode Extremely dark scenes may ...

Page 41: ...TR WB BACK WB WB S P 3 h 5 9 m 5 9 s 2 9 f R 2 0 0 1 2 3 4 5 6 A M J A N 2 2 0 0 6 1 0 0 Recording in Natural Colors White Balance Depending on the scene or lighting conditions the Automatic White Balance Adjustment Mode may not be able to bring out natural colors In this case the white balance can be adjusted manually When the Camcorder is turned on with the Lens Cap on the Automatic White Balanc...

Page 42: ...orescent lamp 7 Halogen light bulb 8 Incandescent light bulb 9 Sunrise or sunset 10 Candlelight Notes When the Camcorder is turned on with the Lens Cap attached the automatic White Balance adjustment may not function properly Please turn the Camcorder on after removing the Lens Cap When setting both the White Balance and the Iris Gain set the White Balance first Whenever recording conditions chang...

Page 43: ...d is 1 60 s when the EIS is OFF Selecting a speed closer to 1 8000 causes the shutter speed to be faster 2 Move the Joystick Control to select One Touch Navigation icon 5 5 NEXT IRIS SHTR WB BACK SHTR SHTR S P 3 h 5 9 m 5 9 s 2 9 f R 2 0 0 1 1 0 0 1 2 3 4 5 6 A M J A N 2 2 0 0 6 1 0 0 The Shutter Speed Indication appears Manual Iris Adjustment F Number You can use this function when the screen is ...

Page 44: ... Switch to AUTO or FOCUS When focused with a wide angle the subject may not be in focus when zoomed in First zoom in on the subject and then focus on it 6 6 NEXT MF MF S P 3 h 5 9 m 5 9 s 2 9 f M F R 2 0 0 1 2 3 4 5 6 A M J A N 2 2 0 0 6 1 0 0 One Touch Navigation icon 5 5 NEXT IRIS SHTR WB One Touch Navigation icon 6 6 NEXT MF MF Notes Depending on zoom magnification there are iris values that ar...

Page 45: ... AUDIO Adjust the speaker volume for playback 1 Push the VOL Lever to adjust the volume Towards increases the volume Towards decreases the volume Nearer the bar to larger the volume One Touch Navigation icon Repeat Playback When the tape end is reached the tape will be rewound and played back again 1 Set ADVANCED REPEAT PLAY ON 2 Move the Joystick Control to start playback The Indication appears T...

Page 46: ... the Ι Button is pressed Slow Motion Playback proceeds in the forward direction If the Slow Motion Playback continues for approx 10 minutes or more then the playback will automatically stop 10 minutes of Slow Motion playback is equivalent to approx 2 minutes in the SP mode or approx 3 minutes in the LP mode In the reversed Slow Motion Playback the time code indication may be unstable S P 3 h 5 9 m...

Page 47: ...W T Lever of the Camcorder in the Still Playback Mode still pictures can be advanced one frame at a time in the forward or backward direction If you keep pushing the Lever still pictures advance continuously Playing Back a Memory Card For PV GS39 PV GS59 It plays back files recorded on a Card Open the LCD Monitor or extend the Viewfinder before turning on the power 1 Set the OFF ON Switch to ON Th...

Page 48: ...mes bluish and the UNPLAYABLE CARD Indication may appear as warning When the Access Lamp is lit do not insert or remove a card When playing back a picture recorded on other equipment its size and that of this Camcorder may appear differently It takes time to display the file depending on the number of pixels of the file When playing back a file recorded on other equipment the date and time display...

Page 49: ...ck Mode and then delete unnecessary files If files conforming to DCF standard are deleted all the data related to the files will be deleted One Touch Navigation icon DELETE SETUP ENTER EXIT ALL FILES DELETE 1 FILE NO OK TO DELETE IMAGE DELETE SETUP ENTER EXIT YES NO DELETE THIS IMAGE One Touch Navigation icon DELETE SETUP ENTER EXIT ALL FILES DELETE 1 FILE NO OK TO DELETE IMAGE DELETE SETUP ENTER ...

Page 50: ...n another camera may not be recognized by Camcorder Perform the DPOF Settings on your Camcorder Verifying the DPOF Settings may take a little time Wait until the Card Access Lamp goes out The number of prints 2 is displayed in the picture set You can select from 0 to 999 Selected number of pictures can be printed as you set the number of prints with the printer supporting DPOF 2 or more files can ...

Page 51: ...completed the screen becomes gray Notes Normally it is not necessary to format the card If a message appears even though you insert and remove the card several times format it In order to maintain full compatibility you must format the SD Memory Card using the Camcorder PC formatted SD Memory Cards are not compatible with the Camcorder The Camcorder supports SD Memory Cards formatted in FAT12 syst...

Page 52: ...itor or the Viewfinder One Touch Navigation icon time code and mode indication etc date and time can be displayed on the TV 1 Press the EXT DISPLAY Button on the Remote Control PV GS59 Only Press the button again to erase the OSD information Note Use the AC adaptor to avoid battery depletion ...

Page 53: ...ne you wish to record and press the PHOTO SHOT Button Before Recording with Audio Dubbing Set to Tape Recording Mode When you want to preserve the original sound taken during recording set ADVANCED AUDIO REC 12bit to take pictures When set 16bit the sounds taken during recording are erased after recording with audio dubbing Set BASIC REC SPEED SP to take pictures 2 Press the AUDIO DUB Button on th...

Page 54: ...he optional DV cable Only for equipment with a DV terminal 2 Turn on the Camcorder and set to Tape Playback Mode 3 Select the input channel on the TV set and recorder 4 Move the Joystick Control to start playback The image and sound are reproduced 5 Start recording 6 Move the Joystick Control to stop playback 7 Stop recording If you record dub images onto another video device and then play them ba...

Page 55: ... R 2 0 0 1 2 3 4 5 6 A M J A N 2 2 0 0 6 1 0 0 PC Connection With DV Interface Cable A video clip can be transferred directly to your PC Personal Computer via a DV Interface Cable Optional using products and software from a number of video editing software companies Using products from video editing software companies allows you to capture and edit video clips using the DV Interface Our DVC being ...

Page 56: ...used Acrobat Reader To view the included Operating Instructions Adobe Acrobat Reader 5 0 or later is required Please install Adobe Acrobat Reader from the CD ROM 4 Follow the instructions on the computer screen until the installation is complete Setup window will disappear when the installation is complete Software Installation For Windows PV GS39 Only If you have Internet access please download t...

Page 57: ...omputer with pre installed Microsoft Windows XP Professional Home Edition Microsoft Windows 2000 The USB equipment operates with the driver installed standard on your OS 2 Function This is the Operating environment for the USB Driver which can be installed from the supplied CD ROM PV GS59 or the Web Site PV GS39 IBM PC AT compatible personal computer with pre installed Microsoft Windows XP Profess...

Page 58: ...r OS If you have Internet access please download the USB Driver PV GS39 Only 1 To download and install the Driver go to For U S A consumers http www panasonic com consumerdownloads For CANADA consumers http www panasonic ca english customercare downloads asp 2 For U S A consumers Click Camcorder on the screen For CANADA consumers Click software drivers 3 Click USB Driver for Web Camera 4 Decompres...

Page 59: ... v 10 4 4 Double click the NO_NAME icon You can view images stored on the Memory Card and also save them to your hard disk Please do not change file or folder names on the Personal Computer The images on the Memory Card may not be able to be viewed on the Camcorder To disconnect USB cable safely For Windows If USB Cable is disconnected while computer is on error dialog may appear In such case clic...

Page 60: ... 2000 Professional SP4 or later CPU Intel Pentium lll 450 MHz or higher including compatible CPU RAM 128 MB or more 256 MB or more recommended Free hard disk space At least 250 MB or more Interface USB 1 1 or more A Type To use the Camcorder as a Web Camera the additional minimum requirements must be met Graphic display High Color 16 bit or more Desktop resolution of 800 600 pixels or more Communi...

Page 61: ...r Tape Playback Mode To send the live camera picture to a PC set the Camcorder to Tape Recording mode To send pictures recorded on a tape to a PC set the Camcorder to Tape Playback mode Connecting the Camcorder to Personal Computer For Using as a Web Camera When the Camcorder and personal computer with Windows 2000 are connected via USB Cable a message such as the one below is displayed However te...

Page 62: ... be exchanged will depend on the Internet connection status If the USB Cable is disconnected from the personal computer the Web Camera mode is canceled If the Camcorder is used as a Web Camera video cannot be recorded onto a tape or a card You cannot output the video input from the DV terminal to the display of the PC In the Web Camera mode the audio may be interrupted in the middle of communicati...

Page 63: ... finished close Windows Messenger then turn off the Camcorder Finally disconnect the USB Cable If the Camcorder is used as Web Camera continuously for two hours the communication is automatically shut OFF In this case restart Windows Messenger and set up the communication again 8 Select DVC in the Microphone menu 7 Click Web Camera Settings in the Tools menu 8 Confirm that the Panasonic DVC Web Ca...

Page 64: ...t allows videos to be captured from a video device edited and outputted Digital edition on a PC Non linear edit enables you to create video works with minimum deterioration of image quality You can also apply various special effects such as fade effects transition effects and titles to videos The Camcorder can be connected to the personal computer with the DV Cable The Camcorder can be connected t...

Page 65: ...e supplied CD ROM into the personal computer s CD ROM drive Quit all applications The Setup Menu screen appears 2 Click MotionDV STUDIO PV GS59 Supplied Sample data is installed concurrently with the MotionDV STUDIO software After reading the displayed contents please carry out the installation according to instructions 4 Select the Video system 5 After the completion of setup click on Finish The ...

Page 66: ... set the Camcorder to the Tape Recording Mode and remove the tape and the card With USB supplied OS Windows XP SP2 or later Windows 2000 SP4 or later The personal computer should be compatible with USB 2 0 Hi Speed Confirmation before connection For Windows XP 2000 When you connect the personal computer and the Camcorder with the USB Cable and then use Quick Movie Magic or MotionDV STUDIO on Windo...

Page 67: ...rder When 2 or more USB devices are connected to a personal computer or when devices are connected through USB hubs or by using extension cables proper operation is not guaranteed When connected to the keyboard USB terminal normal function may not be possible By connecting the Camcorder and Macintosh with the DV Cable you can transfer motion pictures saved on a DV Tape directly to your Macintosh i...

Page 68: ...r the Camcorder when connecting to the personal computer Data may be lost if the battery power is lost while transferring data If the Camcorder is used as a Web Camera while virus checking software is running the Camcorder s operation may stop midway through In this case exit the Windows Messenger or MSN Messenger reconnect the Camcorder and restart the Windows Messenger or MSN Messenger Do not de...

Page 69: ...m established by JEITA Japan Electronics and Information Technology Industries Association If you attempt to play back files recorded with this Camcorder on other equipment or to play back files recorded with other equipment on this Camcorder you may not be able to play them back Please check the compatibility with the other equipment in advance About the compatibility of the card files When a Car...

Page 70: ...hot Mode Red While Photoshot recording is activated Green While the Card being read Red Using a card that cannot be recognized Tape Recording Mode p 30 Tape Playback Mode p 45 Card Recording Mode p 32 Picture Playback Mode p 47 PC Mode pp 58 59 SP Standard Play Mode Recording Speed Mode p 29 LP Long Play Mode Recording Speed Mode p 29 Automatic Mode p 30 Manual Mode pp 40 44 Image Stabilizer p 36 ...

Page 71: ... SAVE position WRONG TAPE FORMAT You are attempting to play back a tape section that has been recorded with a different TV system This cassette is incompatible CLOSE CASSETTE DOOR The cassette cover is open Close the cassette cover pp 18 19 UNABLE TO A DUB LP RECORDED Because the original recording was in LP Mode audio dubbing cannot be performed UNABLE TO A DUB You are attempting to perform audio...

Page 72: ...on properly turn off the Camcorder power and detach the Battery or AC Adaptor and then connect the Battery or AC Adaptor again Thereafter turn on the Camcorder power Do not use your Camcorder near radio transmitters or high voltage cables If you record pictures near radio transmitters or high voltage cables recorded images or sounds may be adversely affected Do not use this Camcorder for surveilla...

Page 73: ... the Lens Is Fogged Set the OFF ON Switch to OFF and leave the Camcorder in this condition for about 1 hour When the lens temperature becomes close to the ambient temperature the fog disappears naturally Video Head Clogging and Care If the heads the parts that make contact with the tape are dirty mosaic pattern noise may appear on the playback image or the screen as a whole becomes black If the he...

Page 74: ...terminals to come in contact with metal objects such as necklaces hairpins etc This can result in a short circuit or heat generation and if you touch the Battery in this condition you may be badly burned Store the Battery in a completely discharged state To store the Battery for a long period of time we recommend you charge it once every year and store it again after you completely use up the char...

Page 75: ...e or always lit However this is not a malfunction and does not affect the recorded picture Before Requesting Service Problems and Solutions Power Body The Camcorder power cannot be turned on Is the battery fully charged Use a fully charged battery The battery protection circuit may have operated Attach the battery to the AC adaptor for 5 to 10 seconds If the Camcorder still cannot be used the batt...

Page 76: ...unning condition warning and date indications disappear The Camcorder cannot be operated though powered up The Camcorder does not operate normally The Camcorder cannot be operated unless you open the LCD Monitor or extend the Viewfinder Remove the cassette and then press the RESET button p 78 If normal conditions are not restored yet turn off the power Then about 1 minute later turn on the power a...

Page 77: ...ot played back from the built in speaker of the Camcorder Is the volume too low During playback push the VOL lever to display the volume indication and adjust it p 45 Different sounds are reproduced at the same time Have you set SETUP 12bit AUDIO MIX If you set AUDIO REC 12bit and dub audio to a recorded tape you can hear the sound on recording and the sound dubbed at a later time To hear the soun...

Page 78: ... not attempt to repair the appliance by yourself Even if connected by the USB cable the Camcorder is not recognized by the PC Is the USB driver installed For information refer to pages 56 58 When the USB cable is disconnected an error message will appear on PC For Windows To disconnect the USB cable safely double click the icon in the task tray and follow the instructions on the screen For Macinto...

Page 79: ...sty glass Because the focus is on the dirty glass the subject behind the glass will not be focused 3 Recording a subject in dark surroundings Because the light information that comes through the lens decreases considerably the Camcorder cannot focus correctly 4 Recording a subject that is surrounded by objects with glossy surfaces or by highly reflective objects Because the Camcorder focuses on th...

Page 80: ...Mic sensitivity 50 dB 0 dB 1 V Pa 1 kHz Power Source DC 7 9 7 2 V Power Consumption Recording 4 2 W PV GS29 4 4 W PV GS39 PV GS59 USB Card reader writer function USB 2 0 compliant Hi Speed PV GS59 Full Speed PV GS39 No copyright protection support Digital Interface DV Input Output Jack IEEE1394 4 pin Dimensions Approx 69 H 82 W 120 D mm Approx 2 11 16 H 3 1 4 W 4 3 4 D inch Mass Approx 0 41 kg 0 9...

Page 81: ...P SD128BU1A RP SD064BPPA RP SD032BPPA Pro High Speed 2 GB SD Memory Card Pro High Speed 1 GB SD Memory Card Pro High Speed 512 MB SD Memory Card Super High Speed 256 MB SD Memory Card High Speed 2 GB SD Memory Card High Speed 1 GB SD Memory Card High Speed 512 MB SD Memory Card High Speed 256 MB SD Memory Card High Speed 128 MB SD Memory Card High Speed 64 MB SD Memory Card High Speed 32 MB SD Mem...

Page 82: ...e street address Please photocopy this form when placing an order 2 Items Ordered 1 Camcorder Model Accessory Description Price Each Quantity Total Price Subtotal Your State Local Sales Tax Shipping Handling 6 95 Total Enclosed 3 Method of payment check one Check of Money Order enclosed NO C O D SHIPMENTS VISA MasterCard Discover Credit Card Expiration Date Customer Signature Make Check or Money O...

Page 83: ...oduct needs service Please include your proof of purchase Failure to do so will delay your repair To further speed your repair please provide an explanation of what is wrong with the unit and any symptom it is exhibiting Mail this completed form and your Proof of Purchase along with your unit to Panasonic Services Company 410B Airport Road Elgin IL 60123 9333 Attn Camcorder Repair ...

Page 84: ...co call Panasonic Sales Company 787 750 4300 or fax 787 768 2910 In Home service if applicable requires clear complete and easy access to the product by the authorized servicer and does not include removal or re installation of an installed product It is possible that certain in home repairs will not be completed in home but will require that the product or parts of the product be removed for shop...

Page 85: ...7262 Monday Friday 9 am 9 pm Saturday Sunday 10 am 7 pm EST Accessory Purchases For hearing or speech impaired TTY users TTY 1 877 833 8855 As of October 2005 Service in Puerto Rico Panasonic Puerto Rico Inc Panasonic Sales Company Factory Servicenter Ave 65 de Infantería Km 9 5 San Gabriel Industrial Park Carolina Puerto Rico 00985 Phone 787 750 4300 Fax 787 768 2910 For hearing or speech impaire...

Page 86: ...to the original end user purchaser only A purchase receipt or other proof of date of original purchase is required before warranty service is performed THIS EXPRESS LIMITED WARRANTY IS IN LIEU OF ALL OTHER WARRANTIES EXPRESS OR IMPLIED INCLUDING ANY IMPLIED WARRANTIES OF MERCHANTABILITY AND FITNESS FOR A PARTICULAR PURPOSE IN NO EVENT WILL PANASONIC CANADA INC BE LIABLE FOR ANY SPECIAL INDIRECT OR...

Page 87: ...ivo puede no causar interferencias perjudiciales y 2 este dispositivo debe aceptar cualquier interferencia recibida incluyendo interferencias que pueden causar un funcionamiento no deseado Nota Este equipo ha sido puesto a prueba y se encontró que cumple con la Parte 15 de las reglas del FCC Estos limites están diseñados para proveer una protección razonable contra interferencias cuando se opera e...

Page 88: ... cierre la cubierta del compartimiento del cassette presionando la marca 3 Inserción de una tarjeta de memoria 2 Abrir la cubierta de la ranura de tarjeta 3 3 Mientras sostiene la tarjeta de memoria con su esquina cortada hacia la derecha 4 insértela en la ranura de tarjeta 5 4 Cierre bien la cubierta de ranura de tarjeta 3 1 Usando su pulgar presione la perilla OPEN 1 y saque la pantalla LCD 2 en...

Page 89: ...a en tarjeta Photoshot Para PV GS39 PV GS59 3 Presione el botón de inicio parada de grabación nuevamente para detener la grabación PV GS39 PV GS59 PV GS29 PV GS39 PV GS59 PV GS29 1 Ajuste el selector de modo en modo de reproducción de cinta Se visualiza la indicación REPRODUCCIÓN DE LA CINTA en la pantalla El icono del sistema de navegación de un toque aparece en la parte inferior derecha de la pa...

Page 90: ...g 50 Dubbing 54 E Erasure Prevention Slider 19 F Fade 37 Formatting a Card 51 F Number 43 I Iris 43 J Joystick Control 23 L LCD Monitor 21 75 Limited Warranty 84 List of Menus 26 28 Lock Setting 50 Low Light Mode 40 M MagicPix Function 38 Manual Focus 44 Mode Dial 23 MotionDV STUDIO 64 O One Touch Navigation icon 23 P Photoshot 32 Playback with Zoom Lever 47 Portrait Mode 40 Q Quick Movie Magic 64...

Page 91: ...low Motion Playback 46 Sound Volume 45 SP LP Mode 29 Spanish Quick Use Guide 87 Sports Mode 40 Spotlight Mode 40 Still Advance Playback 47 Surf Snow Mode 40 T Time Code 79 V Variable Speed Search 46 Video Head Clogging 73 Viewfinder 21 75 W Warranty 86 Web Camera 60 White Balance 41 Wide 4 3 Function 39 Z Zoom 35 Zoom Microphone 35 ...

Page 92: ...ration of North America One Panasonic Way Secaucus New Jersey 07094 Panasonic Sales Company PSC Division of Panasonic Puerto Rico Inc Ave 65 de Infanteria Km 9 5 San Gabriel Industrial Park Carolina Puerto Rico 00985 Panasonic Canada Inc 5770 Ambler Drive Mississauga Ontario L4W 2T3 905 624 5010 www panasonic ca ...

Reviews: