background image

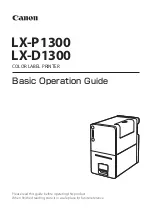
Basic Operation

 Guide

COLOR LABEL PRINTER

Please read this guide before operating this product.

When finished reading, store it in a safe place for future reference. 

LX-P1300

LX-D1300

Summary of Contents for LX-P1300

Page 1: ...Basic Operation Guide COLOR LABEL PRINTER Please read this guide before operating this product When finished reading store it in a safe place for future reference LX P1300 LX D1300 ...

Page 2: ...ations This manual contains troubleshooting procedures as well as steps on how to print and change paper User s Guide This manual is available in PDF format and provides a detailed description of how to operate this product 1 Basic Operations Printing Maintenance Troubleshooting Appendix About Moving the Printer About Setting the Network Utility etc Specifications The User s Guide is stored on the...

Page 3: ...13 Operation Panel 14 Turning the Printer On Off 15 Turning the Printer On 15 Turning the Printer Off 16 Loading the Paper 17 How to Print 30 Making Prints 30 Cancel Printing 33 How to Check the Printer Status 34 Troubleshooting 35 Status Lamp Lights up Orange 35 Status Lamp Is Flashing Orange 36 Power Does not Turn on 37 Printing Does not Start Complete 37 Paper Does not Feed Properly 40 Improvin...

Page 4: ... clarification of an operation or contains additional explanations for a procedure Reading these notes is highly recommended Instructions including notes for operation and additional explanations Sample Screens The sample LX P1300 printer driver screens displayed in this manual were created with Windows 10 Trademarks Canon and the Canon logo are registered trademarks of Canon Inc Microsoft and Win...

Page 5: ...y omissions or mistakes in this manual We can accept no responsibility for loss or damages resulting from the use of this printer or its software please accept this before you use the printer Legal Notice Legal Limitations on the Usage of Your Product and the Use of Images It is illegal to reproduce currency bills negotiable securities and other documents prohibited by law Reproduction of such ite...

Page 6: ...rence to radio communications However there is no guarantee that interference will not occur in a particular installation If this equipment does cause harmful interference to radio or television reception which can be determined by turning the equipment off and on the user is encouraged to try to correct the interference by one or more of the following measures Reorient or relocate the receiving a...

Page 7: ...nter Necklaces and other metal objects Cups vases flowerpots and other containers filled with water or liquids If such an object is brought into contact with the electrical parts inside the printer this could cause a fire or electrical shock If an object enters the inside of the printer turn the printer off immediately disconnect the power plug from the power outlet and contact your place of purch...

Page 8: ...er If this happens allow the printer to sit for at least 1 hour at room temperature to adapt to the ambient temperature and humidity To ensure normal operation of the printer and avoid possible damage do not install the printer near large office equipment or any other type of electrical device that emits a strong magnetic field Power Supply WARNING Do not use any power cord and AC adapter other th...

Page 9: ... If the connection terminal of the AC adapter is brought into contact with any metallic part when the power plug is still connected to the power outlet a fire or electric shock could result Always keep the area around the power plug free of obstacles so you can unplug it easily This allows you to unplug the power cord quickly in an emergency Do not use any power outlet other than the one rated for...

Page 10: ... plug from the power outlet and contact your place of purchase If you continue to use the printer this could cause a fire or serious electrical shock If the printer will not be used for a long period of time for your safety disconnect the power cord from the power outlet Do not place a heavy object on the printer It could fall down or fall over resulting in personal injury Keep the power cord cabl...

Page 11: ...l out the transport unit immediately Turn the printer on again before performing any operation Pulling out the transport unit forcibly without turning the printer on again could cause a printer failure Do not place the printer close to TV radio receiver or loudspeakers etc The magnetic field produced may cause the printer to malfunction or the printer may interfere with TV radio reception Printed ...

Page 12: ...ing the printer be sure to execute Moving The Printer or Shipping The Printer from the printer driver Also when shipping the printer set the protectors Moving or Shipping the printer without taking necessary measures could cause ink leak inside the printer resulting in a fire electric shock or printer failure Maintenance and Inspections WARNING To avoid a fire hazard occasionally disconnect the po...

Page 13: ... pulled excessively or secured with staples The power plug is loose The power cord is tied in a bundle The power cord protrudes into a walkway The power cord or AC adapter is placed in front of heating appliance CAUTION Before cleaning the printer be sure to turn it off and remove the power plug from the power outlet Otherwise a fire or electric shock could result Ink Tank and the Maintenance Cart...

Page 14: ...en this cover when replacing ink tanks 5 USB Connector Connect a USB cable to this connector 6 LAN Connector Connect a LAN cable to this connector 7 Power Socket Connect the supplied AC adapter to this socket 8 Rating Plate Label A serial number for identifying the printer is shown on this plate The serial number is required when you contact customer support or require any sort of printer repairs ...

Page 15: ...12 Names and Functions of Components Internal View 1 1 Maintenance Cartridge Ink used to clean print head is collected in this cartridge ...

Page 16: ...ransports paper here Clean the transport area when stained with paper dust and ink 3 Paper Alignment Line Align the paper leading edge with this line 4 Paper Set Lever Secure paper to the transport unit using this lever 5 Roll Holder Set paper here 6 Paper Guide This guide presses on paper so that paper does not float Move it to fit the width of paper ...

Page 17: ...amps Bk C M Y Each lamp lights up or blinks when there is no ink available for printing or the ink tank is low Lit There is no ink available for printing or the ink tank is faulty Blink The ink tank is low Off The ink tank is full 4 Maintenance Cartridge Lamp This lamp lights up or blinks when there is limited space to collect ink in the maintenance cartridge Lit The maintenance cartridge is full ...

Page 18: ...p blinks green and then lights up NOTE About the Sleep Timer The printer will automatically enter sleep mode when a predetermined amount of time elapses without printing By default the time is set to 4 minutes For details of sleep timer setting refer to Changing the Power Settings User s Guide ...

Page 19: ... turned off When the status lamp is off press and hold the power key for at least 1 second IMPORTANT After powering the printer down make sure the power lamp is off prior to unplugging the power cord If the printer will not be used for a long period of time disconnect the power cord AC adapter and interface cable NOTE About the Off Timer After switching to sleep mode if the printer is not in use f...

Page 20: ...a and paper guide are not stained with ink If the transport area or paper guide is stained with ink clean the transport unit For how to clean the transport area and paper guides refer to Cleaning the Printer User s Guide Use the dedicated paper Using other paper could cause blurred or faint printing or have a negative impact on the printer resulting in a printer failure NOTE Types of paper that ca...

Page 21: ...lamp is lit If the power lamp is off press the power key to turn the printer on P 15 2 Pull the transport unit out of the printer 1 Raise the transport unit lever 2 Pull this lever while holding the printer with one hand so that it does not move ...

Page 22: ...ds so that it does not fall down Do not put your hands inside the printer Failure or physical injury could result Ink adhered inside of the printer could stain clothes or hands IMPORTANT When pulling the transport unit out of the printer or inserting it in the printer be careful not to hit it strongly against the table or shelf The surface of the table or shelf could be damaged ...

Page 23: ...etting paper for the first time Refer to P 20 When replacing paper after the printer has run out of paper Refer to P 21 When replacing with paper of a different type or size Refer to P 23 When setting paper for the first time 1 Open the paper set lever 2 Remove the roll holder ...

Page 24: ...Paper When replacing paper after the printer has run out of paper 1 Open the paper set lever 2 Peel off the tape affixed at the end of the remaining paper 3 Pull the remaining paper out through the paper ejection slot ...

Page 25: ...roll holder IMPORTANT When replacing paper before the printer has finished printing ensure that the new paper is the same type and size of the paper to be replaced Using new paper of a different type or size could cause a printing error ...

Page 26: ...23 Loading the Paper When replacing with paper of a different type or size 1 Open the paper set lever 2 Pull the paper set out between the paper guides onto the roll holder 3 Remove the roll holder ...

Page 27: ...per guides Removing the roll holder with paper still set between the paper guides could damage the paper guides or sensor 4 Remove paper or a paper core from the roll holder 1 Remove the roll holder shaft 2 Remove the roll stopper L and roll stopper R 1 2 Roll stopper L Roll stopper R Roll holder shaft ...

Page 28: ...the roller stoppers until they are pressed against paper without clearance 2 Insert the roll holder shaft until it clicks 6 Set the roll holder in the transport unit as shown in the figure NOTE If two or more types or sizes of paper are used use of optional roll holders is recommended For how to purchase the optional holders for this printer contact your place of purchase 2 1 ...

Page 29: ...moved to the guide position 54 mm NOTE For the default paper size set the paper guide at the position shown in Table 1 Guide positions of paper For the paper of custom paper size confirm the guide position in advance using the printer driver For more details see Printing with the Custom Paper Size User s Guide Table 1 Guide positions of paper Paper name Guide position mm 1 x 1 5 Label Gap 28 2 x 1...

Page 30: ...E If it is hard to feed paper in check whether the paper guide is positioned properly P 26 IMPORTANT If there is a large slack in the paper roll remove the roll and tighten the paper Paper with a large slack may touch the paper set lever causing the printer to malfunction 9 Fix paper 1 Hold the paper set lever as shown in the figure 2 Press the rollers F onto the paper surface D E C A F ...

Page 31: ...r If the rollers are not firmly pressed onto the paper surface the paper set lever can not be closed 10 Set the transport unit in the printer 1 Slowly insert the transport unit as far as it will go If there is an interference in inserting the transport unit check that the paper set lever is closed properly P 27 F ...

Page 32: ...or box and store it in a place where it will not be exposed to high temperature high humidity and direct sunlight It is recommended that unpacked paper be used up in the shortest time possible Do not print outside the printable area of the dedicated paper When replaced with paper of a different type or size change the printer driver settings Printing on paper of the wrong size could stain the pape...

Page 33: ...ate to an operating state Selecting Never in the Microsoft Windows Power Saver or Power Option settings will prevent the computer from entering a sleep state Follow the procedure below to open the Windows Power Saver or Power Option settings Windows 10 Selecting Control Panel Control Panel Power Options For Windows 8 1 Windows 7 Selecting Control Panel Hardware and Sound Power Options Refer to Mic...

Page 34: ...rint in the Print dialog box Printing starts IMPORTANT While the printer is printing observe the following precautions Do not open the ink tank cover and transport unit lever It could cause a printer failure Shock or vibrations could cause a paper jam or printer failure Before printing check that the paper set in the printer is the same as the paper set with the printer driver in terms of size sha...

Page 35: ...uide If the paper size you want to select is not found in the list set the Custom Paper Size or the Customize For more details refer to Printing with the Custom Paper Size User s Guide NOTE Checking the Current Printing Status The status monitor allows you to check the printing status Number of Pages The number of the page currently being printed is displayed Copies The progress of printing of eac...

Page 36: ...nter driver To read the description of a setting item Right click on the character string of the setting item and then click Help Cancel Printing To cancel printing click Cancel Print Job on the status monitor When printing stops paper is moved to the cutting position to be cut NOTE Stopping Printing Temporarily To stop printing temporarily press the pause key on the operation panel Besides the st...

Page 37: ...Another screen opens allowing you to know details of the message and the error handling instruction For details of the error and warning messages displayed on the status monitor refer to List of Error Messages Warning Messages User s Guide By default the status monitor automatically appears when printing starts For how to activate the status monitor and make display settings refer to Checking the ...

Page 38: ...e printer that requires attention the status lamp on the operation panel will light up orange operator call error The error details and actions required can be confirmed with the Status Monitor After selecting the message in Status Information click Display the details of the selected status Alternatively double click the message of the Status Information ...

Page 39: ...ss the pause key and bring it online If multiple errors occur simultaneously the errors will be shown in order from the importance Handle all of the errors Status Lamp Is Flashing Orange When an error occurs in the printer and normal operation is not possible the status lamp of the operation panel will flash orange service call error Handle accordingly 1 Turn the printer off P 16 2 After the power...

Page 40: ...orrectly with the interface cable Is the correct printer selected Select the printer to be used with the Printing dialog box Are you printing a large image If the status lamp green is flashing the data is still being processed Stand by Are you printing for long periods of time When printing for a long period of time the print head temperature will rise To protect the head printing operations will ...

Page 41: ... Right click on start and then select Control Panel Hardware and Sound Devices and printers For Windows 8 1 From the Desktop charms select Settings Control Panel Hardware and Sound Devices and Printers For Windows 7 Select the Start menu Devices and Printers 2 Right click the printer icon and select Printer Properties The properties window will appear 3 Click on the Ports tab and confirm that the ...

Page 42: ... enter cmd For Windows 8 1 From the Desktop charms select Settings and enter cmd For Windows 7 Enter cmd in the Search programs and files of the Start menu 2 In the window started enter ipconfig all 3 After confirming the IP address close the screen Once you have confirmed the IP addresses if the printer and computer are not on the same network change the printer s IP address according to the foll...

Page 43: ...nter enabled The port number and protocol that the printer uses for communication are set as follows Use these settings as references Port number Protocol 50000 TCP 50001 TCP UDP 50002 UDP Paper Does not Feed Properly Points to Confirm Solution Is the dedicated paper being used Use dedicated paper Do not use paper other than dedicated paper It can cause paper jams and malfunctions Is the paper lea...

Page 44: ...t resolution 1200dpi prioritize image quality and then print Refer to Changing Print Quality and Adjusting Color User s Guide If you are using the printer at low temperature Room temperature is 14 degrees Celsius 57 degrees Fahrenheit or lower Open the Utility tab in the printer driver and then select the Low Temperature Print Mode in the Special Settings Refer to Changing the Special Settings of ...

Page 45: ...deviation matches the paper size shape and type configured by the application software or printer driver is the same Adjust the position of the print head Refer to Adjusting Print Head Position User s Guide Set the resolution to Input resolution 1200dpi prioritize image quality and then print Refer to Changing Print Quality and Adjusting Color User s Guide The halftone representation is coarse Ope...

Page 46: ...User s Guide The color printed differs from the color on screen Open the Color tab of the printer driver and adjust the settings for image quality and color Refer to Changing Print Quality and Adjusting Color User s Guide Verify that the Display and Screen Properties are correctly configured in the control panel of the computer used Especially if the type of display or gamma factor is wrongly conf...

Page 47: ...es on the edge of the paper are missing Decrease the Paper Length and adjust the image according to the paper size changed Also if images on the edge of the paper are missing verify that the transport area is clean before printing If stained clean the transport unit Refer to Cleaning the Printer User s Guide When the margin is large Increase the Paper Length and adjust the image according to the p...

Page 48: ... out from the ejection slot Printing problems will occur Use the dedicated paper When paper that is not compatible is used blurring or bleeding may occur and it may adversely affect the printer a malfunction Paper jams could occur if the leading edge of the paper is bent 1 Pull the transport unit out of the printer 1 Raise the transport unit lever 2 Pull this lever while holding the printer with o...

Page 49: ...s so that it does not fall down Do not put your hands inside the printer Failures or physical injury could result Ink adhered inside of the printer could stain clothes or hands IMPORTANT When pulling the transport unit out of the printer or inserting it in the printer be careful not to hit it strongly against the table or shelf The surface of the table or shelf could be damaged ...

Page 50: ...area is clogged remove the paper retainer A and verify that labels or other matter is not stuck to it If there are any labels or scraps remove them all 2 Remove the jammed paper and cleanly cut the paper leading edge Cut the paper s separator mount part Cut the center of the mark on the paper A 1 ...

Page 51: ...er A was removed in Step 1 attach the paper retainer back Align the arrow of the Paper Retainer A and the attachment position 3 Load the paper P 17 When the paper is loaded cleaning will be performed and printing will resume To cancel printing click on Cancel Print Job on the Status Monitor A ...

Page 52: ...used Water based pigment ink Yellow Y Magenta M Cyan C and Black Bk Water based dye ink Yellow Y Magenta M Cyan C and Black Bk Interface USB 2 0 High Speed 1000BASE T 100BASE TX 10BASE T Ethernet Operating noise Approx 50 dB A or less Installation environment Temperature 15 to 30 degrees Celsius 59 to 86 degrees Fahrenheit Humidity 10 to 80 no condensation Power supply AC adapter used AC100 240V 5...

Page 53: ...oated paper Glossy paper Synthetic paper Paper size 28 4 mm 63 0 mm 1 12 in 2 48 in W 25 4 mm 400 mm 1 00 in 15 7 in L Including Liner Paper thickness 145 μm 255 μm 5 71 mil 10 0 mil Paper capacity Outer diameter 75 mm 2 95 in and less Core diameter 25 4 mm 1 00 in 1 without perforation ...

Page 54: ...CANON FINETECH NISCA INC 2018 PRINTED IN JAPAN One Canon Park Melville NY 11747 U S A www usa canon com CANON U S A INC 4Y8 8157 020 ...

Reviews: