background image


Instructions for using HoloLens with VimedixAR™


 ©2017 CAE 
905K800022 v4 


VimedixAR: Getting Started  

Thank you for choosing the VimedixAR add-on module, the latest innovation for your Vimedix ultrasound simulator. 
Using the Microsoft HoloLens, VimedixAR allows you to see Augmented Reality in the form of 3D holograms that 
appear directly on the Vimedix manikins.  
The following guide contains links to videos that will show you how to easily start using VimedixAR to enhance your 
Vimedix learning experience.  

Getting Started with the Microsoft HoloLens  

Please use the following links for instructions about the general use, maintenance and functionalities of the 
Microsoft HoloLens: 


Instructions for using HoloLens with VimedixAR™ 

CAE Vimedix Augmented Reality Comes Alive


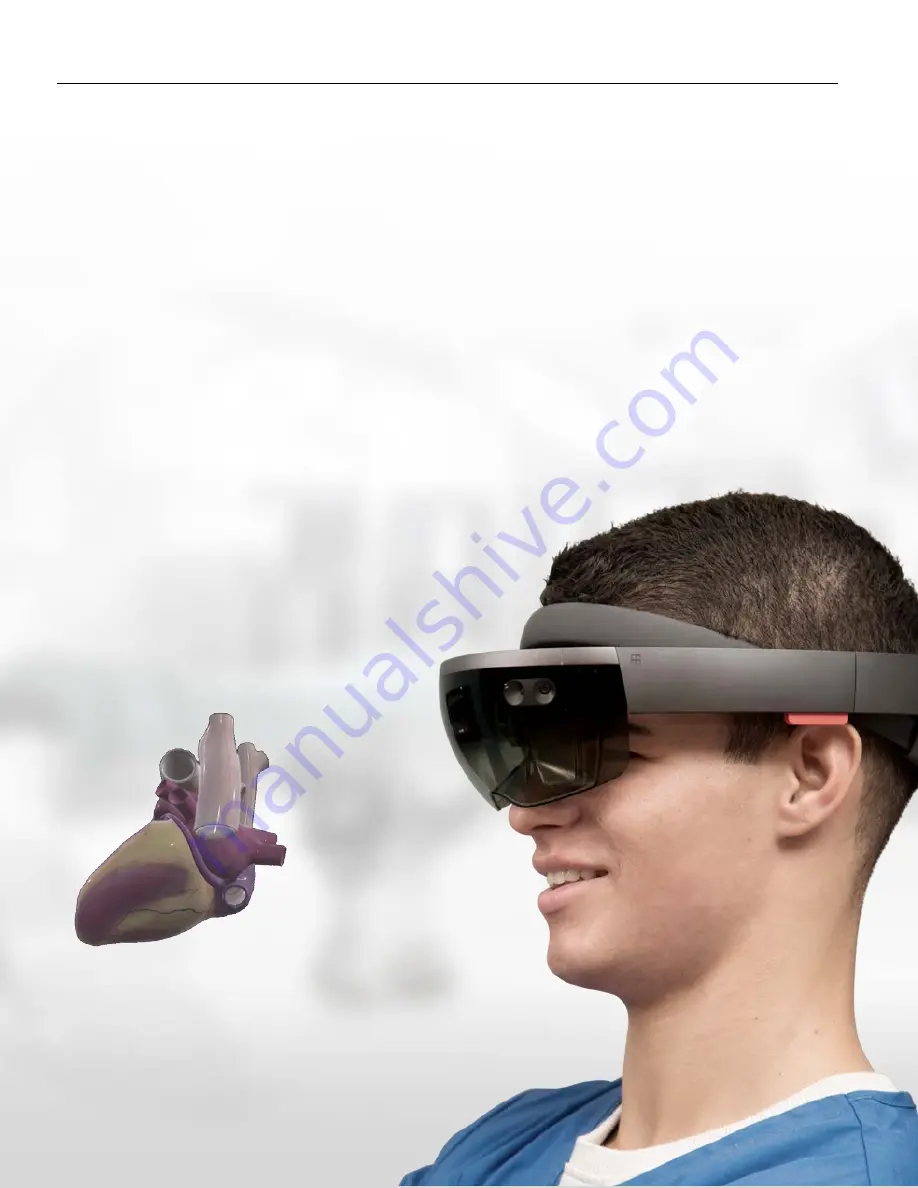
Freed from its two-dimensional environment inside a monitor, our VimedixAR™ ultrasound simulator leaps to life, 
displaying anatomy you can enlarge, turn, rotate or command to return into its manikin body so you can view the 
interrelatedness of its structures. Witness in real time how the ultrasound beam cuts through the human 

anatomy. 

Summary of Contents for VimedixAR

Page 1: ...VimedixAR to enhance your Vimedix learning experience Getting Started with the Microsoft HoloLens Please use the following links for instructions about the general use maintenance and functionalities...

Page 2: ...tps support microsoft com en us help 12644 Start menu and finding your apps https support microsoft com en us help 12638 Spaces on HoloLens https support microsoft com en us help 13760 hololens spaces...

Page 3: ...INTERFACE 11 INTERACTIVE PANEL 11 Ultrasound Panel 17 HOLOGRAM CONTROLS 18 SHARED EXPERIENCE MODES 20 CALIBRATION PROCEDURE 21 Calibration by Tag 21 Calibration by Gaze 21 Fine Tuning Your Calibratio...

Page 4: ...Instructions for using HoloLens with VimedixAR 4 2017 CAE 905K800022 v4 ESTABLISHING A NETWORK CONNECTION 46 CHECKING FOR VIMEDIXAR UPDATES 47 UPDATING VIMEDIXAR 48...

Page 5: ...the following sequence Beginning with the router computer and HoloLens powered off 1 Turn on the router Power on the Router 2 Connect the network cable between the bottom port of the computer and any...

Page 6: ...WIFI network by following the steps below 1 Bloom to view the Start menu 2 Select the Settings icon in the Start menu Settings Icon 3 Air tap the Settings window to anchor it in place 4 Select the Ne...

Page 7: ...ng around This directs the device to return visual feedback on its spatial mapping drawing green triangles on the surfaces it knows about Note The HoloLens continuously tracks its surroundings to main...

Page 8: ...rting a VimedixAR Simulation with Microsoft HoloLens To start a VimedixAR simulation with the HoloLens 1 Select the VimedixAR app in the Start menu Vimedix App Icon 2 Move the VimedixAR Startup window...

Page 9: ...h VimedixAR 9 2017 CAE 905K800022 v4 3 Adjust your HoloLens so that all four corners of the FitBox are visible VimedixAR Start Simulation FitBox 4 Begin the simulation by air tapping or using the voic...

Page 10: ...imedixAR simulation with the HoloLens 1 Bloom to return to the Start menu 2 Select the Remove icon in the upper right corner of the VimedixAR Startup window to exit the VimedixAR simulation VimedixAR...

Page 11: ...ce is divided into three main sections Interactive Panel Ultrasound Panel Hologram Controls VimedixAR User Interface Interactive Panel The Interactive Panel is controlled by the following tabs along i...

Page 12: ...al Patient 3 and the Shared Experience Mode e g Individual Instructor or Student when the Information tab is selected and there are no warnings to be displayed Information Tab Interactive Panel Note R...

Page 13: ...each Shared Experience Mode in VimedixAR If your Shared Experience Mode is Individual you can gain control over the other HoloLens by selecting the Instructor option If your Shared Experience Mode is...

Page 14: ...e Interactive Panel also provides you with the option to calibrate the position of the Hologram Manikin relative to the Physical Manikin by tag or by gaze Calibration by tag is started by selecting th...

Page 15: ...Find Fluids exercises To begin the setup that is required prior to starting the Region Scan or Find Fluids exercise select the Start button that is directly below the description of the respective exe...

Page 16: ...instructions You can end the IPD Calibration prematurely with the bloom gesture in which case your IPD will not be updated To start the Shared Demo select the Shared Demo button on the Interactive Pan...

Page 17: ...active Panel Select the Help tab using the voice command Vimedix Help or with the gaze and air tap gestures Please refer to the Voice Commands section of the user guide for more information about when...

Page 18: ...you are prompted to tap and hold the UI to drag it to your desired location Note The UI will be boxed in orange when it is in your grasp and boxed in blue when it is not The Adjust Menu icon is an op...

Page 19: ...layers above the Physical Manikin The Raise Anatomy button raises the anatomy that is selected in the Structures Visibility menu on the Vimedix system above the Physical Manikin such that the anatomy...

Page 20: ...well as perform a Shared Demo for them The Local Demo option is disabled for the Instructor An Instructor can become an Individual user by selecting the Individual option on the Interactive Panel und...

Page 21: ...right ear of the Physical Manikin with the arrow facing the head When the HoloLens recognizes the tag it places a holographic image of the tag on top of it with the Hologram Manikin not far You must...

Page 22: ...irection of its head Vimedix Move Caudal Moves the Hologram Manikin one centimeter in the direction of its feet Vimedix Apply Stand Inclines the Hologram Manikin at a 45 angle on its left side to matc...

Page 23: ...t the stand control of the 3D Calibration Widget to incline the Hologram Manikin at a 45 angle on its left side to match the inclination of the Physical Manikin when it is configured with both stands...

Page 24: ...horough FAST Focused Assessment with Sonography for Trauma ultrasound examination in the shortest time possible The Region Scan exercise is only performed by the Instructor and is observed by the Stud...

Page 25: ...ect one or more regions to scan To scan all regions select the All option above the Right Upper Quadrant option The Region Scan Parameters also include the option to enable visual aids representing th...

Page 26: ...e button at the bottom of the Interactive Panel with the gaze and air tap gestures The Interactive Panel then displays the Region Scan Results which include total time total distance traveled cm total...

Page 27: ...protocol regions will also appear at this point regardless of whether you enabled them or not during the setup of the Region Scan exercise Use your gaze to select a region to view its name and the pe...

Page 28: ...col regions they selected prior to starting the exercise you will see them on the Hologram Manikin when the Exercise Status is In Progress When the Exercise Status is Completed the Interactive Panel d...

Page 29: ...ayed in simulation once you have completed the Free Fluids exercise To begin the setup that is required prior to starting the Find Fluids exercise select the Start button that is directly below the de...

Page 30: ...e and air tap gestures The timer starts when the Find Fluids exercise is started the timer is visible at the top of the Interactive Panel Find Fluids Interactive Panel Instructor When you finish locat...

Page 31: ...ram Manikin representing the percentage of a region that was successfully scanned Note Green points indicate scanned areas and red points indicate non scanned areas The visual aids representing the fr...

Page 32: ...visual aids representing the free fluid in the regions they selected prior to starting the exercise you will see them on the Hologram Manikin when the Exercise Status is In Progress When the Exercise...

Page 33: ...y are connected to Vimedix The Shared Demo gives the Instructor the opportunity to demo the features of VimedixAR To start a Shared Demo the Instructor must select the Shared Demo button on the Intera...

Page 34: ...asound beam cut plane only the Ultrasound Panel displays the ultrasound image Note Only the anatomy that is selected in the Structures Visibility menu on the Vimedix system is visible when the Cut Pla...

Page 35: ...v4 Shared Demo Interactive Panel Note Only the Instructor can select each item with the gaze and air tap gestures or with the voice commands listed in the table above The Instructor selects the Exit...

Page 36: ...Structures Visibility menu in Vimedix even if you are connected to Vimedix Demo Item Voice Command Description FitBox Vimedix Step 1 Displays the FitBox in your field of view Anatomy Vimedix Step 2 Di...

Page 37: ...2017 CAE 905K800022 v4 Local Demo Interactive Panel Demo items are selected with the gaze and air tap gestures or with the voice commands listed in the table above To exit the Local Demo select the E...

Page 38: ...and towards the right Please refer to the Hologram Controls Shared Demo and Local Demo subsections of the user guide to learn when these zoom and rotation gestures are unlocked during a VimedixAR simu...

Page 39: ...Counterclockwise Increase Zoom Decrease Zoom voice command can only be executed when the anatomy is raised Calibration Move Lateral Left Move Lateral Right Move Anterior Move Posterior Move Cranial Mo...

Page 40: ...ffect if the Vimedix Hide Menu voice command was used beforehand it should not be confused with the Vimedix Face Me voice command Menu Configuration Help Configures the Interactive Panel to display th...

Page 41: ...ectional view of the hologram anatomy based on the position of the ultrasound beam cut plane Probe Beam Configuration Remove Cross Section Removes the cross sectional view of the hologram anatomy Prob...

Page 42: ...the different anatomical systems into layers above the Physical Manikin Anatomy Configuration Collapse Layers Collapses the layers of the different anatomical systems but configures the collapsed ana...

Page 43: ...e HoloLens are not connected to the Vimedix WIFI network Refer to the Connecting and Starting the Microsoft HoloLens section of the user guide for more information on how to verify this connection You...

Page 44: ...This warning message will appear when Vimedix is turning ON or OFF When Vimedix is running make sure to load one of the following pathologies that are supported by VimedixAR in Vimedix Normal Patient...

Page 45: ...s Whenever a software update for VimedixAR is released during the warrantee period you will be notified via email phone or standard mail It is important to note that the VimedixAR application does not...

Page 46: ...ap the Settings window to anchor it in place 4 Select the Network Internet icon Settings Window Network and Internet Icon 5 Connect to a WIFI network with internet capabilities If required enter the p...

Page 47: ...anchor it in place 4 Select the User icon to the left of the search bar User Icon 1 Select the Downloads and updates option 2 Select the Check for updates button Note it may take a few minutes for th...

Page 48: ...verify that these will not interfere with VimedixAR functionality Reestablish Vimedix Network 1 Close all open windows by air tapping on the Remove icon 2 Bloom to show the Start menu 3 Select the Set...

Page 49: ...ates and Latin America Monday Friday from 7 00 a m to 6 00 p m ET Phone 1 866 462 7920 Email customerservice caehealthcare com Customer Service Canada Monday Friday from 8 00 a m to 5 00 p m ET Phone...

Reviews: