

LPV4-U2-300S Quick Setup Guide
35020158-02
3
1
2
3
2
1
Download "LPV4-U2-300S Utility" from the following URL to set up the print server. You can also download the
user manual from this link.
Make sure the printer is installed on your PC or Mac with the correct printer drivers and software. If the PC or
Mac does not have the required drivers, even if the software detects the printer you will not be able to print to
the device.
http://d.buffalo.jp/lpv4-u2-300s/
Download Utility and User Manual
Before Installation
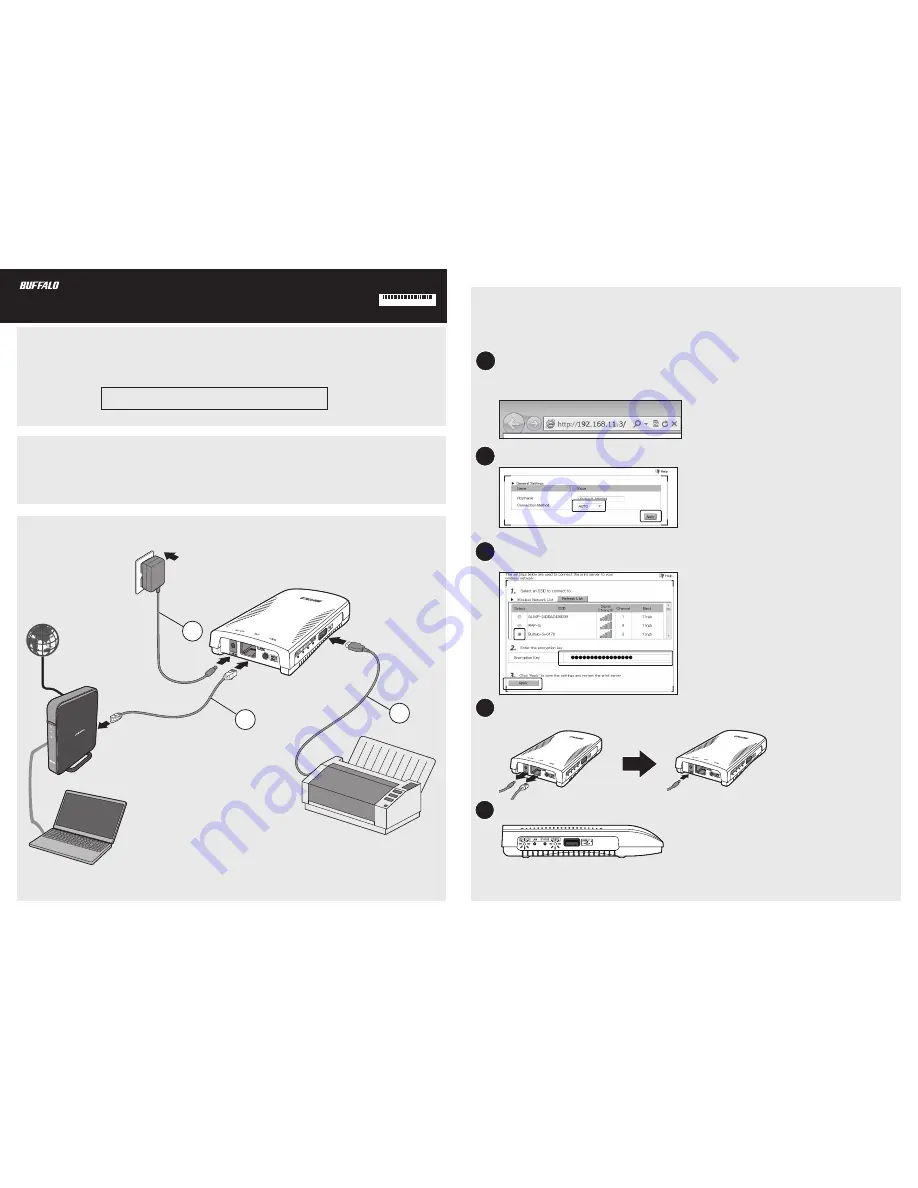
Wired Connection
Wireless Connection
If your router supports WPS/AOSS, you can use the print server's WPS button to connect directly. Otherwise,
set up a wired connection and follow the procedure below. WPA2-PSK (TKIP) encryption is not supported.
Enter the print server’s IP address into a web browser and log in to Settings. For Windows users, use the
LPV4 utility to find the IP address. For Mac users, install Network-USB Navigator (included with LPV4
utility) to find the IP address. When the security window appears, enter “admin” for the username and
“password” for the password, then click
OK
.
From Settings, go to
Network
-
General
;
set the Connection Method to 'Auto' and click
Apply
.
Go to
Network
-
Wireless LAN
and select your wireless access point. Enter the encryption key and click
Apply
. The print server will reboot.
After rebooting, disconnect the LAN cable and the AC adapter from the print server. Then reconnect the
AC adapter.
When the wireless LED is lit green, the wireless connection is established.
4
5
Note:
If you cannot access Settings from a wireless connection, initialize the print server and try again.
To initialize the print server, disconnect the AC adapter and reconnect it while holding down the WPS
button until the power LED blinks green.


