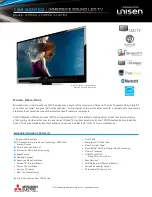
background image

1

List of contents

Special features

Safety instructions

Getting started

Aerial connection
Switching on

Battery fitting

Control unit

Front and rear panel

External connections table
Remote control

Using the TV

TV controls
Manual tuning
Automatic tuning
Child lock
Program table

TV setup

Sound menu
Picture menu
Features menu
Picture format

Using teletext

Connecting external equipment

Help and service tips

Technical specifications table

2

3

4

4
4

4

5

5

6
6

7

7
8
9
9
10

11

11-12
13
14
15

16-17

18-22

23

24

Summary of Contents for 772 GRI

Page 1: ...l External connections table Remote control Using the TV TV controls Manual tuning Automatic tuning Child lock Program table TV setup Sound menu Picture menu Features menu Picture format Using teletext Connecting external equipment Help and service tips Technical specifications table 2 3 4 4 4 4 5 5 6 6 7 7 8 9 9 10 11 11 12 13 14 15 16 17 18 22 23 24 ...

Page 2: ... the setting in memory after the colour contrast brightness setting have been changed Picture adjustment using one button Smart control Sound adjustment using one button Smart control Equalizer Sound Setup Automatic Volume Limiting Your TV set is equipped with an On Screen Display system This system enables the user to see the function on screen and to control them efficiently Infrared Remote Cont...

Page 3: ...ance Do not use the television near any apparatus that produces a magnetic field such as HI FI speakers or electric motors otherwise colourpurity may be affected The heat built up in the set escapes through ventilation holes so do not cover the set by drapes clothes etc that may block air circulation Do not place the television on carpet or soft furnishings Clean the TV Screen using a slightly dam...

Page 4: ... television Press the Standby button to switch the TV to standby The standby indicator will brighter Please Note Do not leave the television on standby unattended or overnight Battery fitting Insert the 2 AAA Batteries supplied into the compartment on the rear of the remote control ensure you follow the polarity diagram inside the compartment Press the Power button on the front of the TV The stand...

Page 5: ...ns table on next page for available connections depending the size and model of your TV set Do not use Video RCA and S Video connections at the same time otherwise they will effect the picture each other AV1 scart External connections Rear AV2 scart Aerial socket Power cable AV3 scart optional 5 P P V V You may wish to connect audio amplifier or any similar devices to audio out The output is alway...

Page 6: ...X MENU 16 9 PP MIX UPDATE SUB HOLD DOUBLE REVEAL P 100 TIMER SWAP 28 4 3 Picture tube size typee 25 4 3 28 16 9 29 4 3 32 16 9 33 4 3 AV1 Scart AV2 Scart Headphone socket Audio Video RCA S Video socket Back Audio Out STD STD STD STD STD STD STD STD STD STD STD STD OPT OPT OPT OPT OPT OPT OPT OPT OPT OPT OPT OPT OPT OPT OPT OPT OPT OPT OPT OPT OPT OPT OPT OPT OPT OPT OPT OPT OPT OPT AV3 Scart 26 16...

Page 7: ... program by pressing in the OK button Press the OKbutton and a grey box will appear on the screen with programme numbers on it Volume Press the Volume or Volume button on the TV or the Vol or Vol button on the remote control A sound level bar will appear on the L L Use theProgram up and Program down buttons to scroll through the programme numbers When you find the program number you want press the...

Page 8: ...TUP menu Press the blue Setup button or Press the Menu button and use the Program down button to select SETUP Press the OK button to enter the SETUP menu Use theProgram down button to select PROGRAM NO Use theVolume up down buttons to select the program number Use the Program down button to select Store Press theOKbutton and STORED will appear on the STORE line You have now stored the first channe...

Page 9: ...ll appear Select the desired country using Program and Volume buttons press Press the Program down up buttons to exit the channel row Child lock Childlock switches off the programme you are watching when you select it All other programmes are unaffected If you go back to the programme with childlock on you will see a black screen with the OSD showing You can lock as many programs as you want Press...

Page 10: ...m down buttons They can still be selected using the numeric buttons or the OK button Select the programs you want to skip and press the Redbutton The program will turn red To unskip the program press the Redbutton again When you select a programme the information you entered in the PROGRAM TABLE menu will appear All the following programmes are shifted down by one place on the top of the screen i ...

Page 11: ...for 15 seconds the TV will exit the menu system Sound menu red button or use the coloured fastext buttons for quick access Red button Green button Yellow button Blue button Pink button Select the required item in the menu using the Program up down buttons and make the changes pressing Volume up down buttons Use the OK button to enter EQUALIZER sub menu If the channel you are watching is in Nicam s...

Page 12: ... be displayed Press the Menu button to go back to the previous Dynamic Bass optional Set DYNAMIC BASS to ON if you wish to deepen the bass sound specifically Subwoofer optional A sub woofer speaker can be fitted within the TV case as an option depending to the model For 33 84cm TV sets there is an external subwoofer optional to be fixed as shown below OK MENU OK MENU Please Note If you move the lo...

Page 13: ...izer setting will revert to the stored setting Use the Program up down buttons to make the changes Press OK button to adjust the frequency band levels Use the Volume up button to select the KHz column you want to change Picture menu Green button The picture menu allows you to set up the following BRIGHTNESS CONTRAST COLOUR SHARPNESS COLOUR TEMPERATURE Equalizer BRIGHTNESS CONTRAST COLOUR SHARPNESS...

Page 14: ...button to select the language list Press the Program down button to page through all the languages and OK to select LANGUAGE TIMER FEATURES Timer Use Program up and down buttons to select Timer in the features menu Using the Timer fuction you can switch to a specific programme at a pre programmed time or you can turn your TV off at the time you want your TV to be turned off Press OK to access the ...

Page 15: ... of 25 28 29 and 33 TV sets But you can change the picture format to 16 9 to able to watch the inputs in 16 9 format i e some broadcasts and DVD s Once you have switched the TV off the picture format will revert to the stored setting 4 3 conventional TV picture format L Box Letter box Useful for watching video some film formats and Pal Plus format Widescreen TV sets 16 9 this is the screen format ...

Page 16: ...press button The text will be superimposed over the TV programme Press the button again to return to the text page In Text mode press theUpdate button The TV will return to TV mode with the text page number in the top left hand corner of the screen Enter the page number you want using the buttons The top line of the text page will appear whilst the text searches for your page When the page is foun...

Page 17: ...hen the page number is found it will appear in the top left hand corner of the screen Press the Update button again to view the text page To reveal information Press the Rev button to reveal concealed information quiz answers etc Press the Revbutton again to conceal the information again Clock Press the Sub button whilst watching a TV program to display the time HOLD HOLD REVEAL REVEAL Fastext At ...

Page 18: ... on the back of the TV Via SCART Make sure the TV and video recorder are both switched off AV Make sure the TV and video recorder are both switched off Plug one end of the RCA lead into the video and audio out sockets on the back of the video recorder and plug the other end into the video and audio in sockets of the TV If the sound is in mono use the Audio Input L In the SOUND menu select MONO Pre...

Page 19: ...order test signal Select a programme number 0 or between 55 and 99 Press the AV button three times to select A V2S available by two scart models Press the AV button repetitively to select AV3S by two scart models or AV4S by three scart models Plug the S Video plug into the S Video socket and the audio leads into the audio sockets You can also connect it through the S Video socket of the TV optiona...

Page 20: ...e both switched off Plug one end of the RCA lead into the video and audio out sockets on the back of the DVD player and plug the other end into the video and audio in sockets of the TV Press the AV button repetitively and select the A V3 mode by two scart models or select AV4 mode by three scart models Press the AV button repetitively to select AV3S by two scart models or AV4S by three scart model...

Page 21: ...audio in sockets on the TV Select TINT by using Program down button and use the adjust the colour to Volume up and down buttons Please Note You can record from one external piece of equipment to another via the TV by connecting the playback to SCART 1 and the recorder to SCART 2 or SCART 3 and selecting AV1 You cannot watch the TV You can connect NTSC supported equipment to the TV via the SCART so...

Page 22: ...order Camcorder AV1 AV2 AV3 AV3 3 scart models only R L VIDEO AV1 S Video In S Video TV Game Player Connecting TV with video and satellite digital receiver ANT IN ANT OUT Scart 2 AUXIN Scart 1 TV IN OUT DIGITAL SATALLITE RECEIVER VIDEO RECORDER BEHIND THE TELEVISION Scart Socket Antenna socket Scart ...

Page 23: ...al sources at once Disconnect one of the sources Adjust the fine tuning No picture Is the aerial plugged in properly Is the aerial lead damaged Are all the plugs in the aerial lead fitted correctly Have you pressed the correct buttons on the remote control Sound coming from only one speaker Is the balance set to one side See the sound menu If you have external speakers has one of them become disco...

Page 24: ...LL if both systems are avaible to receive BG or DK and BG or LL Please refer to Tuning the TV Speaker empedance 8 ohm Technical specifications table Picture tube size type 25 4 3 28 4 3 28 16 9 SF 29 4 3 SF 32 16 9 SF 33 4 3 Visible screen size Sound Output 10 THD Power consumption 28 16 9 PF 29 4 3 PF 32 16 9 PF Stand by Power consumption 26 16 9 PF 24 16 9 SF Screen size 63 cm 70 cm 70 cm 70 cm ...

Reviews: