Axminster PROFESSIONAL AP50UE, Manual
The Axminster PROFESSIONAL AP50UE user manual is available for free download on our website. This comprehensive manual provides step-by-step instructions and essential information for operating and maintaining your AP50UE. Get the most out of your product by accessing the manual at manualshive.com.
Share
Download


Reviews:
No comments
Related manuals for PROFESSIONAL AP50UE

Pro Attachment PAS-225
Brand: Echo Pages: 28

081198
Brand: GARANT Pages: 100

1963826
Brand: hilmor Pages: 12

G0825
Brand: Grizzly Pages: 44

YK20ECF.V2
Brand: Sealey Pages: 3
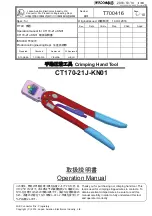
CT170-21J-KN01
Brand: JAE Pages: 11

YT-82902
Brand: YATO Pages: 80

AIR DUEL
Brand: Cannondale Pages: 12

Signature DEF Series
Brand: Balcrank Pages: 12

Mini CERTI-LOK
Brand: Tyco Pages: 11

LSV28 S040-01M14 LF
Brand: Atlas Copco Pages: 136

9RS Series
Brand: Ingersoll-Rand Pages: 28

AGS 72-2 Lion
Brand: Grizzly Pages: 136

10692
Brand: ASTRO TOOL Corp. Pages: 2

R9PLUS
Brand: Leigh Pages: 20

BAS 14,4
Brand: Bavaria Pages: 34

LITHIUM II Series
Brand: Hytorc Pages: 36

KR8PNSE
Brand: HellermannTyton Pages: 3


