Automatic Technology GDO-8V2 EasyRoller II, Руководство по установке
Автоматический привод для ворот GDO-8V2 EasyRoller II - это надежное и легкое в использовании устройство. Установочные инструкции можно бесплатно скачать с нашего сайта. Подробное описание и инструкции по эксплуатации гарантируют безопасность и удобство использования продукта. Скачайте руководство на manualshive.com.
Поделиться
Скачать


Отзывы:
Нет отзывов
Похожие инструкции для GDO-8V2 EasyRoller II

ALPHA
Бренд: Wallace Perimeter Security Страницы: 182

DKL400U
Бренд: LockMaster Страницы: 18

RollerLift
Бренд: Chamberlain Страницы: 20

BIG METRO
Бренд: Nice Страницы: 12

CR502
Бренд: Nice Страницы: 96

SLH400
Бренд: Nice Страницы: 148

Security+ 1000SDC-R
Бренд: Chamberlain Страницы: 36

DC BLUE ADVANCED
Бренд: E.T. Systems Страницы: 32

SWIFT6
Бренд: DTM System Страницы: 16

CN738
Бренд: Rival Страницы: 4

FIBO 300 LB-1,5 HP
Бренд: fadini Страницы: 8

PasM24T
Бренд: DITEC Страницы: 42

entrematic TRAFFIC C
Бренд: DITEC Страницы: 44
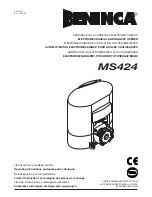
MS424
Бренд: Beninca Страницы: 24

ZK300DC
Бренд: TdA Страницы: 16

FROGPLUS-S7
Бренд: CAME Страницы: 28

SL300
Бренд: Assa Abloy Страницы: 22

Drive 300
Бренд: E.T. Systems Страницы: 50


