background image


Literature number 31970 

hydro flame

™ 

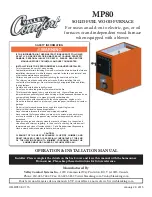
AF Series Furnaces Models  

AFSAD12111, AFSAD12121  

AFSD12111, AFSD12121 


AFSD16111, AFSD16121 
AFSD20111, AFSD20121 

Technical Installation Manual


1120 North Main Street • Elkhart, IN 46514 

USA & Canada :

 1-866-869-3118 

Internet:

 http://www.atwoodmobile.com 

English, Français (et Canada) 
 

This instruction manual is for use by an authorized service technician 
to install an Atwood 

– 

hydro flame

™ furnace. Should you require 

further information, contact your dealer or Atwood Mobile Products 
LLC. 
This furnace design has been certified for installation in recreation 
vehicles as a MSP Category III furnace. Follow this installation 
instruction to insure safe operation of the furnace. Failure to install 
furnace according to this installation instruction nullifies the furnace 
warranty. 


Effective 5/2014 


 WARNING


Installation of this appliance must be made in accordance with the written 
instructions provided in this manual. No agent, representative or 
employee of Atwood or other person has the authority to change, modify 
or waive and provision of the instructions contained in this manual.


WARNING 

Avoid possible injury or death 

Improper installation, adjustment, alteration, service or maintenance can 
cause  property  damage,  personal  injury  or  loss  of  life.  Refer  to  the 
installation  instructions  and/or  owner’s  manual  provided  with  this 
appliance.  A  qualified  installer,  service  agency  or  the  gas  supplier  must 
perform installation and service. 


 CRITICAL INSTALLATION WARNINGS 

  DO NOT install furnace on material that restricts return air, like carpet or 

any soft material such as vinyl. 

  DO NOT install furnace where clearance to combustibles cannot be 

maintained. 

  DO NOT modify furnace in any way. 

  DO NOT alter furnace for a positive grounding system. 

  DO NOT hi pot furnace unless electronic ignition system (circuit board) 

has been disconnected. 

  DO NOT use battery charger to supply power to DC model furnace 

even when testing. 

  DO NOT use 120-volt AC current with DC models. 

  DO NOT use furnace cabinet area as a storage compartment. 

  DO NOT vent furnace with venting system serving another appliance. 

  DO NOT vent furnace to an outside enclosed porch area. 

  DO NOT use for temporary heating of buildings or structures under 

construction. 

  Protect building materials from degrading from flue gas exhaust. 

  Protect furnace electrical components from water. 

  Compartments must be closed when operating unit. 

  Should the gas supply fail to shut off during operation or overheating 

occurs, shut the gas valve off to the furnace before shutting off electrical 
supply. 

  DO NOT use this furnace if any part has been under water. 


 CAUTION 

PERSONAL INJURY 

All  sheet  metal  edges  are  sharp  care  should  be  taken  when  handling  or 
brushing up against them. 


 FOR YOUR SAFETY 

Do not store or use gasoline or other flammable vapors and liquids in the 

vicinity of this or any other appliance.


 WARNING


Be sure the furnace and all ignition systems are “off” during any type of 
refueling and while vehicle is in motion or being towed.


TO THE INSTALLER:


  LEAVE THIS MANUAL WITH 

THE APPLIANCE. 

TO THE CONSUMER:


RETAIN THIS MANUAL FOR 

FUTURE REFERENCE.


SAFETY ALERT SYMBOLS 

Safety Symbols alerting you to potential personal safety 

hazards obey all safety messages following these symbols 


WARNING 

Avoid possible injury or 

death 


CAUTION 

Avoid possible injury 

and/or property damage 

 WARNING 

FIRE OR EXPLOSION


If the information in this manual is not followed exactly, a 
fire  or  explosion  may  result  causing  property  damage, 
personal injury or loss of life. 

FOR YOUR SAFETY 

WHAT TO DO IF YOU SMELL GAS: 


Extinguish any open flame. 


Evacuate all persons from the vehicle. 


Shut off the gas supply at the gas container or 
source. 


Do not touch any electrical switch, or use any 
phone or radio in the vehicle. 


Do not start the vehicle’s engine or electric 
generator. 


Contact the nearest gas supplier or qualified 
service technician for repairs. 


If you cannot reach a gas supplier or qualified 
service technician, contact the nearest fire 
department. 


Do not turn on the gas supply until the gas 
leak(s) has been repaired. 

A qualified Service Technician 

Service Center or gas supplier must perform 

installation and service. 


Summary of Contents for AFSAD12111

Page 1: ...DO NOT use furnace cabinet area as a storage compartment DO NOT vent furnace with venting system serving another appliance DO NOT vent furnace to an outside enclosed porch area DO NOT use for temporary heating of buildings or structures under construction Protect building materials from degrading from flue gas exhaust Protect furnace electrical components from water Compartments must be closed whe...

Page 2: ...cted 12 Volt Amperage AMPS 3 4 3 4 4 8 2 4 Power Supply Volt DC 12 12 12 12 Watts 41 41 56 34 Minimum Return Air 35 in2 35 in2 35 in2 35 in2 WC WATER COLUMN DUCTING CONFIGURATION Table 2 Models AFSD12 AFSD16 AFSD20 AFSAD12 Side Ducting 2 Ducts 2 Ducts 2 Ducts N A Front with Side Ducting 1 or 2 Ducts 1 or 2 Ducts 1 or 2 Ducts N A Front Only no Side Ducts Front Front Front Front DIMENSION Table 3 Ap...

Page 3: ...ition CAUTION Due to the differences in vinyl siding materials this appliance should not be installed without first consulting with the manufacturer of the siding or cutting the siding away from the area around the appliance vent A gas fired furnace for installation in a residential garage must be installed so the burner s and the ignition source are located not less than 18 in 457mm above the flo...

Page 4: ...h cutout about a 1 inch slip bezel around casing and flush inner flange with casing 4 Secure bezel to furnace casing with 6 screws 5 Push furnace and bezel back tight against side wall and secure with 14 screws 6 When installing screws DO NOT deform bezel 7 Connect the gas line to the valve and push the gas line plug into casing opening 8 Remove excess sealant from around bezel and visually inspec...

Page 5: ...d PROPANE GAS CONNECTION Propane Gas Pressure Test The furnace and any individual shut off valve must be disconnected from gas supply piping system during and pressure testing of system at test pressures of more than 1 2 PSI Before furnace is connected piping systems are to be tested to be leak free The test must maintain air pressure of a least 6 of mercury or 3 PSI for at least 10 minutes The en...

Page 6: ... and remain off until unit is reset by reactivating the thermostat Stop Read Users Information Manual supplied with furnace 1 Turn the manual valve if so equipped or the valve at the outside LP tank to the OFF position Do NOT force NOTE This furnace is equipped with a valve shut off switch with switch in OFF position Gas will not flow to burner nor will the furnace operate Turn switch to ON positi...

Page 7: ...7 WIRING AND LADDER DIAGRAM ...

Page 8: ...8 PART DRAWINGS PART LISTS ...

Page 9: ...9 ...

Page 10: ...10 ...

Page 11: ...lorsque vous effectuez le test NE PAS utiliser un courant alternatif de 120 V avec les modèles à courant continu NE PAS utiliser la zone du cabinet de fournaise comme compartiment de rangement NE PAS aérer la fournaise avec un système de ventilation pour entretenir un autre appareil NE PAS aérer la fournaise à un endroit extérieur fermé comme une véranda NE PAS utiliser pour le chauffage temporair...

Page 12: ...S ÉLECTRIQUES 6 INSTALLATION DU THERMOSTAT 6 INSTRUCTIONS D UTILISATION 6 POUR METTRE HORS TENSION 7 VÉRIFICATIONS DU SYSTÈME 7 SPÉCIFICATIONS MODÈLE Tableau 1 Nos de modèles AFSD12 AFSD16 AFSD20 AFSAD12 Type de gaz LP Propane LP Propane LP Propane LP Propane BTU en entrée 12 000 16 000 18 000 12 000 BTU en sortie 9 120 12 160 13 680 9 120 Conduit de pression statique 0 10 po WC 0 10 po WC 0 10 po...

Page 13: ...souples installez la fournaise sur des taquets ou sur un panneau de bois ou de métal s étendant de la largeur et profondeur complète de la fournaise plus un dégagement minimal pour les combustibles NE PAS utiliser de nettoyant à base de pétrole ou de type citron sur les pièces de plastique vous pourriez les endommager ATTENTION À cause des différences dans les matériaux de revêtement en vinyle cet...

Page 14: ...e dans le calfeutrage et inspectez visuellement le conduit pour vous assurer qu il est bien scellé fixez avec deux conduits et deux vis et retirez l excès de calfeutrage INSTALLATION STANDARD DE LA PORTE Figure 3 Toutes les surfaces en contact avec l extérieur du mur latéral doivent être étanches et scellées avec un scellant RTV Les conduits sont conçus pour permettre l évacuation d eau lorsqu ins...

Page 15: ...s de tuyauterie flexible Suivez les configurations de tuyauterie dans le tableau 2 Évitez des extrémités tranchantes ou des conduits écrasés Étirez tous les conduits et branchez les directement aux sorties gardant la quantité et les angles de tuyaux pliés au minimum 1 Retirez le plateau de déboucheur des sorties désirées See Figure 6 Si les deux sorties de 4 po ne sont pas utilisées laissez les en...

Page 16: ...19 17 11 16 87 65 52 43 37 33 29 26 17 Cette fournaise est conçue pour une mise à la terre négative de 12 V à courant continu seulement NE PAS essayer de modifier la fournaise pour un système de mise à la terre positif ou connecter la fournaise directement à un courant alternatif de 120 V Les dommages sur les composantes de la fournaise se produiront et la garantie sera annulée Utilisez un fil de ...

Page 17: ... éteignez l unité et contactez votre revendeur ou une agence locale de véhicules récréatifs Ne pas continuer faire fonctionner la fournaise par le thermostat espérant avoir une ignition POUR METTRE HORS TENSION 1 Mettez le thermostat au réglage le plus bas puis déplacez le levier dans la position ARRÊT 2 Tournez la valve manuelle d arrêt si équipé à la position ARRÊT Ne pas forcer VÉRIFICATIONS DU...

Reviews: