background image

1. Start using MISSION2 

1.1 Diving Safety 


Please read the user manual before using MISSION2 to ensure safe and proper use. 


The manual is based on the default settings of MISSION2. 


All dive gear will fail. It is not a question of whether it will fail, but when it will fail. 
There may also be bugs in the firmware. Do not use MISSION2 as your only diving 
instrument. You should have a detailed diving plan before each dive. 


Diving involves risk. Only trained divers should use the MISSION2. Dive computers 
are not a substitute for training. Do not use the MISSION2 on any dive beyond your 
certification level. Diving with an incorrect assessment of your ability and physical 
condition can result in injury or even death. 


MISSION2 is designed for recreational diving. Do not use MISSION2 for commercial 
diving applications. 


It is assumed that the diver's ascent rate is 10m/min(33ft/min). Ascending 
significantly faster than this will impact decompression calculations. 


Please follow the decompression stops advised by MISSION2. Violation will increase 
the risk of decompression sickness, which may lead to serious injury or death. 


The MISSION2 is a precision instrument. Take care to protect your computer from 
damaging shocks or chemical exposure. Store your MISSION2 out of direct sunlight 
and avoid exposure to excessive heat or leaving it in a vehicle exposed to the sun. 


Do not wear your MISSION2 in hot spring pools or saunas. 


After each day of diving, rinse the MISSION2 thoroughly with fresh water. Do not use 
high-pressure sprays to avoid damage to buttons or sensors. If the device is covered 
with dirt, soak it in fresh water. Do not use any solvents or detergents. 


Please use the Screen Guard included in the package. Replacement screen guards 
may be purchased from an authorized dealer. 


The dive computer is a personal device. Sharing shall be avoided as it may cause 
divers to misjudge diving information and cause serious injury. 


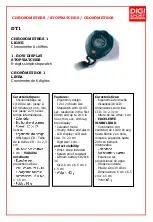
1.2 What's in the box? 

* MISSION2 
* Charging Cable 
* Scratch Guard*2 
* Silicone strap 

Summary of Contents for MISSION2

Page 1: ...y faster than this will impact decompression calculations Please follow the decompression stops advised by MISSION2 Violation will increase the risk of decompression sickness which may lead to serious injury or death The MISSION2 is a precision instrument Take care to protect your computer from damaging shocks or chemical exposure Store your MISSION2 out of direct sunlight and avoid exposure to ex...

Page 2: ...take out the strap and release the strap spring clip To replace a new strap simply follow the opposite steps The strap is a consumable item and when it must be replaced with a new strap you can make a purchase through the dealer or directly at ATMOS 1 4 Using MISSION2 for the first time 1 4 1 Button Function Press button A Up Smart Notification Hold button A Quick mobile phone Bluetooth On Off Pre...

Page 3: ... and cause the watch to overheat It takes 2 hours to full charge and the screen will display 100 The lithium battery in MISSION2 can be damaged if not fully discharged MISSION2 has an internal protection mechanism which will disconnection the battery before it is fully discharged However a small amount of discharge will still occur If it is left unused for a long time without charging the lithium ...

Page 4: ...NNECT CONNECT TO MOBILE PHONE iOS Android ON 3 In the App Select your MISSION2 Enter the 5 Pin code shown on MISSION2 to complete the connection Long press button A on the main screen to switch the Bluetooth on and off Unpair 1 MISSION2 SETTING SMART CONNECT UNPAIR YES 2 ATMOS App Select or swipe left to delete the paired MISSION2 3 Your mobile phone Bluetooth Forget the device 1 6 Smart Notificat...

Page 5: ...N2 updated Checking the firmware Settings System About The Model SN and FW will be displayed Updating Firmware Download PC tool 1 MISSION2 Setting Firmware update the firmware update screen will appear 2 Connect MISSION2 with the PC via USB charging cable and the FIRMWARE folder will appear 3 Go to ATMOS official website https www atmos app to download the latest firmware 4 Double click to open th...

Page 6: ...rt rate measurement The wrist optical heart rate sensor measures the heart rate with the LED optical sensor on the device The blood flow per unit area in the blood vessel will change with the heart pulse and the light sensor will obtain the change of the user s heart rate based on the change of the blood Enable Heart Rate Settings Widget Heart Rate On Checking the heart rate after enabling the wid...

Page 7: ...e to the heart rate sensor on the back of MISSION2 The heart rate sensor should be kept clean Note MISSION2 is not a medical device so the heart rate data should not be used as a reference for medical use or medical diagnosis When the heart rate function is enabled it is less energy efficient 2 2 Sleep Monitoring The sleep monitoring function is currently only used for sleep monitoring at night an...

Page 8: ...n page The orange outer circle is the step counter and the yellow inner circle represents calories The increase in steps and calorie consumption will gradually form a circle When the set target value is reached it will be a complete circle Press button B again on the steps and calories screen to enter individual step and calories information page MISSION2 will display the weekly calories and steps...

Page 9: ...Widget Outdoor On 2 4 1 Sunrise Sunset time Show sunrise and sunset information at current location The sunrise and sunset time will only be displayed after the GPS positioning is successful The time will not be displayed if the GPS positioning is not completed 2 4 2 Altitude Calibration Press button B in the sunrise and sunset screen to enter ALT altitude the screen will display the altitude valu...

Page 10: ...es to ensure the best experience The compass is magnetically oriented and will be disturbed if it is too close to electric fields magnets and metal objects The electronic compass is small and subject to interference Please avoid wearing another computer compass or metal objects next to the MISSION2 Calibration is recommended before every dive to ensure the best experience Compass Calibration Selec...

Page 11: ...ugh the mobile phone GPS or select the location via the search function 5 Please check MISSION2 Widget if tidal information is displayed Tidal Encyclopedia The phenomenon of rising sea level is called flood the falling sea level is called ebb When changing from high tide to low tide when the water level reaches the relative highest it is called high water when changing from low tide to high tide w...

Page 12: ...lay the weather data 4 Please check MISSION2 Widget if weather information is displayed 2 7 Stopwatch Press and Hold button C for 2 seconds while in watch mode Press button A Start Press button B Mark current time 4 set can be displayed Press button A Stop Press button A when stopped Reset Press and Hold button D for 2 seconds Exit 2 8 Alarm Clock MISSION2 provides three alarm clock settings 1 Go ...

Page 13: ... off MISSION2 will not automatically turn on dive mode and no icon will appear at the bottom of the time screen 3 1 2 No Fly Time and Surface Interval Due to residual nitrogen in the body after diving please wait until the No Fly time icon disappears before flying or ascending to altitudes above 300m 1 000ft Upper left No fly time Icon Displays for 24hrs starting from the moment you exit the water...

Page 14: ... Settings Do not change any setting until you understand the effects Adjustable Function Dive Plan Dive plan is used to estimate the no decompression limit for diving at the planned depth at a specified time in the future See 3 2 5 Dive Plan Dive Alarm Time Alarm Time Alarm display notifies the diver when the Dive Time has been reached 1 set Depth Alarm Depth Alarm notifies the diver when the maxi...

Page 15: ... and the depth of fresh water will be deeper under the same pressure value Air Nitrox Setting While in Scuba Mode Press button B to enter Advanced settings Then scroll to the Air Mix 21 40 and PPO2 1 2 1 6 settings Always check the oxygen percentage and MOD before each dive Do not exceed to prevent central nervous system CNS O2 toxicity Tank Volume Set the tank volume for diving and enter the resi...

Page 16: ...tion Depth HR Bottom right 21 AIR 22 40 NITROX During the dive Upper left Compass heading Left Ascent rate bar m min Left Water temperature Upper right NDL No Decompression Limit Mid right Current depth Bottom right Dive time Press button C to scroll and view maximum depth average depth TTS surface time heart rate Press button E Turns the backlight On Off TTS Time to surface represents the time to...

Page 17: ...pass Heading Hold button A to enter the Compass Heading in preparation screen or during dive Hold button B to enter the Mark Compass Heading Use button B to mark heading Use button A to unmark heading Fast Ascent When the ascent speed exceeds 13m min the ascent rate bar will turn red and MISSION2 will notify with a Fast Ascent Alarm if it continues for 5 seconds Time Alarm ...

Page 18: ...m Depth Alarm notifies the diver every minute when the maximum depth has been reached Battery Low Battery Low Notifies the diver when battery power is low Safety Stop The safety stop can be switched on and off and can be set according to personal needs and dive plans The default is ON ...

Page 19: ...the countdown will stop and a Safety Stop Pause reminder will appear Safety Stop Clear Safety Clear notifies the diver when the safety stop is completed NDL below 3mins LOW NDL notifies the diver every minute when the remaining NDL time is less than 3 mins Decompression Stop ...

Page 20: ...me 3 min Please ascend slowly to the depth for a decompression stop As ascending is decompression it is possible to end decompression before reaching the depth for a decompression stop Missed Stop Missed Stop alarm appears when the diver has ascended above the Deco Stop ceiling depth Please decent below the Deco Stop depth to continue decompression Maximum Operation Depth Immediately ascend to a s...

Page 21: ... It is the sum of all decompression stops and ascent times on the current dive It is based on the following calculations Assumes that the diver s ascent rate is 10m min 33ft min Follows decompression stops calculated by dive computer Check SPG SPG Alarm notifies the pressure when the set dive time has been reached 3 2 4 Scuba Log Scuba Log can be viewed in Settings Log Description ...

Page 22: ...rtain period of rest Press button B to switch between depth and surface rest time Press button A and C change the planned depth and surface rest time The above NDL is the calculation result Example If you continue to dive to 23m after a 45 minute surface internal you will have a 22 minute NDL 3 2 6 High Altitude MISSION2 will automatically read the air pressure at current location It will calibrat...

Page 23: ...reen light once the positioning is complete The heart rate function is disabled by default during dive Press button C to enter the Advanced setting Press button B button to start diving Dynamic apnea mode Set the pool distance before each start 3 3 2 Freedive Setting Press button C in Freedive preparation screen to enter the Advanced Settings Do not change any setting until you understand the effe...

Page 24: ...salt water is about 3 higher than that of fresh water and the depth of fresh water will be deeper under the same pressure value Optical heart rate The heart rate function is disabled by default during diving and can be enabled according to personal needs Backlight Adjust the backlight constant brightness brightness level and backlight on wrist raise Factory Reset Restore settings to factory defaul...

Page 25: ...to surface After returning to the surface the maximum depth dive time and dive count will be displayed During surface internal Upper left current count of consecutive dives Left Water temperature Upper right Stopwatch Mid right Surface internal time Bottom right Press button C to switch between maximum time maximum depth heart rate time compass Press button D for page setting save exit Dynamic apn...

Page 26: ...rnal time Bottom Battery and time Press button A to start During the dive Press the button A to end End of dynamic apnea Enter distance During surface internal SI continues to accumulate The blue frame sets will increase with the number of dynamic apnea ...

Page 27: ...PS will start blinking and positioning It will stop blinking and display a green light once the positioning is complete The heart rate function is disabled by default during dive Press button C to enter the Advanced setting Press button B button to start diving 3 4 2 Gauge Setting Press button C in Gauge preparation screen to enter the Advanced Settings Do not change any setting until you understa...

Page 28: ...al needs Backlight Adjust the backlight constant brightness brightness level and backlight on wrist raise Factory Reset Restore settings to factory defaults 3 3 4 Gauge Screen Layout and Alarms Predive Upper left Compass heading Mid left Water temperature Upper right Set time alarm Mid right Current depth Bottom right set depth alarm During the dive Upper right Stopwatch Button A Start Reset Mid r...

Page 29: ...nking satellite icon indicates that the GPS signal is being acquired P S You can use the mobile phone to sync with the GPS ephemeris function go to Your Device in the ATMOS App and select GPS It is not required but it can greatly shorten the positioning time The first positioning takes longer about 1 2 minutes After 3 hours it is recommended to download the ephemeris again through the App 4 MISSIO...

Page 30: ... 4 1 2 Dive Site Dive Site function can be accessed in Scuba Freedive Gauge Mode s advanced setting prior to descent after the GPS positioning is complete 1 Nearby Sites Show 5 nearby dive sites in the ATMOS database 2 Add Add new set of dive sites named by date and with GPS location You can also add synchronize and change dive site names through ATMOS App My List View your Dive Sites ...

Page 31: ...uaranteed The following are common disturbances High rise buildings With cement wall of high rise buildings and alleys on both sides the signal received will be relatively less Forest roads Dense leaves and branches act as concrete walls which will reduce the penetration of GPS electromagnetic waves Adjacent to high voltage towers As electromagnetic waves of different frequencies will be generated...

Page 32: ... 2 Running Terminology PACE The time it takes to run or complete a kilometer or mile For example a runner says that he has a pace of 7 minutes which means that he will run a kilometer in 7 minutes STRIDE The distance between two feet after initial contact of one foot CAD Number of steps per minute a person takes during a run Lap Count Record split pace by distance or time as a tool for runners to ...

Page 33: ...pause and the time will not continue to count Stride Enter the stride distance the default value is converted from the height value entered by user Optical heart rate Heart rate sensing function can be enabled according to needs Sensors Add sensors such as heart rate monitor Backlight Adjust the backlight constant brightness brightness level and backlight on wrist raise Factory Reset Restore setti...

Page 34: ...per right bottom left and bottom right field information can go to the setting field to adjust the information you want to see such as climb temperature altitude etc Automatic Lap Count The lap will be counted automatically when the set time or distance has been reached Manual Lap Count Press button A to manually count the lap Auto Pause ...

Page 35: ...e and exit 5 2 Cycling Mode Cycling mode provides outdoor mode and two options in indoor mode 5 2 1 Cycling Preparation Screen and Operation Cycling Mode The GPS will start blinking and positioning It will stop blinking and display a green light once the positioning is complete Heart rate will be displayed when turned ON Indoor bicycle mode The heart rate and sensor icon connection icon will be di...

Page 36: ... the speed Wheel diameter Enter the wheel diameter of the bicycle for example 700 23C for road bikes is equivalent to 2096mm Wheel sizes are usually marked on both sides of the tires This is not a complete list If you do not have your wheel diameter information you can search the Internet and calculate the sizes that are not in the list Wheelset RIMS mm RIMS mm 24 1 75 1890 27 1 3 8 2169 24 1 1 4 ...

Page 37: ...61 700 45C 2242 5 2 3 Cycling Setting Press button C in cycling preparation screen to enter the Advanced Settings Adjustable Function Fields Fields displayed on the cycling sub screen Adjust the displayed information such as climb temperature altitude etc Reminder Distance reminder Distance reminder will appear when the set distance has been reached Time Alarm Time Alarm display notifies the diver...

Page 38: ...abled according to needs Sensors Add sensors such as heart rate monitor and cadence sensor Backlight Adjust the backlight constant brightness brightness level and backlight on wrist raise Factory Reset Restore settings to factory defaults 5 2 4 Cycling Screen Layout and Alarms Cycling Main Screen Upper Heart rate First field distance Second field cycling time Third field speed Bottom Battery and t...

Page 39: ...be counted automatically when the set time or distance has been reached Manual Lap Count Press button A to manually count the lap Auto Pause If you turn on the auto pause function when you stop moving forward it will automatically pause the time will not continue to be calculated and it will automatically continue until you advance again ...

Page 40: ...MISSION2 for the first time please follow the manual to select the length of the pool or customize the distance After setting the distance MISSION2 will use this setting the next time you swim If the distance changes go to the Setting to change Open water The GPS will start blinking and positioning It will stop blinking and display a green light once the positioning is complete Heart rate will be ...

Page 41: ...he set distance has been reached Time Alarm Time Alarm display notifies the diver when the Dive Time has been reached Swimming Distance Enter the pool distance 25m 50m or custom Lap Count Open Water Lap Count Button Press button A to manually count the lap There are two modes for automatic lap count Distance Lap Count Count the lap automatically when the set distance has been reached Time lap coun...

Page 42: ...ime without turning Third field 100m pace Bottom Battery and time Pool and Open Water sub screen Press button C in the main swimming screen to go to the sub screen and press button C again to return to the main screen The upper left upper right bottom left and bottom right field information can go to the setting field to adjust the information you want to see such as climb temperature altitude etc...

Page 43: ...t successful before starting to move the accuracy of the daily log record will be affected 5 4 Ski Board Due to the characteristics of the battery using MISSION2 in a sub zero environment may encounter a situation where it cannot be powered on It is recommended to power it on before entering an extremely cold environment Avoid rinsing it with hot water when returning from a sub zero environment to...

Page 44: ... been reached Time reminder Time reminder will appear when the set time has been reached Lap Count Lap Count Button Press button A to manually count the lap There are two modes for automatic lap count Distance Lap Count Count the lap automatically when the set distance has been reached Time lap count Count the lap automatically when the set time has been reached Auto Pause When you stop running MI...

Page 45: ...eld speed Bottom Battery and time Ski board sub screen Press button C on the main ski board screen to go to the sub screen and press button C again to return to the main screen The upper left upper right bottom left and bottom right field information can go to the setting field to adjust the information you want to see such as climb temperature altitude etc Automatic Lap Count ...

Page 46: ...d Manual Lap Count Press button A to manually count the lap Auto Pause If you turn on the auto pause function when you stop moving forward it will automatically pause the time will not continue to be calculated and it will automatically continue until you advance again Pause and save ...

Page 47: ...arge once every 2 months to extend the lifespan of the battery Static electricity might cause MISSION2 to malfunction and strong static electricity can damage the electronic components MISSION2 has a compass function so strong magnetic field such as one emitted by medical equipment shall be avoided as it may cause the compass to fail or malfunction MISSION2 can withstand the swaying swinging and o...

Page 48: ...the receiver is connected Consult the dealer or an experienced radio TV technician for help FCC Caution Any changes or modifications not expressly approved by the party responsible for compliance could void the user s authority to operate this equipment This device complies with Part 15 of the FCC Rules Operation is subject to the following two conditions 1 This device may not cause harmful interf...

Reviews: