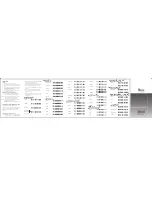

2
Interface Selection
RS-232
USB HID
USB COM
RS-232/USB HID *
Auto detection
Scan Mode
Good-read off
Momentary *
Alternate
Timeout off
Continue
Test only
Note:
*
-Default
2
Interface Selection
RS-232
USB HID
USB COM
RS-232/USB HID *
Auto detection
Scan Mode
Good-read off
Momentary *
Alternate
Timeout off
Continue
Test only
Note:
*
-Default
3
Keyboard Layout
USA *
Belgium
Danish
France
Germany
Italian
Portuguese
Spanish
Swedish
Switzerland
UK
Latin American
Japanese
3
Keyboard Layout
USA *
Belgium
Danish
France
Germany
Italian
Portuguese
Spanish
Swedish
Switzerland
UK
Latin American
Japanese
4
RS-232 Baud Rate Setting
300 BPS
600 BPS
1200 BPS
2400 BPS
4800 BPS
9600 BPS *
19200 BPS
38400 BPS
57600BPS
115200BPS
4
RS-232 Baud Rate Setting
300 BPS
600 BPS
1200 BPS
2400 BPS
4800 BPS
9600 BPS *
19200 BPS
38400 BPS
57600BPS
115200BPS
5
RS-232 Flow Control
None *
RTS/CTS
Xon/Xoff
ACK/NAK
RS-232 Parity Setting
None *
Odd
Even
RS-232 Data Bit Setting
8 bits *
7 bits
5
RS-232 Flow Control
None *
RTS/CTS
Xon/Xoff
ACK/NAK
RS-232 Parity Setting
None *
Odd
Even
RS-232 Data Bit Setting
8 bits *
7 bits
5
RS-232 Flow Control
None *
RTS/CTS
Xon/Xoff
ACK/NAK
RS-232 Parity Setting
None *
Odd
Even
RS-232 Data Bit Setting
8 bits *
7 bits
6
Stand Mode Enable
Stand mode
+
Suffix Characters Setting
(HID & USB )
Enter *
Tab
None
Enable Barcode
Industrial 2 of 5
Matrix 2 of 5 Eur
Standard 2 of 5
Codabar
Code 93
Code 11
6
Stand Mode Enable
Stand mode
+
Suffix Characters Setting
(HID & USB )
Enter *
Tab
None
Enable Barcode
Industrial 2 of 5
Matrix 2 of 5 Eur
Standard 2 of 5
Codabar
Code 93
Code 11
6
Stand Mode Enable
Stand mode
+
Suffix Characters Setting
(HID & USB )
Enter *
Tab
None
Enable Barcode
Industrial 2 of 5
Matrix 2 of 5 Eur
Standard 2 of 5
Codabar
Code 93
Code 11
0
Introduction
RS-232
1) Disconnect power to the terminal/computer.
2) Connect the appropriate interface cable to the scanner
3) Connect the external power supply (DC adapter) to the
scanner
4) Plug the serial connector into the serial port on the back
of your computer/terminal. Tighten the two screws to
secure the connector to the port.
5) Plug the power pack into power source.
6) Once the scanner has been fully connected, turn the
terminal/computer power back on.
USB (Simulate with keyboard wedge)
1) Connect the USB cable between scanner and PC
2) Windows will automatically detect the USB device.
Note:
If any of the above operation is incorrect, turn off the
power immediately and check any improper
connections. Go through all above steps again.
Note:
If you need more programming parameters to setup
your ArgoScan scanner, please go to
www.argox.com
and download the completed user
’
s
manual.
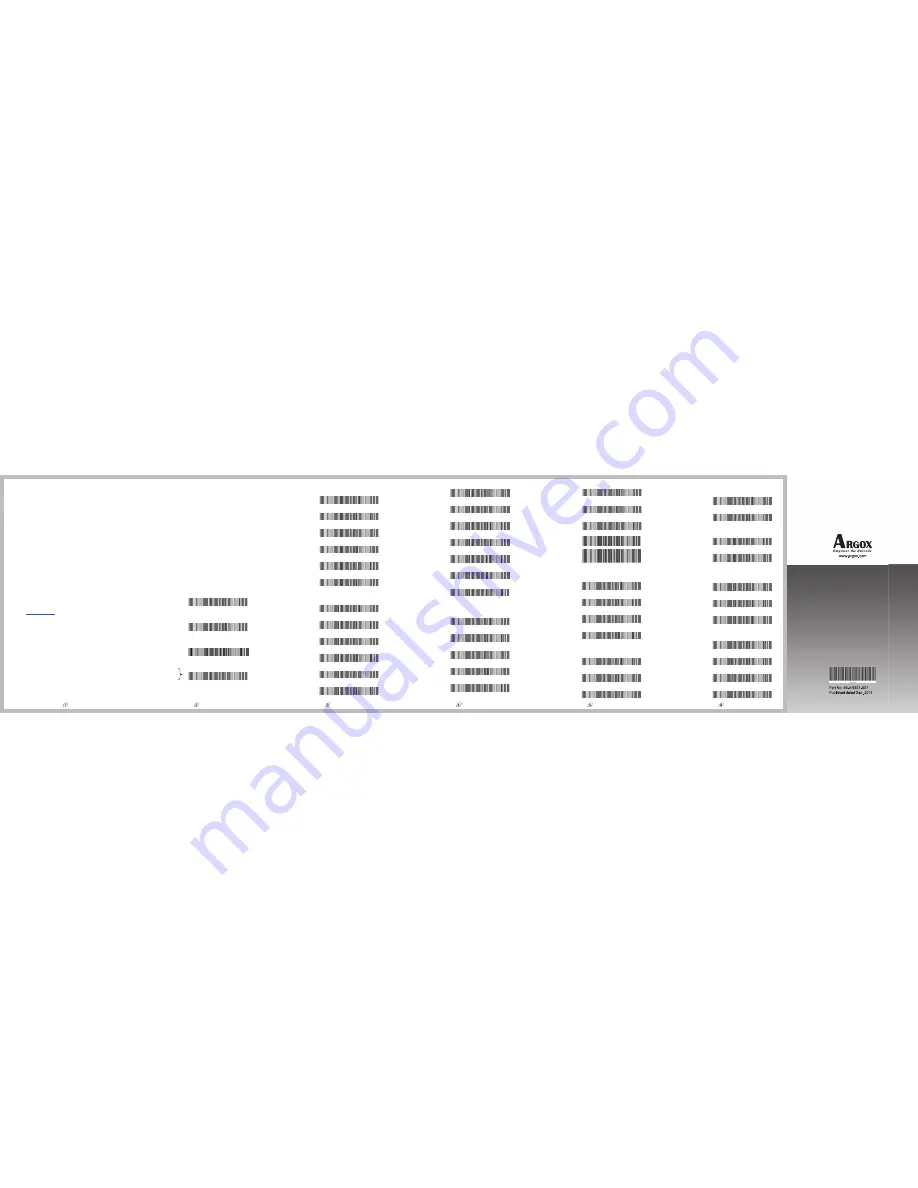
1
Programming the ArgoScan AR-3000
To program the AR-3000, you must scan a series of
programming barcode in the correct order. Fold out the back
cover of this manual, you will see a table of alphanumeric
barcodes, which are used to program the various options
presented.
To program each option, you must:
1. Scan the
Program
barcode on the parameter setting part.
2. Enter the option mode by scanning the
Option Bar Code
(also on the Parameter setting part).
3. To the right of the option barcode, the necessary
alphanumeric inputs are listed. Scan these alphanumeric
entries from the
back fold out
page. To confirm above
steps, you must scan the
Finish
barcode on the back fold
out page.
4. Once you have finished programming. Scan the
Exit
barcode, listed on the lower right hand corner of each
parameter setting part.
5. In this Quick Start Guide, you will only need to scan the
single barcodes which are specially made for this QSG
(Quick Start Guide).


