Allen-Bradley 1747-PT1, User Manual
The Allen-Bradley 1747-PT1 is a versatile industrial communication interface module. To ensure smooth operation and optimal performance, refer to the comprehensive User Manual available for free download on manualshive.com, offering step-by-step instructions and insightful guidelines. Unlock the full potential of this product with our downloadable manual today!
Share
Download


Reviews:
No comments
Related manuals for 1747-PT1

Mobile POS
Brand: Handpoint Pages: 12

EZPPC70-2B-C1G
Brand: EBN Technology Pages: 21

H19-ExReady
Brand: TCi Pages: 24

T19-Slim-PC
Brand: TCi Pages: 16

Link/2500
Brand: Ingenico group Pages: 25
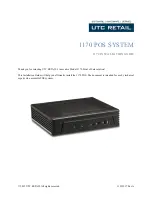
1170
Brand: UTC Pages: 9

Anypos30
Brand: Wintec Pages: 10

FD150
Brand: EVOLV Pages: 2

G-010G-A
Brand: Nokia Pages: 3

G-010G-T
Brand: Nokia Pages: 3

30 GSM
Brand: Nokia Pages: 114

DNT2Mi mp
Brand: Nokia Pages: 128

7368 ISAM ONT G-240W-C
Brand: Nokia Pages: 146

PageCounter
Brand: Equitrac Pages: 126

SB9095
Brand: Bematech Pages: 28

Data Collection Terminal DC7000
Brand: Acroprint Pages: 36

BM7500
Brand: Aratek Biometrics Technology Pages: 11

AKS 100 COMPACT
Brand: Designa Pages: 31


