Alienware AW2720HFA, User Manual
The Alienware AW2720HFA is an exceptional gaming monitor designed to deliver immersive visuals and smooth gameplay experiences. To unleash its full potential, make sure to download the User Manual. Get all the essential guidance and insights absolutely free from manualshive.com. Experience gaming like never before!
Share
Download


Reviews:
No comments
Related manuals for AW2720HFA

DPLUS 74SB -BKB
Brand: Mitsubishi Pages: 176

MC14
Brand: TCL Pages: 13

TrueGuard PRO
Brand: OmniMetrix Pages: 6

706TSA
Brand: Xenarc Pages: 19

HY101CTM
Brand: HAOYU Pages: 9

WA-88
Brand: B.Well Pages: 36

HL205
Brand: Hanns.G Pages: 24

CM16a
Brand: QSC Pages: 40

PD160487
Brand: Graco Pages: 6

MT-1 Series
Brand: Mitsutech Pages: 10

OF-215P-B1
Brand: MicroTouch Pages: 40
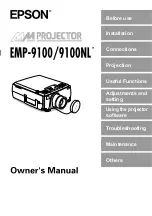
EMP-9100
Brand: Epson Pages: 117

EMP-830
Brand: Epson Pages: 141

EMP-9100
Brand: Epson Pages: 3

HCM9LWAT11
Brand: HCL Pages: 58

Elvox 6624
Brand: Vimar Pages: 20

97133
Brand: AEG Pages: 76

UltraSharp U2417HA
Brand: Dell Pages: 62


