background image

©2009 Alamo Group Inc.

EAGLE 10/15

Published 03/09


     Part NO. 00780567C

OPERATOR’S MANUAL 

ALAMO INDUSTRIAL 

1502 East Walnut
Seguin, Texas 78155
830-379-1480

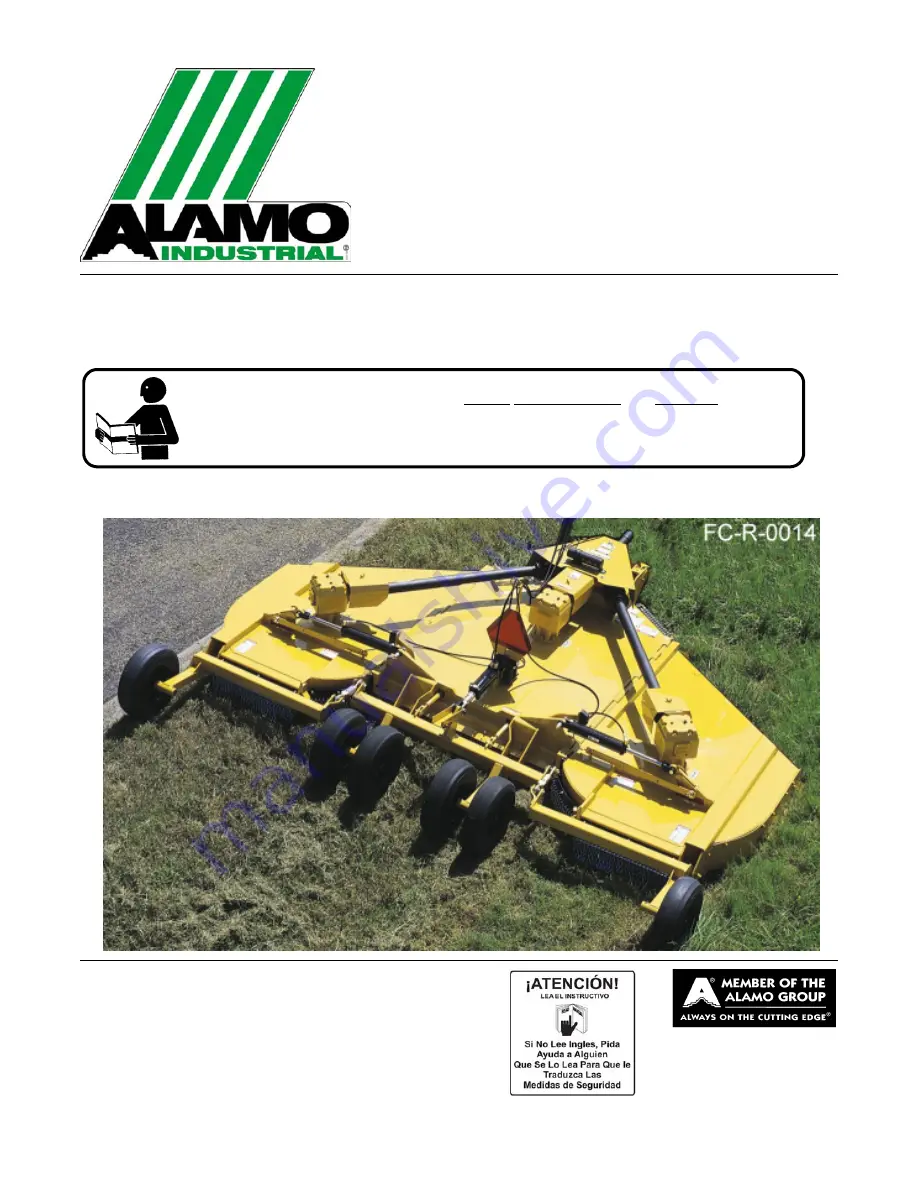
FLEX-WING MECHANICAL LEVEL

LIFT ROTARY CUTTER/SHREDDER

This Operator's Manual is an integral part of the safe operation of this machine and must
be maintained with the unit at all times.  READ, UNDERSTAND, and FOLLOW the Safety
and Operation Instructions contained in this manual before operating the equipment. 

C01-

Cover

$0.00

Summary of Contents for EAGLE 10

Page 1: ...5 830 379 1480 FLEX WING MECHANICAL LEVEL LIFT ROTARY CUTTER SHREDDER This Operator s Manual is an integral part of the safe operation of this machine and must be maintained with the unit at all times...

Page 2: ...safety equipment properly attached to minimize the chance of accidents BEFORE YOU START Read the safety messages on the implement and shown in your manual Observe the rules of safety and common sense...

Page 3: ...ctions 3 9 OPERATION SECTION 4 1 Standard Equipment and Specifications 4 3 OPERATOR REQUIREMENTS 4 4 TRACTOR REQUIREMENTS 4 5 ROPS and Seat Belt 4 5 Tractor Safety Devices 4 5 Drawbar 4 6 Tractor Hydr...

Page 4: ...INTENANCE SECTION 5 1 Lubrication 5 2 WHEEL HUB ASSEMBLY 5 4 Tongue 5 4 CENTER WING GEARBOXES 5 5 DIVIDER GEARBOX 5 5 DRIVELINES 5 6 MAIN CV DRIVELINE SAFETY SHIELD 5 7 CAT IV WING DRIVELINE SHIELDS 5...

Page 5: ...wn this video and presented you a DVD Video when you purchased your mower If you or any mower operator have not seen this video Watch the Video Read this Operator s Manual and Complete the Video Guide...

Page 6: ...MA Mower Operator Safety Video Mower Operator s Manual AEM Mower Operator s Safety Manual Requester Name Phone Requester Address City State Zip Code Mower Model Serial Number Date Purchased DealerSale...

Page 7: ...Safety Section 1 1 2009 Alamo Group Inc SAFETY SECTION...

Page 8: ...are intended to warn the owner operator of impending hazards and the degree of possible injury faced when operating this equipment Indicates an imminently hazardous situation that if not avoided WILL...

Page 9: ...e operator should remain in his seat for 60 seconds after the brake has been set the PTO disengaged the tractor turned off and all evidence of rotation has ceased S3PT 10 Wait a minute Save a life Nev...

Page 10: ...r around Tractor or Implement Children can slip or fall off the Equipment and be injured or killed Children can cause the Implement to shift or fall crushing themselves or others SG 25 NEVER use drugs...

Page 11: ...he Tractor and perform repairs before resuming operation Serious injury and possible death could occur from not maintaining this Implement and Tractor in good operating condition SG 36 Avoid contact w...

Page 12: ...ement s wings Make sure no bystanders are close by or underneath the wings Allow ample clearance around the implement when folding or unfolding the wings Use extreme caution around buildings or overhe...

Page 13: ...e the Tractor controls from the tractor seat only SG 9 Never allow children or other persons to ride on the Tractor or Implement Falling off can result in serious injury or death SG 10 Never allow chi...

Page 14: ...nd you Inadvertent movement of the Tractor or Implement may cause serious injury or death SG 29 In case of mechanical difficulty during operation place the transmission in the park position set the pa...

Page 15: ...marked and carefully avoided by the operator Stop mowing immediately if blades strike a foreign object Repair all damage and make certain rotor or blade carrier is balanced before resuming mowing SGM...

Page 16: ...see Mower Standard Equipment and Specifications DO NOT use this mower to cut vegetation above the Mower s rated capacity or to cut any type of non vegetative material Only operate this Mower on a pro...

Page 17: ...final cut more uniform SRM 01 Do Not attempt to raise or lower the implement wing unless the Implement tongue is securely attached to the Tractor drawbar The Implement could tip over and cause equipm...

Page 18: ...eline back and forth several times to ensure it is securely attached A driveline not attached correctly to the Tractor PTO shaft could come loose and result in personal injury and damage to the Implem...

Page 19: ...ol which could result in property damage or possible injury Do not transport unless 3 Point lift lever is fully raised and in the latched transport position Dropping implement in transport can cause s...

Page 20: ...port the Tractor and Implement at the speeds which allow you to properly control the equipment Be aware of the operating conditions Do not operate the Tractor with weak or faulty brakes or worn tires...

Page 21: ...aintain adequate vision of the public roadway and traffic can result in serious injury or even death STI 10 Make sure the PTO shield integral driveline shields and input shields are is installed when...

Page 22: ...s and lubrication according to the maintenance section Ensure the unit is properly lubricated as specified in the lubrication schedule and all bolts and nuts are properly torqued Failure to properly s...

Page 23: ...arts may reduce mower performance void mower warranties and present a safety hazard Use genuine Alamo Industrial mower parts for economy and safety SPRM 1 SEE YOUR ALAMO DEALER Be sure you have adequa...

Page 24: ...safe operation Damage to the decals may occur while in shipping use or reconditioning Alamo Industrial cares about the safety of its customers operators and bystanders and will replace the safety deca...

Page 25: ...RUCT Slip Clutch Adjustment 17 00763977 1 INSTRUCT Notice to Owner 18 D102 1 INSTRUCT Dbar to PTO distance safety chain 19 D137 2 INSTRUCT CCW Blade Rotation 20 D138 1 0 INSTRUCT CW Blade Roation 21 0...

Page 26: ...English please find someone who knows how to read English P N 00725746 DANGER Stay clear when lowering or raising wings P N 00753840 DANGER Guard Missing Do Not Operate If you see this decal Do Not O...

Page 27: ...s such as wire cable metal objects and all other foreign material Foreign material can be thrown from the mower and cause serious bodily injury to the operator and passerby Do Not let rotating blades...

Page 28: ...lines are correct length and are securely attached P N 00756494 IMPORTANT Use only Genuine Alamo Industrial replacement parts P N 02925100 WARNING Jack Maximum Capacity 3 200 lbs Side Load 2 000 lbs P...

Page 29: ...SAFETY EAGLE 15 03 09 Safety Section 1 23 2009 Alamo Group Inc SAFETY Multi Hazard Decal Sheet P N 00749117...

Page 30: ...center section which can cause SERIOUS BODILY INJURY or DEATH Without weight Do not fold wing Attach transport strap securely to prevent inadvertent dropping from the transport position and possible...

Page 31: ...lectors clean and visible P N 1458392 Amber Reflector Keep reflectors clean and visible P N 1458393 Operator s Manual with repair parts and warranty was attached to this implement during final inspect...

Page 32: ...15 03 09 Safety Section 1 26 2009 Alamo Group Inc SAFETY Blade Rotation Counter Clockwise P N D137 Blade Rotation Clockwise P N D138 NAME LOGO Alamo Industrial P N 02960766 Name LOGO Alamo Industrial...

Page 33: ...o Group Inc SAFETY WARNING DO NOT transport at speeds higher than 20 mph Only transport behind a properly sized and equipped tractor P N 00777394 NAME LOGO EAGLE 15 EAGLE 15 NAME LOGO EAGLE 10 EAGLE 1...

Page 34: ...1 28 2009 Alamo Group Inc SAFETY Read Operator s Manual The operator s manual is located inside this canister If the manual is missing order one from your dealer P N 00776031 PELIGRO Spanish Translati...

Page 35: ...operation and servicing of all equipment with which the employee is or will be involved Employer Responsibilities To ensure employee safety during Tractor and Implement operation it is the employer s...

Page 36: ......

Page 37: ......

Page 38: ......

Page 39: ......

Page 40: ......

Page 41: ......

Page 42: ......

Page 43: ......

Page 44: ......

Page 45: ......

Page 46: ......

Page 47: ......

Page 48: ......

Page 49: ......

Page 50: ......

Page 51: ......

Page 52: ......

Page 53: ......

Page 54: ......

Page 55: ......

Page 56: ......

Page 57: ......

Page 58: ......

Page 59: ......

Page 60: ......

Page 61: ......

Page 62: ......

Page 63: ......

Page 64: ......

Page 65: ......

Page 66: ......

Page 67: ......

Page 68: ......

Page 69: ......

Page 70: ......

Page 71: ......

Page 72: ......

Page 73: ......

Page 74: ......

Page 75: ......

Page 76: ......

Page 77: ......

Page 78: ......

Page 79: ......

Page 80: ......

Page 81: ...Introduction Section 2 1 2009 Alamo Group Inc INTRODUCTION SECTION...

Page 82: ...ically offers three types of shielding to protect the operator passerby livestock and property from thrown objects deflectors single chain guards and double chainguards Shielding should be selected ba...

Page 83: ...540 or 1000 RPM Should you desire to change PTO input speed contact your local Alamo Industrial dealer who will assist you in performing the necessary modifications This machine is recommended for use...

Page 84: ...t 2 Fill out the Warranty Card in full Be sure to answer all questions including the Serial Number of the implement Mail within 30 days of delivery date of this implement NOTE Warranties are honored o...

Page 85: ...Assembly Section 3 1 2009 Alamo Group Inc ASSEMBLY SECTION...

Page 86: ...Cylinders are filled with oil Always keep bystanders away while raising and lowering the wings To lower the wings hook the hydraulic hoses to the tractor From the Operators Seat use the tractor hydrau...

Page 87: ...1 diameter grade 5 or 8 bolt 2 through clevis and drawbar and retain in position with a 1 locknut 3 Tighten the locknut securely but do not overtighten which could spring or break the clevis NOTE NEVE...

Page 88: ...re under the wing or in the area where the wing could fall Reinstall nut and flatwasher to retain side skirt 11 Filling the cylinders with oil should raise the wings slightly and loosen the wing Trans...

Page 89: ...ng speed of the Implement resulting in excessive vibration thrown objects and blade and implement failure Adapter use will also change the working length of the driveline exposing unshielded driveline...

Page 90: ...he lug nut is against the wheel There are only three types of tires that can be used on this cutter DO NOT USE ANY OTHER TYPE OF TIRE OR WHEEL such as automotive tires and rims DO NOT EXCEED THE MAXIM...

Page 91: ...ASSEMBLY EAGLE 15 02 08 Assembly Section 3 7 2009 Alamo Group Inc ASSEMBLY implement tires to manufacturer rated PSI as shown on the tire sidewall...

Page 92: ...ASSEMBLY EAGLE 15 02 08 Assembly Section 3 8 2009 Alamo Group Inc ASSEMBLY Lubricate the PTO drivelines and wheel hubs according to the lubrication information found in the Maintenance Section...

Page 93: ...ne and tighten 75 lb ft torque Push and pull the driveline to ensure it is securely attached to the shaft Regularly check the driveline yoke to ensure a tight connection To remove the yoke remove the...

Page 94: ......

Page 95: ...Operation Section 4 1 2009 Alamo Group Inc OPERATION SECTION...

Page 96: ...is section are intended to be used as a visual aid to assist in explaining the operation of a flex wing rotary mower and are not necessarily of a EAGLE 10 15 cutter Some pictures may show shields remo...

Page 97: ...10 1 2 1 4 x10 1 2 Replaceable Skid Shoes Standard Standard Wing Flex 90 up 22 Down 90 up 22 Down Safety Deflectors Standard Standard Tractor Static Vertical Drawbar Load Rating Min 2100 lbs 2100 lbs...

Page 98: ...Protective Equipment PPE for the job conditions when attaching operating servicing and repairing the equipment PPE is designed to provide operator protection and includes the following safety wear PE...

Page 99: ...imum width of 60 from inside to inside of tires Tractor Horsepower 3 1 ROPS and Seat Belt The tractor must be equipped with a Roll Over Protective Structure ROPS tractor cab or roll bar and seat belt...

Page 100: ...PM mowers set the drawbar length at 16 for 21 spline 1 3 8 mowers and at 20 for 1 3 4 20 spline mowers Pintle Hook Hitch Optional Equipment Drawbar length must be modified to obtain dimension A CV Dri...

Page 101: ...eed If operating an older model tractor where the tractor s transmission and PTO utilize one master clutch an over running clutch must be used between the PTO output shaft and the driveline of the mow...

Page 102: ...ng parts are completely stopped SG 12 4 1 Boarding the Tractor Use both hands and equipped handrails and steps for support when boarding the tractor Never use control levers for support when mounting...

Page 103: ...l the tractor its engine and all moving parts have come to a complete stop Use hand rails and steps when exiting the tractor Be careful of your step and use extra caution when mud ice snow or other ma...

Page 104: ...d position The hydraulic remote control levers are in the neutral position The tractor transmission levers are in park or neutral Refer to the tractor owner s manual for tractor starting procedures On...

Page 105: ...tor with a pin not having a nut 5 Securely attach the mower safety chain to the tractor drawbar or drawbar support frame 6 Lower the jack until the tongue is completely supported by the drawbar Remove...

Page 106: ...on with the remaining control valve Ensure that the operator is aware that each wing cannot be controlled independently nor will they raise and lower simultaneously Operating the Mower Hydraulics with...

Page 107: ...ting 4 Level the mower deck front to rear by adjusting the leveling rods linking the tongue to the rear axle DO NOT allow feet or other body part underneath the mower when mak ing adjustments To adjus...

Page 108: ...n jamnuts to maintain settings 7 2 Setting Deck Pitch To facilitate safe and efficient operation the mower should be operated with the deck approximately 3 4 LOWER IN THE FRONT THAN THE REAR Operating...

Page 109: ...the driveline yoke onto the PTO shaft release the locking collar and position the yoke until the locking collar balls are seated onto the PTO shaft Push and pull the driveline back and forth several t...

Page 110: ...or Technical Ser vice for proper directions OPS R 0004_J Engagement Check Procedure With the driveline attached position the mower to the point where the telescoping driveline is at its maxi mum exte...

Page 111: ...hard left turn until there is approximately a 1 clearance between the left rear tractor tire and mower frame or tongue Stop and completely shut down the tractor Place the tractor in Park and apply th...

Page 112: ...le down time and repair cost can be avoided OPS U 0029 Always disconnect the main PTO Driveline from the Tractor before performing service on the Implement Never work on the Implement with the tractor...

Page 113: ...OPS U 0030 9 2 Mower Pre Operation Inspection Service Before each mower use a complete inspection and service is required to ensure the mower is in a good and safe working condition Damaged and or bro...

Page 114: ...and illegible decals OPS U 0011 Ensure the mower hitch is securely attached to the tractor drawbar with a proper size bolt and secured nut Ensure that a properly rated safety tow chain is equipped sec...

Page 115: ...intenance section Inspect each gearbox oil level using dipstick level indicator and replenish if needed A low oil level is a warning sign that the gearbox may be cracked or its seal is damaged and nee...

Page 116: ...ports IMPORTANT DO NOT use your hands to check for oil leaks Use a piece of heavy paper or cardboard to check for hydrau lic oil leaks OPS R 0013_A Ensure that the mower is equipped and secured with w...

Page 117: ...OPERATION EAGLE 15 03 09 Operation Section 4 23 2009 Alamo Group Inc OPERATION 9 3 Cutting Component Inspection Inspect blade pan and blade assembly for the following OPS U 0031...

Page 118: ...hape or Any cracks are visible or Deep gouges in the blade s surface are persent or Gouges or chipped areas in the cutting edge are larger than 1 2 12 7mm or The material on the leading edge has been...

Page 119: ...E BOLTS on the Blades IMMEDIATELY if either blade bolts has Visible cracks or If the recessed area on blade bolt is worn off or If Blade Bolt has gouges or chipped areas Failure to replace abnormally...

Page 120: ...fety decals are in place and legible The tongue hitch connection bolts pins are tight There are no cracks in tongue or hitch The tow chain is secured to the tractor mower The hydraulic cylinders pins...

Page 121: ...MV Sign is clean and visible The tires are in good condition with proper pressure The wheel lug bolts are tight The tractor brakes are in good condition The steering linkage is in good condition There...

Page 122: ...g and brakes are in good condition and operate properly Before transporting the Tractor and Implement determine the proper transport speeds for you and the equipment Make sure you abide by the followi...

Page 123: ...or limit the tractor from turning During normal cutting conditions locking the differential provides no benefit and should not be used OPS U 0013 Be aware of the operating conditions Do not operate t...

Page 124: ...ent to overturn the Tractor and vice versa resulting in serious injury or even death Never fold wings on a hillside the Implement may overturn STI 02 Operating Position To lower the wings remove the t...

Page 125: ...e control lever in the transport detent position to prevent damage to the mower driveline and tongue when turning Perform turns with the tractor and mower at slow speeds to determine how the tractor w...

Page 126: ...ing the PTO into the tractor and through the support bearings or downward onto the PTO shaft breaking it off Damage resulting from over collapse of the driveline s inner profile and its outer housing...

Page 127: ...TRACTOR AND IMPLEMENT AND ALL CONTROLS BEFORE ATTEMPTING TO OPERATE The operator must read and understand the Safety and Operation Sections of the implement and tractor operator s manuals These manua...

Page 128: ...once Immediately idle the engine speed and disengage the PTO Wait for all mower rotating motion to stop then raise the mower and move the tractor and implement off the object Inspect the area and rem...

Page 129: ...in spread cut material better reduce streaking and make the final cut more uniform SRM 01 11 3 Engaging the Power Take Off PTO Before engaging the PTO make certain that the area is clear of bystanders...

Page 130: ...ng speed depends on terrain condition and grass type density and height of cut Normal ground speed range is from 2 to 5 mph 3 8 kph Use slow mowing speeds when operating on or near steep slopes ditche...

Page 131: ...no persons behind the mower and use extreme care when mowing in reverse Mow only at a slow ground speed where you can safely operate and control the tractor and mower Never mow an area that you have...

Page 132: ...e tractor PTO shaft and could cause extensive mechanical damage to the mower and tractor If the mower is operated in conditions that require frequent sharp turning the mower should be equipped with a...

Page 133: ...or dirt which can cause rapid blade wear and extremely severe shock loads on the drivetrain resulting in rapid wear or damage to these components Blades contacting the ground may cause objects to be...

Page 134: ...a complete stop before exiting the tractor OPS U 0016 12 DISCONNECTING THE MOWER FROM THE TRACTOR Before disconnecting the mower the PTO must be disengaged and blade rotation at a complete stop Move...

Page 135: ...ng on the tractor drawbar and is supported solely by the jack The jack should be in a near vertical position with the ground and can be adjusted by loosening the positioning nut and moving the jack up...

Page 136: ...pray touch up enamel where necessary to prevent rust and maintain the appearance of the mower It is critical that driveline clutches slip when an obstacle or heavy load is encountered to avoid mower a...

Page 137: ...secure its end to the mower deck The mower can then be raised to the maximum lift height OPS R 0033 If the tractor s hydraulic pump is not independent of the tractor PTO or if the tractor PTO has to b...

Page 138: ...r must be equipped with all required safety warning features including a SMV emblem and flashing warning lights to alert drivers of the tractor s presence Remember that roadways are primarily designed...

Page 139: ...slow speed SMV signs are a triangular bright orange with reflective red trim for both easy day and night visibility Make sure the SMV sign is clean and visible from the rear of the unit before transp...

Page 140: ...and implement on public roads Use caution and reduce speed if other vehicles or pedestrians are in the area OPS U 0022 Reduce speed before turning or applying the brakes Ensure that both brake pedals...

Page 141: ...so that when tightened the chains are pulling downward and against themselves Carefully tighten the securing chains or other fasteners using boomers or binders to apply maximum tension Use extreme car...

Page 142: ...ch Weigh blades Weight should be blade tip Were both blades within 1 oz Always replace both blades changed at the same time Blade Broken Replace blades in sets Blade carrier bent Replace carrier Blade...

Page 143: ...ce castings or gear box Gasket damaged Replace gasket Bolts loose Tighten bolts Clutch Slips Excessively Clutch linings badly worn or Repair clutch per maintenance plates warped section of manuals Too...

Page 144: ...t PTO speed and check for correct gear box ratio Cutter not level Adjust machine Tires mashing down grass Move tires out of cutter overlap area Minimum 60 inside tires Ground speed too fast Reduce gro...

Page 145: ...Maintenance Section 5 1 2009 Alamo Group Inc MAINTENANCE SECTION...

Page 146: ...ng adjustments Lubrication Do not let excess grease collect on or around parts particularly when operating in sandy areas The accompanying illustration shows lubrication points The chart gives the fre...

Page 147: ...MAINTENANCE EAGLE 15 03 09 Maintenance Section 5 3 2009 Alamo Group Inc MAINTENANCE...

Page 148: ...ly basis Tongue The Tongue Hitch Pins attach the Tongue to the Center Section and should be checked for signs of wear or cracking Replace as needed The Drawbar 1 Bolt fastens the mower to the tractor...

Page 149: ...leaking It is recommended that the oil level dipstick be removed after every 8 to 10 hours of operation and oil added until it is at proper level on dipstick Filler Plugs are located on top of all Gea...

Page 150: ...CV Joint is located at the end of the Main Driveline The U Joint and CV Joint assemblies are accessible by rotating the Driveline Safety Shield until the hole in the Shield matches up with the Grease...

Page 151: ...remove half shield Remove bearing ring FIGURE MNT R 0038 To assemble outer CV driveline grease yoke groove and inner profile tube Attach bearing ring on groove with recesses facing profile tube FIGURE...

Page 152: ...gns of abnormal wear bent or twisted shafts or cracks in the shafts or tubes Check to see that the Drivelines telescope easily If the Drivelines do not telescope properly or show signs of abnormal wea...

Page 153: ...ve the two shield bearings per half shaft by prying the head of the bearings up with a screwdriver and pulling them out with pliers Figure MntP R 0012 Grasp the Yoke and shield tube and pull shaft fro...

Page 154: ...MntP R 0015 Slide the shield tube assembly over the shaft so that the bearing holes in the shield align with the shield bearing groove on the yoke Figure MntP R 0016 Install two shield bearings per h...

Page 155: ...e strike top arm of unsupported yoke to drive the top cup up Repeat on opposite side 3 If you cannot grip the loosened cap per Step 4 use a pointed tool to tip a needle them repeat Step 2 4 Grip loose...

Page 156: ...NTENANCE TO REASSEMBLE UNIVERSAL JOINT 1 Smear grease into bearings and check for dirt CAUTION Make sure all needle bearings are seated properly 2 Insert cup and cross Drive in with spacer 3 Insert sn...

Page 157: ...5 13 2009 Alamo Group Inc MAINTENANCE 5 Drive cup down with spacer and insert snap ring 6 To loosen cross strike yoke arm and check cross for free rotation 7 Position second yoke on cross Repeat Steps...

Page 158: ...OR DEATH Inspect Blades daily for abnormal wear If Blades have a notch worn into the leading edge at the lower bend more than a 1 2 DEEP due to running in gravel and or the ground REPLACE BOTH BLADES...

Page 159: ...ith the engine stopped or in the event of hose failure etc Always use a secure support for equipment which must be serviced while in the raised position NOTE Replace Blades in pairs after no more than...

Page 160: ...arrier bushings as a snug slip fit If the blade bolt fit appears to be loose or sloppy measure the square hole in bushing If the bottom of the square hole is 1 16 or greater than the square shoulder o...

Page 161: ...ates are 1 8 thick when new Replace after 1 32 wear If the mower has been idle for an extended period of time or in wet weather before operating check to be sure the friction lining plates are not rus...

Page 162: ...r original position of 1 9 16 compressed spring length top of washer to pressure plate HYDRAULIC HOSES Replace pinched and broken Hydraulic Hoses at once Tighten any Hydraulic Fitting with fluid leaki...

Page 163: ...ake replacements immediately 10 Store the cutter in a clean dry place with the cutter housing resting on blocks 11 Use spray touch up enamel where necessary to prevent rust and maintain the appearance...

Page 164: ...AND SUB ASSEMBLIES TO PREVENT INJURIES TO HANDS AND FEET DUE TO INADVERTENT DROPPING OR FALLING OVER ALWAYS WEAR SAFETY GLASSES AND GLOVES TO PREVENT EYE AND HAND INJURY WHEN CHISELING OR HAMMERING ON...

Page 165: ...F DIVIDER GEARBOX Trained Dealer Personnel Only STEP 1 Remove all eight of the M10 Bolts from both Cap Hubs using a 14mm socket FIGURE Mnt R 0048 Remove the Hub Assemblies and gaskets from the Main Ho...

Page 166: ...haft has cleared the Bearing it can be fully removed from the Hub Assembly The remaining Bearings and Bearing Cups can be removed by conventional means FIGURE Mnt R 0050 STEP 4 Remove all eight Bolts...

Page 167: ...earing can be removed from the Input Shaft by tapping the end of the Input Shaft on a solid surface FIGURE Mnt R 0052 The unit is now completely disassembled with exception of Oil Seals and Bearing Ra...

Page 168: ...FIGURE Mnt R 0055 Place the Bearing FIGURE Mnt R 0056 on the Shaft and drive it down Place the Gear FIGURE Mnt R 0057 on the Shaft STEP 3 Apply some Locktite on the Adjusting Nut FIGURE Mnt R 0059 In...

Page 169: ...ew the Nut a small amount and again tap each end of Shaft while holding the Hub Repeat this process until a rolling torque of 10 to 12 inch pounds is reached on the Shaft STEP 4 Apply a small amount o...

Page 170: ...5 Install the Bearing Race into the Main Gearbox Housing STEP 6 Install Bearing on the Shaft On the opposite end of the Shaft install the Gear Spacer and the Gear Install one 012 and one 020 thick Gea...

Page 171: ...rees away from the first bolt tightened Check how the Input Shaft turns When turned if tight additional Shims are needed If loose and the Shaft can be moved from side to side Shims need to be removed...

Page 172: ...lange of the Input Cap FIGURE Mnt R 0072 Place the Input Cap back on the Main Housing and install all eight Bolts and tighten them to a torque of 31 to 34 fast pounds FIGURE Mnt R 0073 STEP 10 Remove...

Page 173: ...Input Shaft The amount of backlash between these two Gears needs to be set to the same amount that was set on the first Gear mesh Add or subtract Shims as required Once this adjustment is made remove...

Page 174: ...2 1 Hex Slotted Flanged Nut 13 1 Cotter Pin 14 1 Lockwasher 15 3 Bolt 16 1 Output Shaft 17 1 Tooth Pinion 18 1 Bearing Adjustment Nut 19 1 Cotter Pin 20 1 Blank Adjusting Cap 21 1 Bearing Assembly 22...

Page 175: ...front cover to be removed Tap on end of input shaft to remove cap Repeat procedure for front cap 4 Step VI Remove Input shaft 5 by tapping on drive spline end Shaft will come through rear cap opening...

Page 176: ...seated firmly against housing STEP II Install Lower Bearing Cone 12 down over Output Shaft from top making sure it is completely seated against shoulder on lower part of Output Shaft STEP III Insert...

Page 177: ...ould be 015 to 025 If back lash is tight add shim to front cap and remove shim from rear cap Reverse procedure if back lash is to large Check input shaft preload push and pull on shaft to see if end p...

Page 178: ...abor charges exceeding a reasonable amount as determined by Manufacturer and for returning the goods to the Dealer whether or not the claim is approved Purchaser is responsible for the transportation...

Page 179: ...to the protected area provided by the ROPS REQUIRED OF THE OPERATOR 1 Securely fasten seatbelt if the tractor has a ROPS 2 Where possible avoid operating the tractor near ditches embankments and hole...

Page 180: ...EAGLE 10 15 SOM 3 09 Printed in USA P N 00780567C...

Reviews: