background image

MANUEL D’UTILISATION
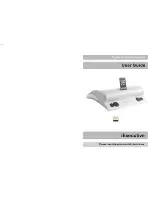
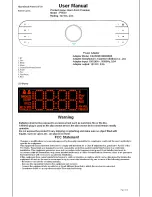
USER MANUAL

Lire attentivement la notice avant 

ď

utiliser 

ľ

appareil

Before operating this product, please read user manual completely
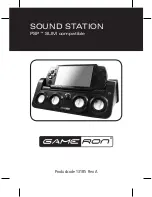
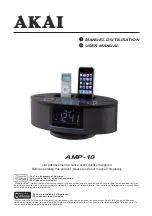
AMP-10

“Made for iPod

®

” means that an electronic accessory has been designed to connect specifically to iPod

®

 and has been certified 

by the developer to meet Apple performance standards. Apple is not responsible for the operation of this device or its compliance 

with safety and regulatory standards.

iPod

®

 is a trademark of Apple Inc., 

registered in the U.S. and other countries. 
iPod

®

 shown not included.

“Works with iPhone” means that an electronic accessory has been designed to connect specifically to iPhone and has been 

certified by the developer to meet Apple performance standards.Apple is not responsible for the operation of this device or its 

compliance with safety and regulatory standards.

iPhone is a trademark of Apple Inc.,
iPhone shown is not included.

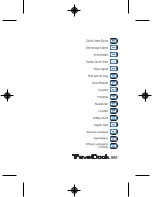
Summary of Contents for AMP-10

Page 1: ...ponsible for the operation of this device or its compliance with safety and regulatory standards iPod is a trademark of Apple Inc registered in the U S and other countries iPod shown not included Works with iPhone means that an electronic accessory has been designed to connect specifically to iPhone and has been certified by the developer to meet Apple performance standards Apple is not responsibl...

Page 2: ... TÉLÉPHONE BALADEUR iPhone 24 GUIDE DE DÉPANNAGE 26 FICHE TECHNIQUE 27 BALADEURS iPod TÉLÉPHONES BALADEURS iPhone POUVANT ÊTRE UTILISÉS AVEC CET APPAREIL 28 Table des matières Merci d avoir choisi de ce produit Cette chaîne multimédia comprend deux stations d accueil pouvant être utilisées pour la lecture et le chargement d un baladeur iPod téléphone baladeur iPhone un syntoniseur MW FM stéréo num...

Page 3: ...urs propre Ne le rangez pas près d une source de chaleur ni dans un endroit humide sale ou mouillé Ne l exposez pas à la lumière directe du soleil N obstruez ni ne couvrez les orifices de ventilation de cet appareil au moyen d un rideau d une nappe d un journal car ceci empêche la circulation d air Laissez une distance minimale de 100 mm autour de l appareil pour assurer une ventilation suffisante...

Page 4: ...ique de la prise murale N utilisez que la tension d alimentation recommandée Après des travaux d entretien ou de réparation sur cet appareil demandez au technicien de procéder aux vérifications de sécurité pour déterminer si l appareil est en bon état de marche Confiez toute réparation à un technicien qualifié Une réparation est requise lorsque l appareil est endommagé de quelque façon que ce soit...

Page 5: ...collants qui se trouvent à l arrière ou sur le dessous de l appareil Nettoyage de l appareil Attention Évitez de faire pénétrer de l eau ou tout autre liquide à l intérieur de l appareil lorsque vous le nettoyez Pour éviter tout risque d incendie ou de choc électrique débranchez l appareil de la prise murale avant de le nettoyer Essuyez le boîtier de l appareil l aide d un chiffon sec et doux pour...

Page 6: ...CR2032 est déjà insérée dans le compartiment de la pile situé sous le boîtier de l appareil Retirez le petit onglet isolant tel qu illustré ci dessous pour que l appareil puisse conserver les réglages de l heure des alarmes et des stations préréglées dans la mémoire du syntoniseur Remplacement de la pile L icône de pile faible clignotera dans le coin inférieur gauche de l affichage lorsque viendra...

Page 7: ... une pile avec cet appareil 1 2 3 4 5 6 Avertissement Risque d explosion si la pile n est pas remplacée correctement N utilisez qu une pile de même type ou de type équivalent Utilisez toujours une pile de même format ou de type spécifié Assurez vous de respecter les polarités signes et lorsque vous insérez la pile selon les indications dans le compartiment de la pile Si les polarités sont inversée...

Page 8: ...he de rappel d alarme gradateur SNOOZE DIMMER 11 Touche de réglage de l horloge mise en mémoire TIME SET MEMORY 12 Touche de minuterie d arrêt différé SLEEP 13 Touche de lecture pause 14 Touche de syntonisation station prédédente ou suivante 15 Touche de sélection du baladeur iPod iPod SELECT 16 Capteur infrarouge 17 Conducteur d antenne FM FM ANTENNA 18 Prise d antenne cadre MW MW ANTENNA 19 Pris...

Page 9: ...isseur Affichage de l heure l alarme Indicateur d arrêt différé rappel d alarme Indicateur de son stéréo Indicateur du baladeur iPod de gauche Indicateur du baladeur iPod de droite Indicateur FM MW Indicateur de dispositif auxiliaire fréquence radio niveau du volume égaliseur électronique amplification dynamique de basses fréquences COMMANDES ET INDICATEURS suite MW ...

Page 10: ...ande REMARQUE Si la pile n est pas bien insérée la télécommande ne fonctionnera pas 1 Transmetteur de la télécommande 2 Touche de veille mise sous tension ON 3 Touche de sourdine MUTE 4 Touche de réduction du volume VOLUME 5 Touche de son FM stéréo mono FM ST MO 6 Touche d amplification dynamique de basses fréquences DBBS 7 Touche de minuterie d arrêt différé SLEEP 8 Touche de réglage de l horloge...

Page 11: ... le transmetteur de la télécommande vers le capteur infrarouge situé sur le panneau avant de l appareil principal La télécommande a un rayon d action d environ 6 m 20 pi À noter que la lumière ardente du soleil ou une lumière artificielle peut nuire au bon fonctionnement de la télécommande Si la télécommande ne fonctionne toujours pas convenablement après avoir réduit le degré de luminosité dans l...

Page 12: ... effectuer ce réglage pour le moment Attentez le moment venu de passer à l heure avancée RÉGLAGES ET FONCTIONNEMENT DE BASE En mode Veille Standby touchez légèrement la touche MODE située sur le panneau supérieur ou appuyez sur la touche MODE de la télécommande Le chiffre 1 apparaîtra brièvement au dessus de l heure et l indicateur de l heure avancée DST apparaîtra également L heure à l affichage ...

Page 13: ...che TUNE SKIP située sur le panneau supérieur ou appuyez sur la touche TUNE SKIP de la télécommande pour régler l heure à l affichage Assurez vous que l indicateur AM ou PM correspond à l heure courante que vous venez de régler Touchez légèrement la touche TIME SET située sur le panneau supérieur ou appuyez sur la touche TIME SET de la télécommande jusqu à ce que seuls les chiffres des minutes cli...

Page 14: ...res Appuyez sur la touche EQ de la télécommande pour consulter les modes d égalisation suivants EQ1 NORMAL EQ2 CLASSIQUE EQ3 ROCK EQ4 POP EQ5 JAZZ L indicateur EQ approprié apparaît brièvement à l affichage pour valider votre choix L appareil conservera en mémoire le réglage choisi lorsqu il est mis hors tension La prochaine fois que vous mettrez l appareil sous tension il utilisera automatiquemen...

Page 15: ...e fréquences la prochaine station au signal le plus fort et s arrêtera sur celle ci Syntonisation manuelle Appuyez à plusieurs reprises sur la touche de la télécommande ou touchez légèrement la touche TUNE SKIP située sur le panneau supérieur jusqu à ce que la fréquence radio désirée apparaisse à l écran Remarque Utilisez la syntonisation manuelle pour syntoniser des stations au signal plus faible...

Page 16: ...hangez l orientation de cette antenne afin d obtenir la meilleure réception possible MW Insérez la petite fiche blanche à l extrémité de l antenne cadre MW dans la prise MW ANT située sur le panneau arrière de l appareil voir illustration 15 Raccordement de l antenne cadre MW MW ANT MW ANT Antenne FM Antenne FM FONCTIONNEMENT DE LA RADIO suite MW ANT ...

Page 17: ...ichage pendant 5 secondes La fréquence radio sélectionnée apparaîtra de nouveau à l affichage La station est maintenant entrée à l emplacement de mémoire no 1 Syntonisez la prochaine station que vous désirez mettre en mémoire Lorsque cette station apparaît à l affichage appuyez une fois sur la touche TIME SET MEMORY L indicateur P 01 commencera à clignoter Appuyez sur la touche PRESET MENU ou de l...

Page 18: ...ALM 1 ou PRESET ALM 2 située sur le panneau supérieur pour sélectionner le numéro d emplacement de mémoire que vous désirez modifier Lorsque ce numéro clignote à l affichage appuyez une fois sur la touche TIME SET MEMORY La nouvelle station est alors entrée à cet emplacement de mémoire et la station qui occupait cet emplacement est effacée Remarque importante L alimentation de réserve à pile conse...

Page 19: ...ant que l appareil se mettra hors tension au bout de 120 minutes Appuyez à plusieurs reprises sur la touche SLEEP pour diminuer la durée de fonctionnement de la minuterie d arrêt différé 4 L indicateur de la minuterie d arrêt différé disparaîtra de l affichage au bout de quelques secondes et sera remplacé par celui de la fréquence radio syntonisée Cependant un petit indicateur SLEEP restera à l af...

Page 20: ... L un des trois indicateurs de mode d alarme clignotera à l affichage Appuyez à plusieurs reprises sur la touche ou de la télécommande ou sur TUNE SKIP ou située sur le panneau supérieur pour sélectionner le mode de réveil désiré iPod radio ou avertisseur Appuyez à nouveau sur la touche ALM 1 Si vous avez sélectionné iPod ou Radio l indicateur du niveau de volume commencera à clignoter Appuyez à p...

Page 21: ...r que cette alarme est bel et bien activée Pour vérifier le réglage de l alarme appuyez sur la touche d alarme appropriée ALM 1 ou ALM 2 de la télécommande Le réglage de l alarme courante s affichera brièvement pendant quelques secondes puis l heure courante reviendra à l affichage L indicateur d alarme demeurera affiché indiquant ainsi que l alarme est bel et bien activée Pour désactiver l alarme...

Page 22: ...correspondre la lettre au bas de cet adaptateur à celle dans le tableau Insérez l adaptateur dans la station d accueil voir illustration en vous assurant qu il se fixe bien en place Insérez votre baladeur iPod dans l adaptateur et assurez vous que le connecteur iPod de cet appareil est inséré à fond dans la fente située au bas de votre baladeur iPod Lorsque le baladeur iPod est inséré parfaitement...

Page 23: ...baladeur iPod téléphone baladeur iPhone dans la station d accueil Assurez vous que l appareil n est pas dans un étui ou emballage 4 Pour enlever ou remplacer un adaptateur enlevez d abord le baladeur iPod téléphone baladeur iPhone de la station d accueil saisissez ensuite l adaptateur et tirez le délicatement vers vous Chargement du baladeur iPod téléphone baladeur iPhone Remarque Assurez vous d u...

Page 24: ...O 80 GO 80 GO 4 GO 4 GO 4 GO 4 GO 4 GO 4 GO 6 GO 6 GO 10 GO 10 GO 15 GO 15 GO 20 GO 20 GO 20 GO 20 GO 30 GO 30 GO 40 GO 40 GO 20 GO 20 GO 30 GO 30 GO 40 GO 40 GO 40 GO 40 GO 4 GO 4 GO 2 GO 2 GO 2 GO 2 GO 4 GO 4 GO 16 GO 16 GO 8 GO 8 GO 16 GO 16 GO 10 GO 10 GO 160 GO 160 GO 120 GO 120 GO 4G nano 5G iPod 3G iPod 4G iPod iPod à effleurement iPod classique iPod nano iPod photo iPod mini avec vidéo lec...

Page 25: ... la télécommande pour écouter la musique provenant de votre baladeur iPod téléphone baladeur iPhone Appuyez à nouveau sur cette touche pour faire une pause TUNE SKIP Touches de syntonisation piste précédente ou suivante TUNE SKIP sur l appareil principal Pendant l écoute de votre musique appuyez sur ces touches pour passer à la piste précédente ou suivante Touches de piste précédente ou suivante s...

Page 26: ...Pod et un téléphone baladeur iPhone en même temps vous pouvez passer d un appareil à l autre en appuyant sur la touche iPod SELECT située sur le panneau supérieur ou sur la télécommande Pour faire une pause touchez légèrement la touche située sur le panneau supérieur ou appuyez sur la touche de la télécommande Appuyez à nouveau sur cette touche pour arrêter la pause et continuer à écouter le balad...

Page 27: ...obstruction dans la station d accueil et sur le baladeur iPod Replacez le baladeur dans la station d accueil Assurez vous que le baladeur iPod fonctionne convenablement avant de l insérer dans la station d accueil Consultez le guide de l utilisateur du baladeur iPod pour connaître tous les détails Cet appareil n est pas compatible avec ce genre de baladeur iPod ou de dispositif Assurez vous que le...

Page 28: ...Syntoniseur Gamme de fréquences MW Gamme de fréquences FM 4 Haut parleur Impédance 5 Entrée AUX Entrée Tension maximale Impédance 230V AC 50Hz 21W 320 x 136 7 x 122 5 mm 1 35 kg 5 W x 2 DHT 10 522 KHz à 1 620 KHz 87 5 MHz à 108 0 MHz 2 haut parleurs de 2 5 po 8 ohms 1 haut parleur d extrêmes graves passif Φ3 5mm 1 V 47 KΩ 27 Spécifications sujetts à modifications sans préavis ...

Page 29: ... pour iPod nano 3e génération vidéo 4 GO 8 GO seulement Conçu pour iPod nano 4e génération 8 GO 16 GO seulement Conçu pour iPod classique 80 GO 160 GO seulement Conçu pour iPod classique 2e génération 120 GO seulement Conçu pour iPod à effleurement 8 GO 16 GO 32 GO seulement Conçu pour iPod à effleurement 2e génération 8 GO 16 GO 32 GO seulement Conçu pour iPhone 4 GO 8 GO 16 GO seulement Conçu po...

Page 30: ... iPod iPhone Operations 49 Dock Adaptor Compatibility 51 iPod iPhone Operation Controls 52 Troubleshooting Guide 54 Technical Specifications 55 The unit supports the listed iPod s iPhones 56 Thank you for choosing the audio product This digital music system comes with dual docks for playing and charging iPhone iPod a MW FM stereo digital tuner with 40 presets dual alarm clock function with wake to...

Page 31: ...Keep it out of direct sunlight Do not block any ventilation openings the ventilation should not be impeded by covering the ventilation openings with items such as newspapers table cloths curtains etc Give minimum 100 mm distances around the apparatus for sufficient ventilation To prevent fire or shock hazard do not expose this unit to rain or moisture Do not subject the product to harsh impacts Do...

Page 32: ...t has been damaged in any way such as power supply cord of plug is damaged Liquid has been spilled of objects have fallen into the unit the unit has been exposed to rain or moisture or has been dropped does not operate normally Batteries shall not be exposed to excessive heat such as sunshine fire or the like Attention should be drawn to the environmental aspects or battery disposal This product i...

Page 33: ...t panels of the unit but do not remove any labels or stickers from the back or bottom panels Cleaning The Unit To prevent fire or shock hazard disconnect your unit from the main power source when cleaning If the cabinet becomes dusty wipe it with a soft dry cloth Do not use any wax or polish sprays on the cabinet If the cabinet becomes dirty or smudged with fingerprints it may be cleaned with a so...

Page 34: ...llustration to begin using the unit for maintain the time and alarm settings and the preset tuner memories Replacing The Back Up Battery When it s time to replace the battery the Low Battery lcon will be shown in the lower left corner of the display Insert a fresh CR2032 battery following the below procedure however leave the unit connected to the AC adaptor while replacing the battery to avoid lo...

Page 35: ... possible battery leakage 5 Do not try to recharge a battery not intended to be recharged it can overheat and rupture Follow battery manufacturer s directions 6 Battery shall not be exposed to excessive heat such as sunshine fire or the like 34 Using The AC Adaptor Connect the small female plug of the AC adaptor to the DC In Jack on the back panel Connect the housing of the AC adaptor to the 230V ...

Page 36: ...t 22 iPod Holders 6 inserts LOCATION OF CONTROLS INDICATORS 35 1 iPod Indicator 2 Universal Dock for iPod 3 Universal Dock for iPod iPhone 4 iPod iPhone Indicator 5 STANDYBY ON Button 6 VOLUME Control 7 MODE Control 8 ALM 1 PRESET Control 9 ALM 2 PRESET Control 10 SNOOZE DIMMER Control 11 TIME SET MEMORY Control 12 SLEEP Control 1 2 3 4 5 6 7 8 9 10 11 12 13 14 15 22 21 16 17 18 19 20 MW ANT ...

Page 37: ...avings Time TIME AM PM Indicator Wake To Indicator iPod Radio Buzzer Time Alarm Display SLEEP SNOOZE Indicator STEREO Indicator Left iPod Indicator Right iPod Indicator MW FM Indicator AUX Radio Frequency Volume Level EQ DBBS Indicator LOCATION OF CONTROLS INDICATORS MW MW ...

Page 38: ... operation becomes weak or intermittent it is time to replace the remote control battery Pull out the battery holder remove the old battery and install a new CR2032 battery in the holder as shown in the illustration Slide the holder back into the remote control NOTE If the battery is installed incorrectly the remote control will not work 1 2 3 4 5 6 7 8 9 10 11 12 13 14 15 16 17 18 19 20 21 22 ON ...

Page 39: ...smitter on the front of the remote control is pointed at the remote sensor on the front panel of the main unit The effective operating range of the remote control is approximately 20 feet Please note that bright sunlight or room lighting may interfere with the remote control operation If the remote control is not operating properly try reducing the brightness of the room or moving closer to the ma...

Page 40: ...tment now Wait until the beginning of Daylight Saving Time 1 With the system in the Standby mode touch and hold the MODE control on the top panel or press and hold the MODE button on the remote control until the number 1 will briefly appear above the time display and the DST indicator also appears The display will advance by one hour After a few seconds the number 1 indicator disappears but the DS...

Page 41: ...ons on the top panel or press the Buttons on the remote control to set the correct hour Be sure to observe the word to confirm that the hour is set correctly 3 Touch the TIME SET button on the top panel or depress the TIME SET button on the remote control then the Minute digits are flashing Press the buttons on the remote control or touch the TUNE SKIP buttons on the top panel to set the correct m...

Page 42: ...ton on the remote control to cycle through the following equalization modes The appropriate EQ indicator briefly appears in the display to confirm your selection The system remembers the EQ setting when the power is switched Off and returns to the same setting when the power is switched On again DBBS Dynamic Bass Boost Control On Remote Control only Press the DBBS button on the remote control to i...

Page 43: ...n the band for the next strong signal and stop on that station Manual Tuning Repeatedly press the buttons on the remote control or touch the TUNE SKIP buttons on the top panel until the display shows the frequency of the desired station Note Use the Manual Tuning method to tune to stations with weaker signals that may be bypassed during Automatic Tuning If you tuned to a FM Stereo station the Ster...

Page 44: ...o have to vary the direction of this antenna until you find the position that provides the best reception MW Insert the small black plug at the end of the MW Loop antenna wire into the MW ANT jack on the back panel as shown in the illustration FM ANT 43 To connect the MW loop antenna FM ANT RADIO OPERATIONS MW ANT MW ANT ...

Page 45: ...play will return to the selected radio frequency Your selected station has now been entered in Preset Memory 1 Tune to the next station that you want to memorize and when that station appears in the display press the TIME SET MEMORY once The P 01 indicator begins flashing Press the PRESET MENU or button on the remote control or touch PRESET ALM1 or PRESET ALM2 control on the top panel to select a ...

Page 46: ...ontrol on the top panel to select the memory number you wish to change When that memory number is flashing in the display press the TIME SET MEMORY button once The new station is entered in the memory and the previously memorized station is erased Important The back up batteries will maintain the preset tuner memories in the event of a power interruption However if the back up batteries are not in...

Page 47: ...ay will show SLEEP 120 indicating that the sleep timer will shut the power off after 120 minutes Repeatedly press the SLEEP button to decrease the amount of sleep timer operation 4 After a few seconds the Sleep Time display disappears and the normal TUNER display returns but the small SLEEP indicator remains in the display When the Sleep Timer counts down to 00 the unit returns to the Standby Powe...

Page 48: ... select the desired wake up mode iPod Radio or Buzzer BUZZ Press the ALM 1 button once more If you selected either the iPod or Radio Alarm Mode the Volume Level indicator begins flashing Press the or buttons on the remote control or touch the TUNE SKIP or control on the top panel not the Volume buttons repeatedly to set the desired wake up volume level Note if you selected the wake up to Buzzer al...

Page 49: ...ion off you can press ON button During normal operation touch the SNOOZE DIMMER area on the top panel or press the SNOOZE DIMMER button on the remote control to control the brightness of the display There are 6 levels of brightness that you can select If you continue to press this control the display will return to full brightness At the selected wake up time the system will turn on to the mode yo...

Page 50: ...or Select the adaptor with the letter that corresponds to your iPod model Position the adaptor in the docking area as shown and make sure that it locks in place then place your iPod into the adaptor and make sure that the iPod connector on this system is fully inserted into the slot on the bottom of your iPod When properly docked your iPod should be leaning backward slightly on a 15 degree angle D...

Page 51: ...then grip the adaptor and pull gently upwards Charging your iPod iPhone Note Please make sure you are using the correct insert for your iPod iPhone and that it is properly docked into this unit FAILURE TO DO SO MAY DAMAGE THE iPod iPhone When an iPod iPhone is inserted into the dock it will go to standby mode then turn off While the iPod iPhone is docked in the system it will recharge until fully ...

Page 52: ...3GS iPhone 3G iPhone A B C D E F 8GB 8GB 16GB 16GB 16GB 16GB 32GB 32GB iPhone 8GB 8GB 4GB 4GB 16GB 16GB 8GB 8GB 16GB 16GB 160GB 160GB 120GB 120GB 4G nano iPod touch iPod classic iPod nano iPod photo iPod mini 5G iPod 4G iPod 3G iPod ...

Page 53: ...ols on the top panel or press the buttons on the remote control iPod iPhone OPERATION CONTROLS 52 Play Pause Touch this area on the top panel or Press this button on the remote control to begin playback on your iPod iPhone Press again to Pause playback TUNE SKIP buttons on Main Unit During playback press to skip forward or backward to the next or previous track Skip Back Forward buttons on Remote ...

Page 54: ...nd an iPhone docked at the same time you can switch between the two devices by pressing the iPod SELECT button on the top panel or the remote control To pause iPod playback touch the control on the top panel or press the button on the remote control Press again to release pause and resume iPod playback To stop iPod playback touch and hold the control on the top panel or depress the button on the r...

Page 55: ...e iPod Then reseat it in the dock Remove the iPod from the dock and check for obstruction on the connections in the dock and on the iPod Then reseat it in the dock Please make sure your iPod is working properly before docking into the unit Please refer to the iPod manual for details This unit cannot control those iPod or other devices Please make sure your iPod is working properly before docking i...

Page 56: ...put 3 Tuner MW Tuning range FM Tuning range 4 Speaker system Impedance 5 AUX IN Input Max voltage Impedance AC 230V 50Hz 21W 320mm W x 136 7mm D X 122 5mm H 1 35 Kg 5W x 2 THD 10 520 KHz to 1710 KHz 87 5 MHz to 108 0 MHz 8 Ω 2 5 Speaker x 2 passive subwoofer panel system Φ3 5mm 1 V 47 KΩ 55 Specifications subject to change without notice ...

Page 57: ...B 2GB 4GB only Made for iPod nano 2nd generation aluminum 2GB 4GB 8GB only Made for iPod nano 3rd generation video 4GB 8GB only Made for iPod nano 4th generation 8GB 16GB only Made for iPod classic 80GB 160GB only Made for iPod classic 2nd generation 120GB only Made for iPod touch 8GB 16GB 32GB only Made for iPod touch 2nd generation 8GB 16GB 32GB only Made for iPhone 4GB 8GB 16GB only Made for 3G...

Page 58: ...AMP 10 www akai france com ...

Reviews: