background image

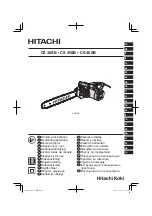
Gasoline Chain Saw

AM-CS-5918WC

AM-CS-5918HC
AM-CS-5922HC

Summary of Contents for AM-CS-5918HC

Page 1: ...Gasoline Chain Saw AM CS 5918WC AM CS 5918HC AM CS 5922HC ...

Page 2: ......

Page 3: ...e for pro tecting your head hands feet legs eyes and ears Keep body parts away from the chain Wear close fitting clothing which cannot get caught in moving parts Always wear an approved safety helmet when felling trees and removing branches Always wear safety goggles and or a face guard Always wear suitable heavy duty protective gloves Wear ear protection to avoid damage to your hearing Wear safet...

Page 4: ...chine Never modify any of the machine components Do not use your petrol chain saw for any jobs other than those for which it was intended WARNING Petrol and its vapours are highly flammable Always stop the engine before refueling Do not smoke or light any flames while refueling Wipe off any fuel that may have spilled Refuel in a well ventilated area and never in closed en vironments Start the engi...

Page 5: ...chains specified by the manufacturer or the equivalent If possible use a log stand for cutting loose logs Always keep aware of the bar tip relative to other objects Cut at high engine speeds Never start the machine while the chain rests on an object Piercing cuts with the bar tip may only be performed by trained and experienced operators E Instructions on safe working techniques Always maintain a ...

Page 6: ...ws 1 Ensure the spark plug wire is disconnected and keep it away from spark plug 2 Place the chain saw on a stable surface 3 Pull the guard towards the front handle to check that the chain brake is not on Fig 2 4 Loosen the nuts Fig 3a and remove the chain cover Fig 3b 5 Install the included claw to the power unit Fig 4 if it is not pre fitted 6 Gear the chain to the sprocket Fig 5 and while fitti...

Page 7: ...s just touch the bottom side of the bar rail Fig 8 The chain should be tensioned such that it can be lifted about 3 mm in the middle of the bar Fig 8 11 Tighten the chain cover nuts securely 12 15N m Check the chain for smooth rotation and proper tension while moving it by hand 12 If necessary readjust the tension of the chain by first loosening the chain cover nuts slightly then again adjusting t...

Page 8: ...ughly as per fuel mix ratio in a separate container Always prepare the fuel mixture and refuel the chainsaw outside in a well ventilated environment 2 Use Lawn Star high performance 2 stroke oil stock code 90 20000 and lead free petrol Octane 95 3 Oil Fuel mix ratio for normal 2 stroke engine oil 1 25 4 e g 40 ml of oil per 1 litre of petrol ...

Page 9: ...maged The cutting teeth must be at least 4 mm long Check the sharpness of the chain every time before using the chain saw Sharpening a chain requires experience and specialised knowledge therefore it is recommended that sharpening be carried out by a specialised workshop or a new chain be used It is recommended to first practice sawing on smaller eas ier to cut logs This helps to get accustomed to...

Page 10: ...hed fully forwards towards the chain into the on position 3 Switch the ON OFF switch Fig 10 No 11 up into the ON I position 4 Pull out the choke knob Fig 10 No 6 to the closed posi tion 5 Press primer bulb slowly 5 10 times Fig 10 No10 6 While holding the chain saw securely on the ground Fig 11 pull the starter cord Fig 10 No 3 three times fully The engine might start WARNING Keep clear of the saw...

Page 11: ... position CHECKING OIL SUPPLY After starting the engine run the chain at medium speed and observe if chain oil is sprayed off Fig 12 First switch off the engine wait for the chain to stop and then remove the spark plug wire before adjusting the chain oil flow The chain oil flow rate can be changed by adjusting the screw in the hole on bottom of the clutch side Fig 13 Ad just according to your work...

Page 12: ...n front Decide the felling direction of the tree by considering the wind lean of the tree location of heavy branches ease of job after felling and other factors The felling notch is cut on this side of the trunk First cut 1 3 of the trunk diameter horizontally into the tree at the intended felling notch Fig 17 No 1 Now cut the second part of the felling notch from above at an angle of 45 degrees t...

Page 13: ...intain your chain saw in proper working order perform the maintenance and checking operations described in this manual at regular intervals Leave all maintenance other than the items listed in the Owner s Manual to your competent servicing dealer Repairs and ser vicing must only be performed by authorized dealers and service agents Before cleaning inspecting or repairing the chain saw make sure th...

Page 14: ...f the chain is too loose it may come off during use and lead to injuries The chain must be replaced immediately if it is damaged The cutting teeth must be at least 4 mm long Oil level and lubrication Check the oil level and lubrication after every use Insufficient oil and lubrication leads to damage to the chain bar and en gine General Check for fuel leakage loose fasteners and damage to major par...

Page 15: ...m when necessary Fig 23 If the electrodes are excessively soiled or worn then replace with an equivalent new spark plug e g BM6A Excessive soiling may be due to a too high ratio poor quality 2 stroke oil or b clogged air filter Replace spark plug and screw in by hand to avoid stripping of thread then tighten with socket Sprocket Fig 5 Check for cracks and for excessive wear interfering with the ch...

Page 16: ... partial wear The bar rail should always be a square Check for wear of the bar rail Apply a ruler to the bar and the outside of a cutter If a gap is observed between them the rail is normal Otherwise the bar rail is worn A worn bar needs to be repaired or re placed Fig 27 Referring to figure 27 1 Ruler 2 Gap 3 No gap 4 Chain tilts GENERAL CLEANING Always remove wood shavings and oil from the chain...

Page 17: ...ap 5 Spark plug wire or spark plug broken correct spark timing or faulty 6 Ignition system IGNITION SPARK RELATED 1 Fill fuel tank 2 Connect spark plug wire properly 3 Clean spark plug 4 Correct spark plug gap 5 Replace spark plug wire and or spark plug 6 Have qualified technician diagnose repair ignition system COMPESSION RELATED Loose spark plug COMPRESSION RELATED Tighten spark plug If that doe...

Page 18: ...e guard torsion rod spring 13 AM CS 5918 22 13 front guard tube 14 AM CS 5918 22 14 screw 15 AM CS 5918 22 15 guide bar outer plate 16 AM CS 5918 22 16 dust shield 17 AM CS 5918 22 17 brake spring belt 18 AM CS 5918 22 18 chain guide block 19 AM CS 5918 22 19 guide bar cover 20 AM CS 5918 22 20 limit board 21 AM CS 5918 22 21 clip 22 AM CS 5918 22 22 baffle pin 23 AM CS 5918 22 23 clip 24 AM CS 59...

Page 19: ...e trigger A 57 AM CS 5918 22 57 handle cover 58 AM CS 5918 22 58 thorttle trigger B 59 AM CS 5918 22 59 reset spring 60 AM CS 5918 22 60 pin 61 AM CS 5918 22 61 balancer 62 AM CS 5918 22 62 balancer block 63 AM CS 5918 22 63 fuel pipe 64 AM CS 5918 22 64 cover fan 65 AM CS 5918 22 65 front handle 66 AM CS 5918 22 66 Idle adjustment guide sleeve 67 AM CS 5918 22 67 taper spring 68 AM CS 5918 22 68 ...

Page 20: ...crankshaft case gasket 119 AM CS 5918 22 119 pin 120 AM CS 5918 22 120 dust plate 121 AM CS 5918 22 121 right crankshaft case 122 AM CS 5918 22 122 right shock absorption rubber 123 AM CS 5918 22 123 air intake washer 124 AM CS 5918 22 124 air intake tube support 125 AM CS 5918 22 125 air intake tube support gasket 126 AM CS 5918 22 126 air intake flange 127 AM CS 5918 22 127 Walbro carburetor 128...

Page 21: ......

Page 22: ... ...

Page 23: ......

Reviews: