ACCESS CONTROL SOLUTION Eternity 4, Руководство пользователя
"Uaccess Eternity 4" - это удобное программное обеспечение для управления системой безопасности. Здесь вы можете скачать бесплатное Руководство по программированию для установки и настройки вашего устройства. Посетите manualshive.com, чтобы скачать руководство сейчас!
Поделиться
Скачать


Отзывы:
Нет отзывов
Похожие инструкции для Eternity 4
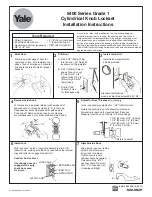
5400 Series
Бренд: Yale Страницы: 2

820S
Бренд: Olympus Lock Страницы: 5

eBOSS E5400LN Series
Бренд: Yale Страницы: 10

5400LN SERIES
Бренд: Yale Страницы: 4

Doorman
Бренд: Yale Страницы: 24

Edition Office Hook
Бренд: BANKSTON Страницы: 2

Simplex 5000 Series
Бренд: Kaba Страницы: 12

FG121 Series
Бренд: Omnio Страницы: 2

DEADBOLT 728F Z
Бренд: LOCKLY GUARD Страницы: 80

10MAGLOCK3UL
Бренд: BEA Страницы: 2

SS0990E Series
Бренд: Phoenix Страницы: 2

701SQ32R36 Series
Бренд: Richelieu Страницы: 4

CL270BLFP
Бренд: Corporate Locksmiths Страницы: 9

BE369
Бренд: Nexia Страницы: 2

Timberline CB-235
Бренд: COMPX Страницы: 1

AL40B
Бренд: ZKTeco Страницы: 22

ASSA ABLOY KS200
Бренд: HES Страницы: 8

Assa Abloy RF5010
Бренд: HES Страницы: 8


