3xLogic Vigil Server V5.00, User Manual
Discover the comprehensive features of the 3xLogic Vigil Server V5.00 in the detailed User Manual. This manual provides essential guidance on setup, operation, and maintenance. Ensure optimal use of your product by downloading the free manual directly from manualshive.com. Enhance your experience with this must-have resource today!
Share
Download


Reviews:
No comments
Related manuals for Vigil Server V5.00

NioWatch
Brand: Barco Pages: 22

Virtual Bass Amp Studio Devil
Brand: Gallo Pages: 9
REACH
Brand: Sharp Pages: 16

AR-P17 Software setupg guide
Brand: Sharp Pages: 22

Qtopia Desktop
Brand: Sharp Pages: 39
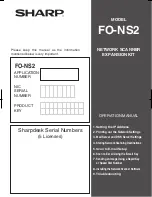
FO-NS2
Brand: Sharp Pages: 43

AR-NB2A
Brand: Sharp Pages: 48
MXUSX5 - Desk - PC
Brand: Sharp Pages: 91

e-Copy ShareScan OP 3.0
Brand: Sharp Pages: 144

PenCell IQ-9B01
Brand: Sharp Pages: 247

CLIENT LOGIN EXTENSION 3.7 - ADMINISTRATION
Brand: Novell Pages: 32

APPARMOR 2.0.1
Brand: Novell Pages: 142

VideoStudio 9
Brand: Ulead Pages: 218

CERTIFICATE SYSTEM 7.3 - ADMINISTRATION
Brand: Red Hat Pages: 554

SmartMonitor
Brand: Draytek Pages: 60

YC-3B
Brand: Yamaha Pages: 4

YC-3B
Brand: Yamaha Pages: 6

USB
Brand: Yamaha Pages: 7


