background image


Stacking Support Note 


All contents copyright (c) 2012 ZyXEL Communications Corporation.   

11 


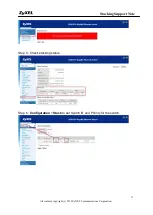
Step 5 : Check stacking status. 


Step 6 : 

Configuration

 > 

Stack 

to set Switch ID and Priority for the switch. 


Summary of Contents for XGS1910

Page 1: ...Stacking XGS1910 Series Ethernet Switch Support Notes Version 1 00 September 2012 ...

Page 2: ...ich switch will be Master Within a managed stack one master switch or just master must be elected Any switch not being master is a slave switch or just slave To elect a master the following criteria are evaluated sequentially 1 If any switch already claims to have been master for more than 30 seconds then that switch will become master 2 If multiple switches claim to have been master for more than...

Page 3: ...re which allows merging of several switches and also improving server bandwidth and link redundancy through the LACP feature LACP LACP LACP LACP Internet XGS1910 24_2F XGS1910 24_1F XGS1910 48_1F Note 1 All switches MUST use the same firmware version before you implemet stacking for them 2 Use ring topology for stacking group in order to prevent switch separation in case of a connection issue 3 Us...

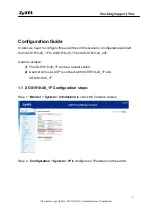
Page 4: ...ation will start from XGS1910 48_1F to XGS1910 24_1F and XGS1910 24_24F Goals to achieve 1 The XGS1910 48_1F will be a master switch 2 A server will use LACP to connect with XGS1910 24_1F and XGS1910 48_1F 1 1 XGS1910 48_1F Configuration steps Step 1 Monitor System Information to check the firmware version Step 2 Configuration System IP to configure an IP address on the switch ...

Page 5: ...12 ZyXEL Communications Corporation 5 Step 3 Configuration Stack to enable the stacking function Note After enabling the stacking function the switch MUST be rebooted Step 4 Maintenance Restart Device to reboot the switch Step 5 Check stacking status ...

Page 6: ...Stacking Support Note All contents copyright c 2012 ZyXEL Communications Corporation 6 Step 6 Configuration Stack to set Switch ID and Priority for the switch ...

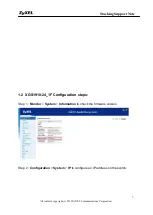
Page 7: ...tents copyright c 2012 ZyXEL Communications Corporation 7 1 2 XGS1910 24_1F Configuration steps Step 1 Monitor System Information to check the firmware version Step 2 Configuration System IP to configure an IP address on the switch ...

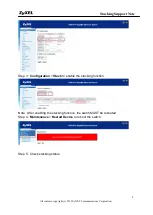
Page 8: ...12 ZyXEL Communications Corporation 8 Step 3 Configuration Stack to enable the stacking function Note After enabling the stacking function the switih MUST be rebooted Step 4 Maintenance Restart Device to reboot the switch Step 5 Check stacking status ...

Page 9: ...tents copyright c 2012 ZyXEL Communications Corporation 9 Step 6 Configuration Stack to set Switch ID and Priority for the switch 1 3 XGS1910 24_2F Configuration steps Step 1 Monitor System Information to check the firmware version ...

Page 10: ...s Corporation 10 Step 2 Configuration System IP to configure an IP address on the switch Step 3 Configuration Stack to enable the stacking function Note After enabling the stacking function the switch MUST be rebooted Step 4 Maintenance Restart Device to reboot the switch ...

Page 11: ...Stacking Support Note All contents copyright c 2012 ZyXEL Communications Corporation 11 Step 5 Check stacking status Step 6 Configuration Stack to set Switch ID and Priority for the switch ...

Page 12: ...e time for all switches Since we finished configuring XGS1910 48_1F first the XGS1910 48_1F has the longest master life time value XGS1910 48_1F XGS1910 24_1F XGS1910 24_2F Based on the rules of master election the XGS1910 48_1F will become the Master switch You can now connect the 10G links between all switches ...

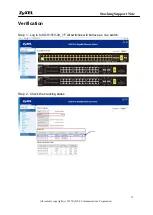
Page 13: ...tacking Support Note All contents copyright c 2012 ZyXEL Communications Corporation 13 Verification Step 1 Log in to XGS1910 48_1F All switches will behave as one switch Step 2 Check the stacking status ...

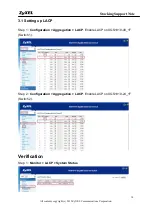
Page 14: ...ZyXEL Communications Corporation 14 3 1 Setting up LACP Step 1 Configuration Aggregation LACP Enable LACP on XGS1910 48_1F Switch 1 Step 2 Configuration Aggregation LACP Enable LACP on XGS1910 24_1F Switch 2 Verification Step 1 Monitor LACP System Status ...

Reviews: