


ENGLISH
7
3 Set Up a 3G Connection
This section shows you how to quickly configure and set up a 3G connection on the
NBG41xW3G. Leave any settings not mentioned at their default values or see the User’s
Guide for more information.
You should have ready the Internet access information for your activated 3G user account.
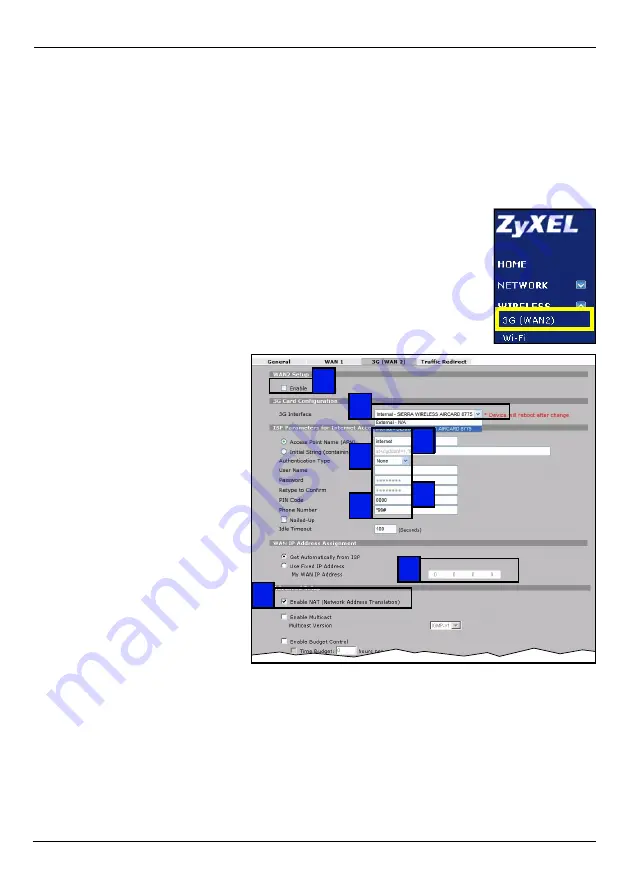
1
Click
WIRELESS > 3G (WAN 2)
in the NBG41xW3G’s navigation
menu.
2
Select
Enable
.
3
Check your device is set to the
correct 3G Interface.
4
Type the access point name
given to you by your 3G service
provider in the
Access Point
Name (APN)
field.
5
If your 3G service provider
gave you a user name and
password, select
CHAP/PAP
in
the
Authentication Type
field
and enter the user name and
password in the fields below.
Otherwise, set the
Authentication Type
to
None
.
6
If your 3G service provider
gave you a PIN code, type it in
the
PIN Code
field.
7
Type the phone number given to you by your 3G service provider in the
Phone Number
field.
8
If your service provider gave you an IP address for a 3G connection, select
Use Fixed
IP Address
and enter it in the
My WAN IP Address
field. Otherwise, select
Get
Automatically from ISP
.
9
Ensure
Enable NAT
is selected and click
Apply
.
8
9
4
6
5
7
3
2
Summary of Contents for 3G Wireless Router NBG410W3G
Page 2: ......
Page 14: ...ENGLISH 14 ...
Page 28: ...DEUTSCH 28 ...
Page 40: ...ESPAÑOL 40 ...
Page 64: ...ITALIANO 64 ...
Page 88: ...繁體中文 88 ...


