


Step 3
Select Enable.
Step 4
Select the DiskGroupID.
Step 5
Input the UsableSpace.
Step 6
Click Modify to save the configuration and exit the interface.
Step 7
Select the file system.
Step 8
Click DiskFormat to format the disk. It will ask you all the information which has been
saved in Disk will be cleared, if yes, then it will start to format.
11.4.5
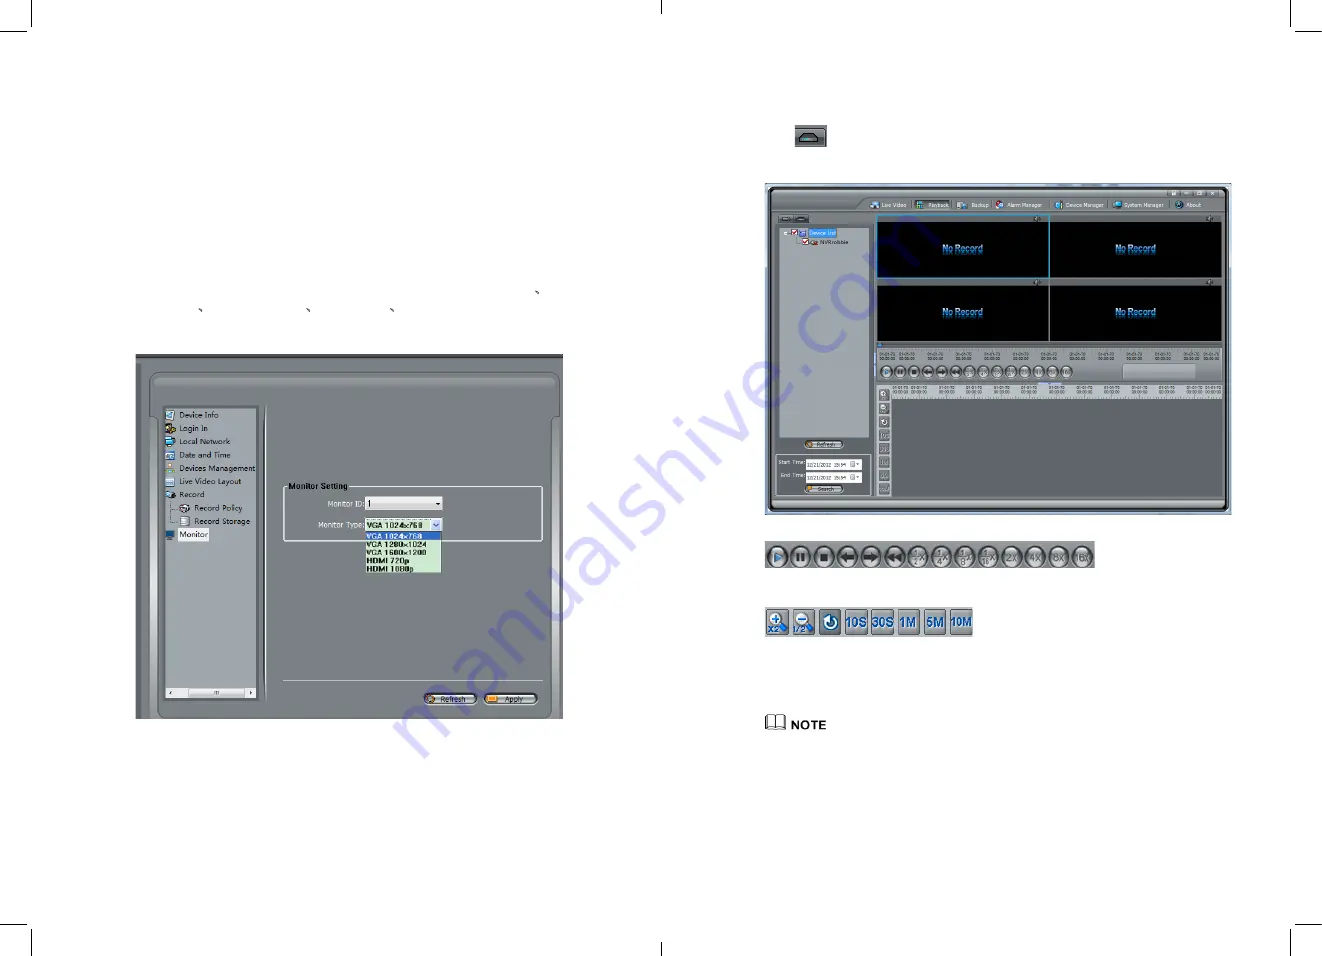
NVR Monitor
NVR Bear panel has a VGA output and a HDMI output interface. Default NVR will
output the VGA “VGA 1024×768” .User can adjust it as:
VGA 1024×768
ǃ
VGA
1280×1024
ǃ
VGA 1600×1200
ǃ
HDMI 720P
ǃ
HDMI 1080P
show in Figure 4-63.
Figure 4-63
Monitor configure
After change the configuration, the NVR will restart automatically.
11.5
Playback
NVMS can remote playback the NVR recording video.
63
11.5.1
Video Search and playback
In the main interface, click Playback enter the interface, and click the NVR
Icon”
” enter NVR Playback show in Figure 4-64.
Figure 4-64
Playback
means: Play, Pause, Stop,
back frame, forward frame, 1/2 fast forward, 1/4fast forward, 1/8fast forward, 1/16fast
forward, 2fast forward, 4fast forward, 8fast forward, 16 fast forward.
Means: amplification, narrow, reduction, 10
seconds amplification, 30 second simplification, 1 minute’s amplification, 5 minutes
amplification, 10 minutes amplification. Use those button can control the time
simplification and narrow.
The maximum playback channel is 16.
Query the start-stop time not more than 7 days, split screen display will be selected in
accordance with the device for automatic screen. Green color is schedule record, red color is
alarm record. Grey color is no video. Local path will read the video save path automatically.
11.5.2
Backup
Enter the Backup interface, select the video that need to backup by mouse drag on the
time axis and right click mouse->Backup to start the video backup.
64


