background image

2 Interfaces 


Wlan Operation Frequency: 2412~2472MHz, EIRP Power (Max.): 15

±

3dbm.


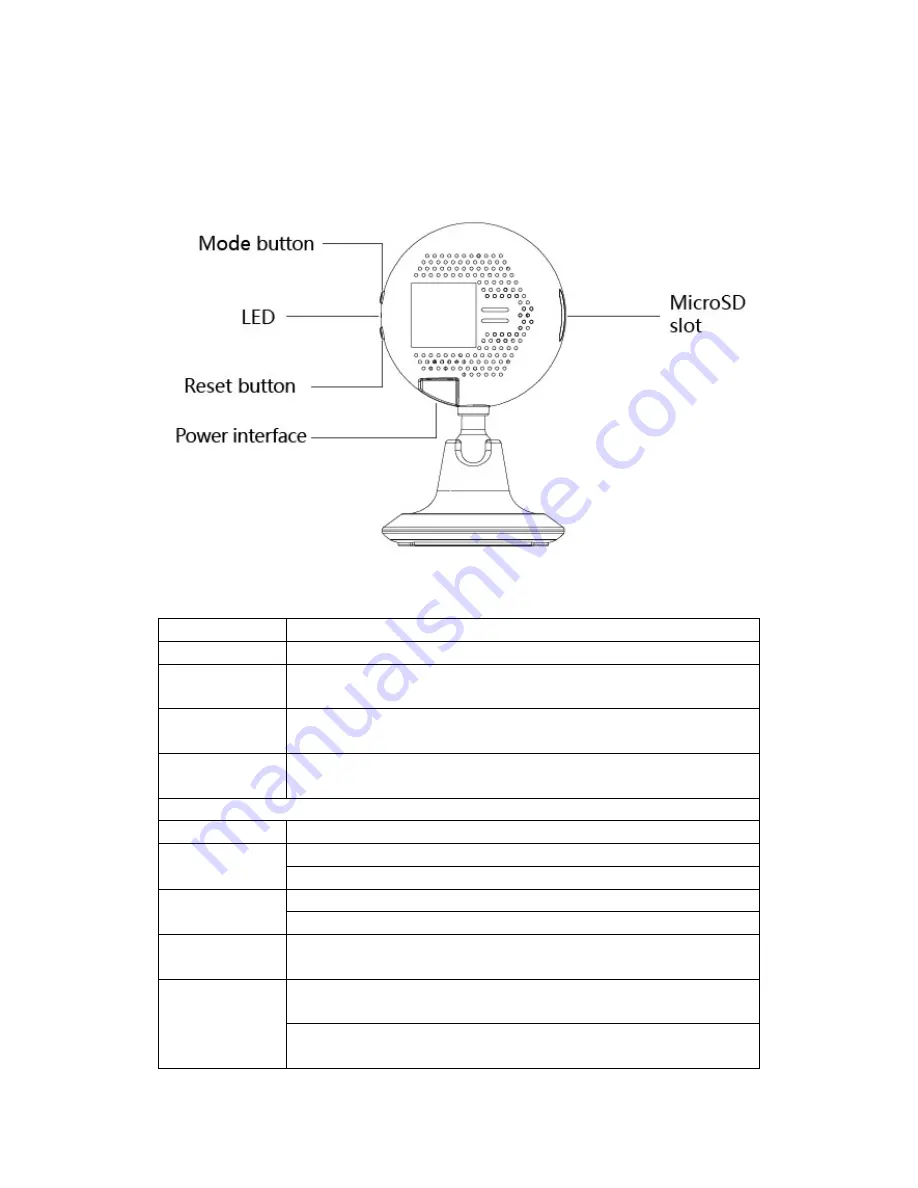
Interface Function 

MicroSD slot 

Insert a TF card into the slot to store local videos. 

MicroUSB power 

interface 

Connect a power adapter or power bank to the interface. 

Mode 

button 

Switch between function modes. For details, please refer to the 

instructions given by the app. 

Reset button 

Press and hold the button until the LED turns red to restore the factory 

settings. 

LED 

Off 

The camera is not powered on. 

Red 

Solid: The camera is starting up. 

Flashing: The camera is being upgraded to the latest version. 

Blue 

Slow flashing: The camera is awaiting network configuration. 

Fast flashing: The camera is having its WLAN configured. 

Blue/Green 

Flashing alternately in blue and green: The camera is obtaining its IP 

address. 

Green 

Flashing: The camera has obtained its IP address and is attempting to 

connect to the server. 

Solid: The camera has been connected to the server and is operating 

normally. 

Summary of Contents for ZXHN HS320

Page 1: ...jured This product is not a toy and should be used by children onlyunder the supervision of an adult Please use this product in the temperature range from 5 C to 40 C Ambient temperatures that are too high or too low maycause the product to malfunction Please keep this product and its fittings from rain and moisture Do not use this product in thunderstorms as they may causeproduct failures or elec...

Page 2: ...button until the LED turns red to restore the factory settings LED Off The camera is not powered on Red Solid The camera is starting up Flashing The camera is being upgraded to the latest version Blue Slow flashing The camera is awaiting network configuration Fast flashing The camera is having its WLAN configured Blue Green Flashing alternately in blue and green The camera is obtaining its IP addr...

Page 3: ...ra to perform its functions it has to be connected to a wireless router whose routing feature is enabled Make sure that the camera is within range of the wireless router 4 Installing the HomeCare App Use your smartphone to scan the QR code below Then download and install the HomeCare app ...

Page 4: ... red After that wait again until the LED starts to slowly flash in blue Follow the instructions of the app to add and use the camera 6 Advanced Functions Activating cloud storage After cloud storage is activated emergency videos can be saved in the cloud server to prevent data loss or damage The cloud storage service can be purchased and activated within the app Locally recording videos Use a TF c...

Page 5: ...ference by one or more of the following measures Reorient or relocate the receiving antenna Increase the separation between the equipment and receiver Connect the equipment into an outlet on a circuit different from that to which the receiver is connected Consult the dealer or an experienced radio TV technician for help To assure continued compliance any changes or modifications not expressly appr...

Page 6: ...nly with dry cloth 3 This camera is for indoor use only 4 Only use attachments accessories specified by themanufacturer 5 Unplug this apparatus during lightning storms or whennot is use for long periods of time 6 To get the best usage out of this product please consistentlyupdate to the latest versions of our app and firmware WARNING Open flame sources such as candles should not be placed nearor o...

Reviews: