49
SATA RAID User Manual
Note:
When more than two HDDs are installed in your computer, the
Disks
item will be selectable.
Then users can select the HDD that you want to belong to the RAID set. Please be noticed
that selecting a wrong disk will result in losing the original data of the HDD.
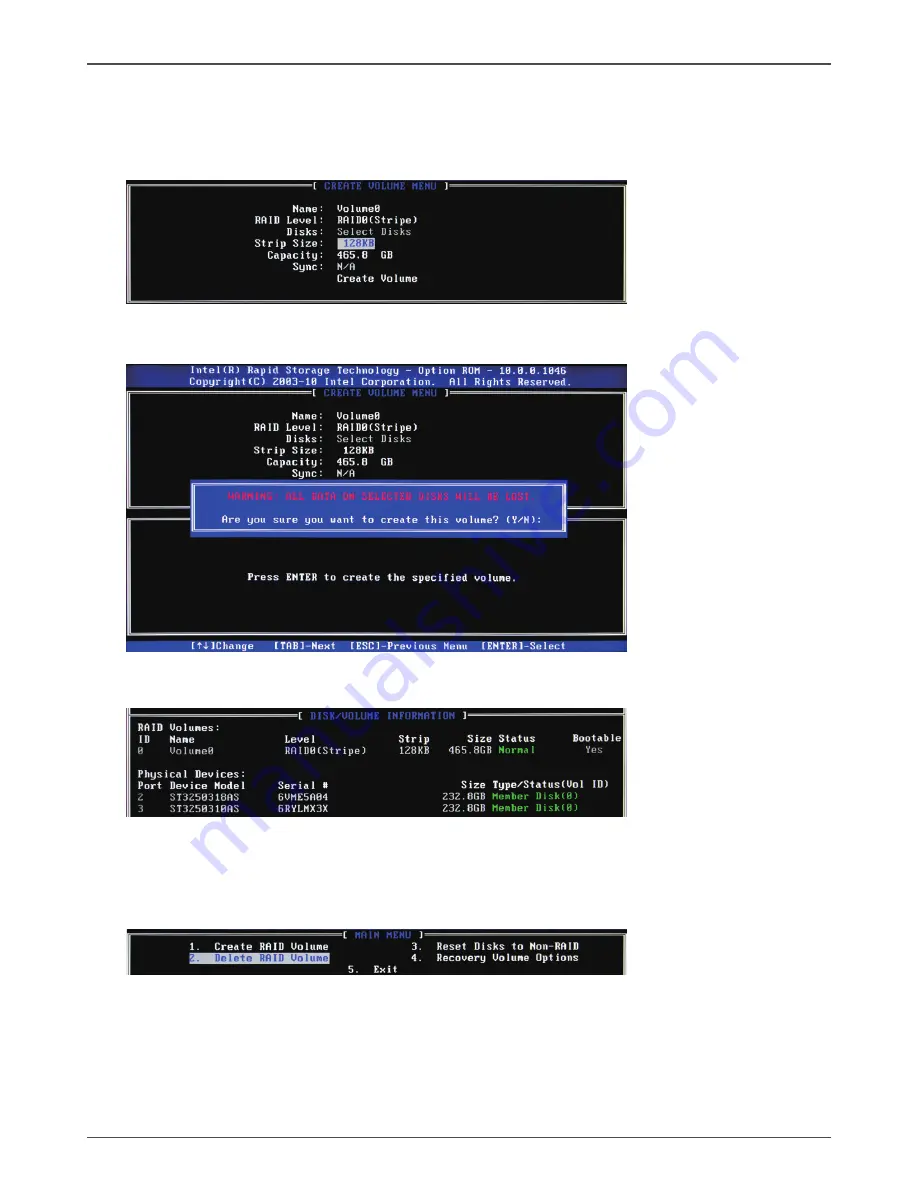
3. Press <Enter> to confirm the creation of the RAID set. A dialogue box appears to confirm
the action. Press <Y> to confirm; otherwise, press <N>.
4. The following screen appears, displaying the relevant information about the RAID set you
created.
Deleting a RAID set
1. In the main Intel(R) Rapid Storage Technology RAID BIOS menu, highlight
Delete RAID
Volume
using the
#$
arrow key then press <Enter>.
2. Use the space bar to select the RAID set you want to delete. Press the <Del> key to delete
the set.
Summary of Contents for H77 ITX Series WiFi
Page 1: ......
Page 31: ...30 Intel H77 ITX series Motherboard 2 Left click Intel Chipset Driver begin loading...
Page 33: ...32 Intel H77 ITX series Motherboard 5 Left click Ethernet PCI E Driver begin loading...
Page 34: ...33 Installing Drivers And Software 6 Left click USB 3 0 Controller Driver begin loading...
Page 35: ...34 Intel H77 ITX series Motherboard 7 Left click JMB36X Driver begin loading...
Page 37: ...36 Intel H77 ITX series Motherboard 9 Left click Usb Charger begin loading...
Page 38: ...37 Installing Drivers And Software 10 Left click Intel Management Engine begin loading...
Page 39: ...38 Intel H77 ITX series Motherboard 11 Left click Bluetooth driver begin loading...
Page 40: ...39 Installing Drivers And Software...
Page 53: ...52 Intel H77 ITX series Motherboard 291 MA209 00...
Page 54: ......


