© 2016 ZOOM CORPORATION
Copying or reprinting this manual in part or
in whole without permission is prohibited.
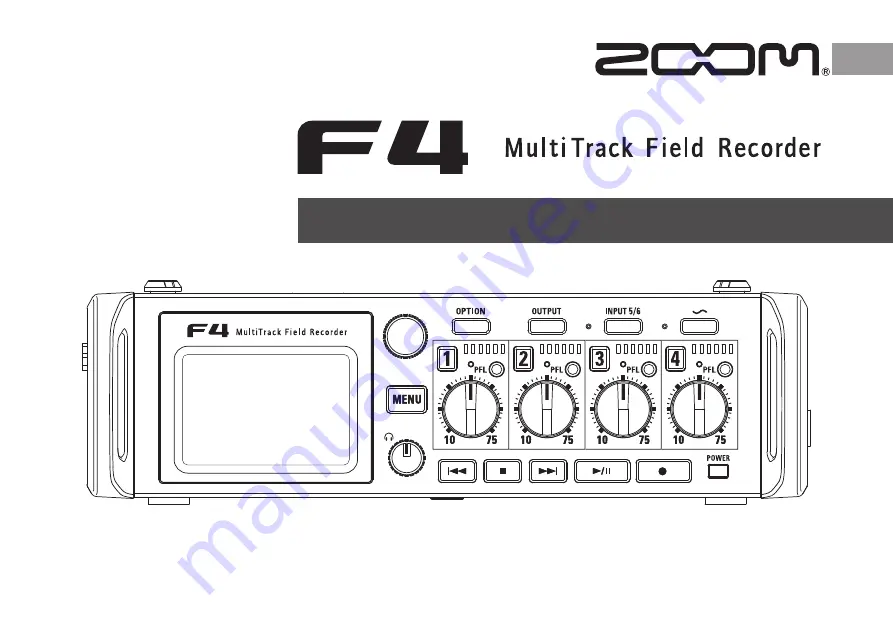
Operation Manual
Page 1: ... 2016 ZOOM CORPORATION Copying or reprinting this manual in part or in whole without permission is prohibited Operation Manual ...
Page 2: ...ct all connection cables and the AC adapter before moving the unit Volume Do not use at a loud volume for a long time Usage Precautions Interference with other electrical equipment In consideration of safety the F has been designed to minimize its emission of electro magnetic waves and to suppress interference from external electromagnetic waves How ever equipment that is very susceptible to inter...
Page 3: ... harmful interference to radio communications However there is no guarantee that interference will not occur in a particular installation If this equipment does cause harmful interference to radio or television reception which can be determined by turning the equipment off and on the user is encouraged to try to correct the interference by one or more of the following measures Reorient or relocate...
Page 4: ...mid side input to stereo Stereo Link Mode 85 Adjusting multiple track input levels together Trim Link 87 Using Input 5 6 as a return RTN input 88 Adjusting the side mic level of a mid side mic capsule Side Mic Level 89 Output settings Setting signals sent to the output jacks Routing 90 Disabling outputs Output On Off 94 Setting the standard output level Output Level 95 Setting the output level 96 ...
Page 5: ...ck and MAIN OUT 1 2 and SUB OUT 1 2 jacks MAIN OUT 1 2 are XLR connectors These outputs allow you to send audio signals to a video camera and other devices while monitoring with headphones Support for return RTN input Monitor the output of a DSLR camera without recording it with the F With flexible signal routing mixer use is also possible Prefader and postfader signals from inputs 1 6 can be rout...
Page 6: ...icator OUTPUT key INPUT 5 6 key OPTION key MENU key Headphone volume REW key MIC IN connector Battery case SD card slots TIME CODE IN OUT connectors FF key PLAY PAUSE key REC key POWER switch STOP key TRACK key LED level meter PFL key Status indicator TRACK knob LED level meter 48 Green Orange Red 30 18 12 6 0 dBFS ...
Page 7: ...MAIN OUT 1 2 XLR XLR TRS Right side 1 GND 2 HOT 3 COLD 1 GND 2 HOT 3 COLD DC 9 16V HIROSE 4 pin TIP HOT RING COLD SLEEVE GND SUB OUT 1 2 jack USB port RTN INPUT 5 6 jack MAIN OUT 1 2 jack Inputs 1 4 Lock release button DC IN connector HEADPHONE jack 1 2 1 4 2 NC 3 NC 2 1 3 3 ...
Page 8: ...t the TRS plugs of keyboards and mixers directly to Inputs 1 4 Direct input of passive guitars and basses is not supported Connect these instruments through a mixer or effects device TRS cable Keyboard TRS cable Mixer The F can record 6 individual tracks that correspond to Inputs 1 6 and a stereo mix of these inputs with left and right tracks for a total of 8 tracks You can connect mics and the ou...
Page 9: ...rotective caps from the F and the mic capsule or extension cable 2 While pressing the buttons on the sides of the mic capsule or extension cable connect it to the main unit inserting it completely 3 To disconnect the mic capsule or extension cable pull it away from the main unit while pressing the buttons on its sides NOTE Do not use too much force when disconnecting Doing so could damage the mic ...
Page 10: ...ence voices con nected to MIC IN PA mixer Mic capsule Vocal mics etc MIC IN 2 1 4 3 While filming Input 1 gun mic for main subject sound XLR connection Inputs 2 3 lapel mics for performers TRS connections Input 4 mic for ambient sound XLR connection RTN Input 5 6 line input for camera output stereo mini connection Pin mics Gun mic Pin mics Camera output 2 3 1 5 6 MAIN OUT 1 2 Ambient mic 4 Connect...
Page 11: ... EXT input external timecode active Recording playback timecode Remaining battery charge Empty Full Stereo linked tracks Parameter controlled by TRACK knobs Level meter Track number Clip indicator Limiter indicator Paused Playing Phantom plug in power enabled HINT Stereo linked tracks are shown together like 3 4 When the Home Screen is not open press and hold m to return to the Home Screen Home Sc...
Page 12: ...ying SD card 1 When recording remaining recordable time When playing remaining playback time SD card 2 Format and sampling rate of file recording playing SD card 2 When recording remaining recordable time When playing remaining playback time Clip indicator Recording playback take name Playback card Level meters NOTE Turn e to switch between showing the mixer Tracks 1 4 and a set level meter View 1...
Page 13: ...ter horizontal Turn e vertical Turn O while pressing it Confirm character Press E Complete editing Move cursor to Enter and press E Cancel editing Press m HINT Press s r to delete the previous character Press s f to move the cursor to Enter NOTE The following characters can be used in project names space 0 1 2 3 4 5 6 7 8 9 A B C D E F G H I J K L M N O P Q R ST U V W XY Z _ a b c d e f g h i j k ...
Page 14: ...E Load the case so that the side with the protruding rail is up 7 Close the battery compartment cover and tighten the screw NOTE Be careful because the battery case could become loose unexpectedly if the battery compartment cover screw is not tightened firmly Use only one type of batteries alkaline NiMH or lithium at a time After loading batteries set Power Source to the correct type of battery P ...
Page 15: ...5 Using a DC power supply 1 Connect the DC power supply device to the DC IN connector Connect a 9 16V direct current power supply 2 If using an adapter plug it into an outlet NOTE When connecting a DC power supply be sure to make the power supply settings P 20 ...
Page 16: ...card further into the slot and then pull it out NOTE Always turn the power off before inserting or removing an SD card Inserting or removing a card while the power is on could result in data loss When inserting an SD card be sure to insert the correct end with the top side up as shown If an SD card is not loaded recording and playback are not possible To format an SD card see P 144 ...
Page 17: ...nabled Slide the lock switch on the SD card to disable write protection If Invalid Card appears on the display the card is not formatted correctly Format the card or use a different card To format an SD card see P 144 Turning the power off 1 Press and hold w briefly NOTE Keep pressing it until the ZOOM logo appears on the LCD Disabling the Auto Power Off function The power will automatically turn ...
Page 18: ... the date and time P 18 Setting the date format P 19 Setting the date and time 4 Use e to select Set Date Time and press E 5 Change the setting Changing settings Move cursor or change value Turn e Select item to change Press E The date and time set on the F are used when recording files for example You can set the date format order of year month and day Note The first time you turn the power on af...
Page 19: ...g the date format 4 Use e to select Data Format and press E 5 Use e to select the format and press E Setting value Explanation mm dd yy Month day year order dd mm yy Day month year order yy mm dd Year month day order 6 Use e to select Enter and press E This completes setting the date and time ...
Page 20: ...ter nal DC power supply runs out and can no longer supply power See the DC power supply manual for the shutdown volt age value 5 Use e to select the volt age and press m 1 Press m 2 Use e to select SYSTEM and press E 3 Use e to select Power Source and press E Continue to one of the following procedures Setting the DC power supply DC IN shutdown voltage P 20 Setting the DC power supply DC IN nomina...
Page 21: ...ed they will be used in the following order of priority 1 DC power supply DC IN 2 AA batteries Int AA The voltages of each power supply are shown on the display Setting the DC power supply DC IN nominal voltage 4 Use e to select Nominal Voltage and press E 5 Use e to select the volt age and press E HINT The nominal voltage is the voltage of the DC power supply under normal conditions This value sh...
Page 22: ...ard and file format for recording ĺ P 23 Set the recording file format for each SD card separately 2 Select the recording tracks ĺ P 25 U s e t r a c k k e y s t o s e l e c t T h e indicators for selected tracks light red and you will be able to monitor input sounds Press two track keys simultaneously to link them as a stereo track 3 Make recording settings You can make other settings including f...
Page 23: ...e to select REC PLAY and press E 3 Use e to select Rec to SD1 or Rec to SD2 and press E 4 Use e to select the file type and press E Setting value Tracks recorded Explanation None Nothing will be recorded on the SD cards Tr1 6 POLY WAV Selected tracks 1 6 A single poly file will be created that contains audio for multiple tracks Tr1 6 MONO ST WAV A single mono file is created for each mono track an...
Page 24: ...ted P 37 When recording to 2 cards simultaneously files will be saved in the same folder as the card set for recording and playback Fold ers will be created automatically if they do not already exist If recording should stop on one SD card because it runs out of space for example recording will continue on the other SD card At such times do not remove the card that has stopped recording from the s...
Page 25: ...k 2 Selecting inputs 1 Press the track key with the same number as the input you want to record making the track indicator light NOTE The signals from the inputs selected this way will also be sent to the L R tracks Selecting Input 5 6 1 Press i 2 Use e to select INPUT and press E 3 Use e to select ON and press E HINT INPUT 5 6 can be used as a return RTN so you can moni tor the input by headphone...
Page 26: ...2 will be joined as a stereo track stereo link Repeat the same procedure to disable the stereo link HINT The 3 4 track pair can also be stereo linked in the same way When a mic capsule that allows independent L and R input selection is connected stereo linking can also be enabled and disabled for their tracks Tracks 5 and 6 are always stereo linked ...
Page 27: ...ay are different moving a will not affect that setting In this case if you adjust a to match the position of the knob on the display the display knob and a will be relinked and you will be able to use it to adjust the setting value again Parameter Setting range Explanation TRIM Input connected using XLR plug Mic 10 75 dB Input connected usingTRS plug Line 10 55 dB This adjusts the input level FADE...
Page 28: ...distorts even when you lower the input level try changing mic positions and adjusting the output levels of con nected devices You can set the standard input level for INPUT 5 6 in advance Press o l Track 1 to disable adjustment of input levels by turning a for all tracks Press o l Track 1 again to cancel this Set PAN values on the PFL screen ...
Page 29: ...ecording A maximum of 99 marks can be added to a take HINT During playback you can use r and f to jump to places where marks have been added You can also add marks without pausing P 139 4 Press s to stop NOTE If the maximum file size is exceeded during recording P 36 recording will continue in a new take with a num ber that is one higher No gap in sound will occur between the two takes when this h...
Page 30: ... 048kHz Select this when recording video at 24 frames per second if you want to edit at NTSC 29 97 or 23 98 HD later 47 952kHz F 48 048kHz F These function the same as the two above but the sampling rate metadata will be recorded as 48kHz for FILE_SAMPLE_RATE This enables playback and editing with devices and software that do not support 47 952kHz and 48 048kHz WAV files Playback however will occu...
Page 31: ...er 31 Setting WAV file bit depth WAV Bit Depth 1 Press m 2 Use e to select REC PLAY and press E 3 Use e to select WAV Bit Depth and press E 4 Use e to select the bit depth and press E HINT This can be set to 16 bit or 24 bit You can set the bit depth of WAV files ...
Page 32: ...le bit depth MP3 Bit Rate 1 Press m 2 Use e to select REC PLAY and press E 3 Use e to select MP3 Bit Rate and press E 4 Use e to select the bit rate and press E HINT This can be set to 128 kbps 192 kbps or 320 kbps You can set the bit rate of recorded MP3 files ...
Page 33: ...lect On and press E When dual channel recording is On the name of the correspond ing second track 3 or 4 changes In addition to the regular recording the F can record another recording adjusted to a different input level dual channel recording For example by using dual channel recording to record at an input level 12 dB below the regular recording you can prepare a replacement if the regular recor...
Page 34: ... amount of space used on SD cards NOTE When using dual channel recording the track that is numbered 2 higher than the original track is used for the second recording For example track 3 is used for the dual channel recording of track 1 and track 4 is used for track 2 Dual channel recording tracks cannot be used independently When dual channel recording is enabled if stereo linking is enabled or di...
Page 35: ...nds on the file format and sampling rate used File format Sampling rate Maximum pre recording time WAV 44 1kHz 6 seconds 47 952kHz 6 seconds 47 952kHz F 6 seconds 48kHz 6 seconds 48 048kHz 6 seconds 48 048kHz F 6 seconds 88 2kHz 3 seconds 96kHz 3 seconds 192kHz 1 second MP3 44 1kHz 6 seconds 48kHz 6 seconds The input signal is always buffered for a set amount of time so it can be captured for up t...
Page 36: ...E 4 Use e to select the maxi mum size of recording files and press E HINT Setting the maximum size to 640MB or 512MB is convenient for backing up to CDs The maximum size of recording files can be set If a recording file exceeds the maximum file size recording will continue in a new take with a number that is one higher No gap in sound will occur between the two takes when this happens ...
Page 37: ...lders and files depend on how scenes are named 160101 001 WAV 160101 003_Tr3 WAV 160101 003_Tr4 WAV 160101 003_Tr1 WAV 160101 003 TAKE Scene001 001 TAKE 160101 003_Tr2 WAV 160102 Scene001 Root Scene 160101 1st take WAV format Polyphonic file Next scene 160101 First scene User created folder Order recorded ĺ 160101 002 MP3 Scene 160101 2nd take MP3 format Stereo file Scene 160101 3rd take WAV forma...
Page 38: ...ata are added to file names File names File names are given according in the following formats Type Structure Explanation Poly file Scene1_001 wav Take names This is a file cre ated by polyphonic recording Audio for multiple tracks is recorded to a single file Mono file Scene1_001_Tr1 wav Take names Track number This is a file created by monophonic recording Stereo file Scene1_001_Tr1_2 wav Take n...
Page 39: ...r 1 Open the Home Screen 2 Press and hold r HINT Moving a take to the FALSE TAKE folder reduces the take number by one You can move the previously recorded take to the FALSE TAKE folder even during recording 3 Use e to select Yes and press E If the just recorded take was a failure you can use a shortcut to move the recording to the FALSETAKE folder ...
Page 40: ... Use e to select Note and press E Continue to one of the following procedures Editing notes P 40 Selecting notes from the history list P 41 Editing notes 4 Use e to select Edit and press E 5 Edit the note See Character input screen P 13 f o r h o w t o i n p u t characters NOTE This note is written to the NOTE metadata You can input characters for a note to use as metadata in the file ...
Page 41: ...take recorded Note F Multi Track Field Recorder 41 Selecting notes from the history list 4 Use e to select History and press E 5 Use e to select the History item to use and press E NOTE The history list will be erased if the Factory Reset function is used ...
Page 42: ...ne and press E Continue to one of the following procedures Setting how scenes are named mode P 42 Editing the scene name P 43 Selecting a scene name from the history list P 44 Setting how scene numbers advance P 44 Setting how scenes are named mode 4 Use e to select Name Mode and press E 5 Use e to select the mode and press E You can set how scenes are named name mode the base scene name and how s...
Page 43: ...med only with the take number such as 001 002 003 and so on s f cannot be used to advance the scene number by one Example 001 wav Current Folder The name of the currently selected folder is used as the scene name s f can be used to advance the scene number by one After advancing the scene number by 1 the corresponding folder will be used as the recording destination If that folder does not already...
Page 44: ...Explanation Numeric Press s f on the Home Screen to increase the scene number by one Example Scene Scene1 Scene2 Scene9999 Character Press s f on the Home Screen to advance the capital letter at the end of the scene name by one If the scene name does not have a capital letter at its end one will be added Example Scene1 Scene1A Scene1B Scene1Z Scene1AA Scene1AB Selecting a scene name from the histo...
Page 45: ...tting the take number reset condition 4 Use e to select Reset Mode and press E 5 Use e to select the reset mode and press E Setting value Explanation Off The take number will not be reset However if the folder is changed and that folder contains a number higher than the current take number the take number will be set to one higher than the highest existing take number Folder Change If the destinat...
Page 46: ...reset condition and numbering format Take continued Setting the take number format 4 Use e to select Number Format and press E 5 Use e to select the format and press E Setting value Take formats T Example Scene001 T001 _ Example Scene001_001 Scene T Take number Scene name Scene T Take number Scene name ...
Page 47: ...o select METADATA NextTake and press E 3 Use e to selectTrack Name and press E HINT On the Home Screen s 3 can be used to open theTrack Name screen 4 Use e to select the track and press E Continue to one of the following procedures Editing the track name P 48 Selecting a track name from the History list P 48 The track name set with the following procedure will be given to the next recorded track ...
Page 48: ...he history list 5 Use e to select History and press E 6 Use e to select the History item to use and press E NOTE The history list will be erased if the Factory Reset function is used Editing the track name 5 Use e to select Edit and press E 6 Edit the track name See Character input screen P 13 f o r h o w t o i n p u t characters NOTE The track name is written to the TRACK NAME metadata ...
Page 49: ...t If 1 6 and L R have playback tracks the L R tracks will not be played HINT The longer you press and hold r or f the faster the speed of searching backward forward During playback press track keys to switch between play ing back lit green and muted unlit An InvalidTake message will appear if the selected take is not valid A NoTake message will appear if no playable take exists During playback you...
Page 50: ...the parameter settings See Adjusting the input levels and monitoring balance P 27 for how to change settings NOTE Settings are saved separately for each take and are used during playback Mix settings are not saved with the take when the format is MP3 You can change the volume and panning of each track during playback ...
Page 51: ... the play mode and press E Setting value Explanation Play One single playback Only the selected track will be played Play All all playback Tracks will be played back continuously from the selected take until the last take Repeat One single repeat playback The selected track will be played repeatedly Repeat All all repeat playback All takes in the selected folder will be played repeatedly You can c...
Page 52: ...operations Move cursor Turn e Move down a level Press E Move up a level Press m SD card selected Open space Size Remaining recordable time Folder selected Date Time Take selected Timecode Date Frame rate Time Recording format The Finder allows you to view the contents of SD cards takes and folders and create folders It also allows you to set and delete recording playback folders and view their inf...
Page 53: ...ake information P 55 Checking take marks and using them for playback P 55 Copying takes to other cards and folders P 56 Deleting folders and takes P 57 Emptying theTRASH FALSETAKE folder P 58 Creating folders Folders can be created inside the currently selected SD card folder 1 Use e to select New Folder and press E 2 Edit the folder name See Character input screen P 13 f o r h o w t o i n p u t c...
Page 54: ...d name of the folder take is written to the PROJ ECT or SCENE metadata You cannot put a space or an mark at the beginning of the name Selecting the take recording playback folder Use this procedure to select the folder that contains the take to be played back or the folder to use for recording takes and return to the Home Screen 4 Press o 5 Use e to select Select and press E 6 Use e to select Yes ...
Page 55: ...E Added Mark Mark added when skipping occurred during recording and its time 7 Use e to select Yes and press E The Home Screen will reopen and playback will start from the mark Checking take information 4 Press o 5 Use e to select Informa tion and press E Use e to scroll the screen and show information that is hidden Item Explanation Date Time Date and time created Timecode Timecode Format Recordi...
Page 56: ...inued 8 Use e to select the copy destination and press o NOTE See Take and folder operations for how to select a folder P 52 9 Use e to select Yes and press E Copying takes to other cards and folders 4 Press o 5 Use e to select Copy and press E 6 Use e to select the take to copy and press E 7 Press o ...
Page 57: ... the SD card They are moved to theTRASH folder Deleting the folders and takes in the TRASH folder will completely erase their data Deleting folders and takes 4 Press o 5 Use e to select Delete and press E 6 Use e to select the folder take to delete and press E Press m to cancel deletion NOTE You can press p to select deselect all the folders and takes that are currently shown 7 Press o ...
Page 58: ... theTRASH folder will completely erase the data in it Emptying the FALSE TAKE folder does not immediately erase its data from the SD card The data is moved to the TRASH folder Emptying theTRASH FALSETAKE folder 4 Use e to selectTRASH or FALSETAKE TRASH folder FALSE TAKE folder 5 Press o 6 Use e to select Empty and press E TRASH folder FALSE TAKE folder ...
Page 59: ... in a single block To use BEXT and iXML chunk metadata an application that sup ports both data formats is necessary WAV file metadata The metadata saved in files recorded by the F in WAV format is collected in BEXT Broadcast Audio Extension and iXML chunks For details about the metadata saved in these chunks see Metadata contained in BEXT chunks in WAV files P 152 Metadata contained in iXML chunks...
Page 60: ...to use the Finder P 52 4 Use e to select Metadata Edit and press E Continue to one of the following procedures Checking and editing notes P 61 Selecting notes from the history list P 61 Checking and editing scene names P 62 Selecting a scene name from the history list P 62 Checking and editing take names P 63 Circling takes P 63 Changing folder tape names P 64 Changing project names P 64 Checking ...
Page 61: ...press E 7 Edit the note See Character input screen P 13 f o r h o w t o i n p u t characters NOTE The contents of this note is written to the NOTE metadata Selecting notes from the history list 5 Use e to select Note and press E 6 Use e to select History and press E 7 Use e to select the History item to use and press E NOTE The history list will be erased if the Factory Reset function is used ...
Page 62: ... 6 Use e to select History and press E 7 Use e to select the History item to use and press E NOTE The history list will be erased if the Factory Reset function is used Checking and editing scene names 5 Use e to select Scene and press E 6 Use e to select Edit and press E 7 Editing scene names See Character input screen P 13 f o r h o w t o i n p u t characters NOTE The scene name is written to the...
Page 63: ... press E 6 Use e to select Circled and press E NOTE To clear a circle select Not Circled and press E This circled status is written to the CIRCLE metadata Checking and editing take names 5 Use e to selectTake and press E 6 Changing the take number Editing operations Move cursor or change value Turn e Select parameter to change Press E HINT This can be set from 1 to 999 NOTE The take number is writ...
Page 64: ...PROJECT metadata The project name used immediately after recording is the name of the highest level folder inside the SD card root directory that contains the folder in which the take was recorded Changing folder tape names 5 Use e to select Folder Tape and press E 6 Edit the folder tape name See Character input screen P 13 f o r h o w t o i n p u t characters NOTE The folder tape name is written ...
Page 65: ...65 8 Editing the track name See Character input screen P 13 f o r h o w t o i n p u t characters NOTE The track name is written to the TRACK NAME metadata Checking and changing track names 5 Use e to selectTrack Name and press E 6 Use e to select the track and press E 7 Use e to select Edit and press E ...
Page 66: ...tadata Edit continued 8 Use e to select the History item to use and press E NOTE The history list will be erased if the Factory Reset function is used Selecting a track name from the history list 5 Use e to selectTrack Name and press E 6 Use e to select the track and press E 7 Use e to select History and press E ...
Page 67: ...report and press o 4 Use e to select Create Sound Report and press E Continue to one of the following procedures Writing sound reports P 68 Editing comments P 68 Selecting comments from the history list P 69 Writing a sound report Create Sound Report A sound report includes information about recording times and takes Reports can be written as CSV format files F4_ folder name CSV You can edit comme...
Page 68: ...t inside the selected SD card or folder NOTE Only information about takes in the folder or SD card is written in the sound report If a sound report file with the same name already exists it will be overwritten Please use caution Editing comments 5 Use e to select Info Edit and press E 6 Use e to select Comments and press E 7 Use e to select Edit and press E 8 Editing comments See Character input s...
Page 69: ...order 69 8 Use e to select the History item to use and press E HINT The history list will be erased if the Factory Reset function is used Selecting comments from the history list 5 Use e to select Info Edit and press E 6 Use e to select Comments and press E 7 Use e to select History and press E ...
Page 70: ...ow MAIN OUT 1 2 SUB OUT 1 2 HEADPHONE OUT Recording OUTPUT Input 1 Trim HPF Input Limiter Phase Invert MS Stereo Input Delay Fader Mixer L R Delay Level Slate Tone Limiter Fader Alert Tone Slate Tone Fader Routing Level Pan Dual Channel Rec Input 2 Input 5 Input 6 RTN ...
Page 71: ...Press o l Track 3 NOTE Shortcuts are disabled during playback 3 Use e to adjust the volume NOTE Volume settings affect the results of recording If only the L R track is recorded the L R track fader setting for the take will be saved as 0 dB 4 When finished adjusting press m Adjusting the L R track volume ...
Page 72: ...s standard input level for RTN INPUT 5 6 Trim Sets input level Fader Sets fader level Pan Sets panning Phantom Sets phantom power supply HPF Sets high pass filter Input Limiter Sets limiter Phase Invert Sets polarity Side Mic Level Sets side mic level of mid side capsule Input Delay Sets input delay Plugin Power Sets plugin power Stereo Link Sets stereo link PFL Mode Sets monitoring volume on the ...
Page 73: ... and press E HINT Select All to set all the tracks at the same time 5 Use e to select the setting and press E Setting value Explanation PFL On the PFL screen monitor the pre fader sound SOLO On the PFL screen monitor the post fader sound NOTE When the PFL screen is open during playback the monitor ing sound will be post fader SOLO regardless of the setting On the PFL screen you can set the monitor...
Page 74: ... E 4 Use e to select the track and press E HINT Select All to set all the tracks at the same time 5 Use e to set the cutoff frequency and press E NOTE The HPF also affects dual channel recording data HINT This can be set to Off or between 80 and 240 Hz The high pass filter can cut low frequencies to reduce the sound of wind vocal pops and other noise ...
Page 75: ...er the signal exceeds the threshold until the limiter starts operating The release time is how long after the signal goes below the threshold until the limiter stops operating Change these two parameters to adjust the sound quality HINT The F uses a newly designed limiter This limiter has 10dB of headroom preventing distortion and allowing it to keep signals below the set threshold even more than ...
Page 76: ...are attenu ated There is no effect below the threshold Soft Knee The limiter gradually affects the signal about 6 dB below the threshold for a gentler effect Continue to one of the following procedures Using the limiter P 76 Setting the type P 76 Setting the threshold P 77 Setting the attack time P 77 Setting the release time P 78 Using the limiter 5 Use e to select On Off and press E 6 Use e to s...
Page 77: ...input signal exceeds the threshold 5 Use e to select Attack Time and press E 6 Use e to adjust the time and press m HINT This can be set from 1 to 4 ms Setting the threshold This sets the base level from which the limiter operates 5 Use e to selectThreshold and press E 6 Use e to adjust the set ting and press m HINT This can be set from 16 to 2 dBFS ...
Page 78: ...reshold the limiter will operate on both tracks When the limiter is operating the end of the level meter and the mixer limiter indicator light on the display Setting the release time This sets the amount of time until compression stops after the input signal goes below the threshold 5 Use e to select Release Time and press E 6 Use e to adjust the time and press m HINT This can be set from 1 to 500...
Page 79: ...Press m 2 Use e to select INPUT and press E 3 Use e to select Phase Invert and press E 4 Use e to select the track and press E HINT Select All to set all the tracks at the same time 5 Use e to select On and press E The phase of the input signal can be inverted This is useful when sounds cancel each other out due to mic settings ...
Page 80: ...rate with lower voltages NOTE Do not use this function with devices that are not compatible with phantom power Doing so could damage the device 1 Press m 2 Use e to select INPUT and press E 3 Use e to select Phantom and press E Continue to one of the following procedures Using phantom power P 81 Setting the voltage P 81 Disabling phantom power during playback P 82 The F can provide phantom power T...
Page 81: ... and press E NOTE This setting affects all tracks HINT When using mics and other equipment that can operate with volt ages less than 48V selecting the lower voltage can reduce the F power consumption Using phantom power 4 Use e to select On Off and press E 5 Use e to select the track and press E HINT Select All to set all the tracks at the same time 6 Use e to select On and press E ...
Page 82: ...All and press E 5 Use e to select On and press E Setting value Explanation Off Phantom power is supplied even during playback On During playback Phantom power is not supplied during playback This can reduce the F power consumption NOTE This setting affects all tracks HINT If supplying phantom power to mics is not necessary during play back disabling it then can reduce F power consumption ...
Page 83: ... 83 Changing the plugin power setting Plugin Power 1 Press m 2 Use e to select INPUT and press E 3 Use e to select Plugin Power and press E 4 Use e to select On and press E Make this setting when a mic that is compatible with plug in power is connected to the mic capsule MIC LINE input jack ...
Page 84: ... Input Delay and press E 4 Use e to select the track and press E HINT Select All to set all the tracks at the same time 5 Use e to adjust the delay time and press m HINT This can be set from 0 to 30 0 ms NOTE When Sample Rate is set to 192kHz Input Delay is disabled If there are differences in the timing of input sounds use this function to correct them when recording ...
Page 85: ...ud ing orchestras live concerts and soundscapes This technique is also extremely effective when you want to adjust room ambience Since it offers a high degree of freedom it is used not only in studios but also for a wide range of recording even of rehearsals and live performances 1 Press m 2 Use e to select INPUT and press E 3 Use e to select Stereo Link and press E 4 Use e to select the track and...
Page 86: ...e signals HINT Use a for each track to adjust the mid side balance You can adjust the side mic level for tracks that have a mid side mic capsule connected on the PFL screen 5 Use e to select Mode and press E 6 Use e to select MS Stereo Link and press E Setting value Explanation Stereo Link When stereo linked inputs are handled normally MS Stereo Link When stereo linked signals from a mid side mic ...
Page 87: ... HINT You can also open the Trim Link screen from the Home Screen by pressing 2 while pressing and holding o 4 Use e to select a track to link and press E Clear all settings Linked Not linked HINT You can use a for the first track in a link group to adjust all the input levels within that group at the same time Icons for group names are shown next to linked tracks NOTE A track cannot be in more th...
Page 88: ...dphones without recording it 1 Press i 2 Use e to select INPUT and press E 3 Use e to select RTN Monitor Only and press E NOTE When Input 5 6 set to RTN Tracks 5 6 will not be recorded When a mic capsule is connected RTN Monitor Only cannot be selected If you want the RTN signal to always be output change the rout ing settings as necessary When this setting is RTN Monitor Only Fader Pan HPF Input ...
Page 89: ...e side mic level and press m HINT This can be set to Off RAW or in a range from 24 to 6 dB NOTE The more the side mic level is increased the greater the stereo width becomes When set to RAW recording will occur without stereo encoding The stereo width of audio in RAW format can be adjusted after recording by using ZOOM MS Decoder or other plug in software You can adjust the side mic level stereo w...
Page 90: ...hone Routing and press E 5 Use e to select the tracks outputs for routing and press E Press to set tracks 1 6 to prefader cancel MS Mid side stereo monitoring Press to cycle through settings Change tracks 1 6 to postfader cancel others Change L R to postfader cancel others Change M1 M2 to postfader cancel others Change S1 S2 to postfader cancel others cancel MS Prefader selected Postfader selected...
Page 91: ...put mono use e to select MONO MIX and press E 7 To monitor a mid side stereo signal use e to select MS and press E NOTE Mid side stereo monitoring is disabled for stereo linked tracks that have Stereo Link Mode set to MS Stereo Link When mid side stereo monitoring is enabled the pre fader tracks will be routed automatically to the headphone channels with odd to the left and even to the right In th...
Page 92: ...acks routed to MAIN OUT 2 Press to set tracks 1 6 to prefader Press to cycle through settings Change tracks 1 6 to postfader cancel others Change L R tracks to postfader cancel others Prefader selected Postfader selected Off Clear all settings HINT Press E to cycle through the options Prefader Postfader Off NOTE Tracks 1 6 can be set to Prefader or Postfader The L R tracks can only be set to Postf...
Page 93: ...ss m Setting signals sent to the SUB OUT 4 Use e to select SUB OUT Routing and press E 5 Use e to select the track for SUB OUT 1 or SUB OUT 2 routing and press E Tracks routed to SUB OUT 1 Tracks routed to SUB OUT 2 Press again to set tracks 1 6 to prefader Press to cycle through settings Change tracks 1 6 to postfader cancel others Change L R tracks to postfader cancel others Prefader selected Po...
Page 94: ...t OUTPUT and press E 3 Use e to select On Off and press E 4 Use e to select the output and press E HINT Select All to set all the outputs at the same time 5 Use e to select Off and press E Disabling unused outputs can reduce power consumption increasing the length of continuous operation using batteries ...
Page 95: ...1 Press m 2 Use e to select OUTPUT and press E 3 Use e to select Level and press E 4 Use e to select the output and press E 5 Use e to set the standard output level and press E Setting value Explanation Normal 10dBV This sets the standard level to 10 dBV Mic 40dBV This sets the standard level to 40 dBV The standard output level can be changed ...
Page 96: ...n P 11 2 Press u 3 Use e to select Fader and press E 4 Use e to select the output and press E HINT Select All to set all the outputs at the same time 5 Use e to adjust the output level and press E HINT This can be set to Mute or from 48 0 to 12 0 dB The MAIN OUT 1 2 and SUB OUT 1 2 levels can be changed ...
Page 97: ... Use e to select the output and press E HINT Select All to set all the outputs at the same time 5 Use e to adjust the delay in frames and press m HINT This can be set from 0 0 to 10 0 frames NOTE Delays set in frames differ according to the frame rate of the selected timecode When Sample Rate is set to 192kHz Output Delay is disabled By delaying output you can correct timing differences for audio ...
Page 98: ...ress E HINT Select All to set all the outputs at the same time Continue to one of the following procedures Using the limiter P 98 Setting the type P 99 Setting the threshold P 99 Setting the attack time P 100 Setting the release time P 100 Linking the limiter P 101 Using the limiter 5 Use e to select On Off and press E 6 Use e to select On and press E Using a limiter on the output can protect devi...
Page 99: ...ly peaks that exceed the threshold are attenu ated There is no effect below the threshold Soft Knee The limiter gradually affects the signal about 6 dB below the threshold for a gentler effect Setting the threshold This sets the base level from which the limiter operates 5 Use e to selectThreshold and press E 6 Use e to adjust the set ting and press m HINT This can be set from 16 to 2 dBFS ...
Page 100: ...the threshold 5 Use e to select Release Time and press E 6 Use e to adjust the time and press m HINT This can be set from 1 to 500 ms Setting the attack time This sets the amount of time until compression starts after the input signal exceeds the threshold 5 Use e to select Attack Time and press E 6 Use e to adjust the time and press m HINT This can be set from 1 to 4 ms ...
Page 101: ...ed independently to MAIN OUT 1 and 2 as well as to SUB OUT 1 and 2 5 Use e to select Link and press E 6 Use e to select On and press E Setting value Explanation Off Separate limiter operation On Link limiter operation If the signal for either linked signal reaches the threshold the limiter will operate on both channels ...
Page 102: ...o adjust the vol ume and press m HINT This can be set to Off or between 48 and 12 dBFs When set to Off no alerts will be output When alerts sound Sound type Remaining battery low 880Hz tone every 30 seconds 4 times Recording starts 1000Hz tone 1 time Recording stops 880Hz tone 2 times Recording not possible 880Hz tone 3 times The volume can be adjusted for alerts output from headphones when for ex...
Page 103: ...The F uses a high precision oscillator that enables the gen eration of accurate timecode with a discrepancy of less than 0 5 frames per 24 hours The F can input and output SMPTE timecode Timecode is time information written to data when recording video and audio It is used for video editing control of other devices and synchronization of audio and video for example Linear editing software 00 10 00...
Page 104: ...itself with the audio data The timecode received by the video camera is recorded with the video data Inputting timecode Timecode is transmitted from a timecode generator Both the F and the video camera receive timecode and record it with their audio and video data The input timecode can also be used to synchronize the audio clock of the F Video camera Timecode Audio Mic Video camera Timecode gener...
Page 105: ...m 2 Use e to selectTIMECODE TC and press E 3 Use e to select Mode and press E Continue to one of the following procedures Setting the mode P 105 Stopping timecode output when recording is stopped P 107 Synchronizing audio clock with external timecode P 107 Automatically enabling internal timecode when no external timecode is input P 108 Setting the mode 4 Use e to select Mode and press E 5 Use e t...
Page 106: ...llowing menu items MENU TIMECODE TC Jam MENU TIMECODE TC Restart Timecode is always output from theTIMECODE OUT jack Int Record Run Internal timecode will be generated only when recording The internal timecode can be set manually using the following menu items MENU TIMECODE TC Jam MENU TIMECODE TC Restart When switching from another mode the internal timecode will stop at the last value Int RTC Ru...
Page 107: ...nal timecode the internal audio clock is enabled to preserve continuity This cannot be set when Mode is set to Off Int Free Run Int Record Run or Int RTC Run Stopping timecode output when recording is stopped You can set whether or not timecode is output from the TIMECODE OUT jack when recording is stopped 4 Use e to select Int Auto Mute and press E 5 Use e to select On and press E NOTE Timecode w...
Page 108: ...no external timecode is input You can enable the automatic generation of internal timecode to preserve continuity when there is no external timecode 4 Use e to select Ext Contin uous and press E 5 Use e to select On and press E NOTE This cannot be set when Mode is set to Off Int Free Run Int Record Run or Int RTC Run ...
Page 109: ...tual time by 0 1 This is used for NTSC video which is used in Japan the United States and other countries 29 97D This is an adjusted frame rate that uses a drop frame to make NTSC match the actual time This is used with video for broadcast that requires the actual time frame to be matched 30ND This is used to synchronize sound with film that is being transfered to NTSC video This is the standard f...
Page 110: ... Jam 110 1 Press m 2 Use e to selectTIMECODE TC and press E 3 Use e to select Jam and press E 4 Use e to select Yes and press E Jamming internal timecode Jam Timecode input through theTIMECODE IN jack is used to set internal timecode ...
Page 111: ...select Restart and press E 4 Change the restart value Editing operations Move cursor or change value Turn e Select parameter to change Press E 5 When done changing the setting use e to select Restart and press E Restarting internal timecode with a specified value Restart You can freely change the internal timecode setting value and restart from that value ...
Page 112: ...ss E 3 Use e to select Auto Rec Delay and press E 4 Use e to adjust the time and press m HINT This can be set from 0 0 to 8 0 s If set to record automatically when external timecode is received unnecessary recording could occur if timecode is received for a brief amount time In order to prevent this you can set the amount of time until recording starts after timecode is received ...
Page 113: ...u The month day and year are entered automatically in that order using the RTC setting You can set the uu value as you like on the Edit screen dd mm yy uu The day month and year are entered automatically in that order using the RTC setting You can set the uu value as you like on the Edit screen yy mm dd uu The year month and day are entered automatically in that order using the RTC setting You can...
Page 114: ...tinued 6 When done changing the setting use e to select Enter and press E Setting the user bits Ubits 4 Use e to select Edit and press E 5 Change the value Editing operations Move cursor or change value Turn e Select parameter to change Press E HINT This can be set using numbers from 0 to 9 and letters from A to F ...
Page 115: ...on RestartTime When the F starts the value set by Restart P 111 is used to jam the internal timecode RTC When the F starts its timecode is restored from the timecode when the power was turned off and advanced by the elapsed time using the Date Time RTC setting P 18 Since RTC is less precise than internal timecode discrep ancies will occur When the F is turned off the internal timecode stops so the...
Page 116: ...apperboard used when recording video NOTE The slate tone cannot be used during audio file playback Setting the volume 3 Use e to select Level and press E 4 Use e to adjust the level and press m HINT This can be set from 20 to 0 dBFS The F can add tones while recording These are called slate tones By adding a slate tone when the recording starts aligning it to a video file during editing will be ea...
Page 117: ...00 to 10 000 Hz Setting the routing Set the destination for the slate tone signal 3 Use e to select Routing and press E 4 Use e to select the tracks outputs for slate tone signal routing and press E Set all to postfader Select postfader Off Clear all settings NOTE Routing to tracks 1 6 is not possible when operating as an audio interface Stereo Mix HINT Press E to switch between Postfader and Off ...
Page 118: ...3 Press c to start recording 4 Press t NOTE When the slate tone is sounding other signals input to tracks that it is routed to are muted The slate signal is output from the headphone L R channels regardless of routing settings The MAIN OUT 1 2 and SUB OUT 1 2 faders do not affect the level of the slate tone The SLATETONE indicator lights when the slate tone is sounding HINT Press t for at least on...
Page 119: ...er Mac OS Mac OS X 10 8 or later The F cannot operate on USB bus power Use AA batteries or a DC power supply HINT When the F is connected to a computer the SD cards loaded in slots 1 and 2 are recognized as separate SD cards Disconnecting 1 Disconnect on the computer Windows Select F from Safely Remove Hardware Mac OS Drag and drop the F icon into theTrash NOTE Always conduct computer disconnectio...
Page 120: ... in 2 out connection mode for iOS devices and sends tracks 1 6 as a stereo mix MultiTrack PC Mac This is a 6 in 4 out connection mode for Mac Windows and sends tracks 1 6 as separate signals cannot be used with iOS devices A driver is necessary for use with Windows Download the driver from the ZOOM website www zoom co jp 5 Use a USB cable to connect the F and the iOS device NOTE A Lightning to USB...
Page 121: ... an audio interface Audio Interface F Multi Track Field Recorder 121 Disconnecting 1 Press m 2 Use e to select EXIT and press E 3 Use e to select Yes and press E 4 Disconnect the cable from the computer or iOS device and the F ...
Page 122: ...rams MAIN OUT 1 2 SUB OUT 1 2 HEADPHONE OUT PC OUTPUT PC Trim HPF Input Limiter Phase Invert MS Stereo Input Delay Pan Fader Mixer Fader L R Delay Level Slate Tone Limiter Fader Alert Tone Slate Tone Loop Back Routing Level Ch1 Ch2 Input 1 Input 2 Input 5 Input 6 RTN Stereo Mix ...
Page 123: ...rder 123 PC PC HPF Input Limiter Phase Invert MS Stereo Input Delay Delay Level Slate Tone Limiter Fader Alert Tone Slate Tone Routing Level Ch1 Ch4 Fader Mixer L R Fader Pan Input 1 Input 2 Input 5 Input 6 MAIN OUT 1 2 SUB OUT 1 2 HEADPHONE OUT OUTPUT Trim RTN MultiTrack ...
Page 124: ... LOOP BACK and press E 3 Use e to select On and press E Mixing inputs You can adjust the mix balance of the inputs Input signals will be sent to the computer or iOS device using the balance settings made here When using a Stereo Mix setting the mixed stereo signal will be sent 1 Open the mixer on the Home Screen P 11 2 Adjust the parameter settings See Adjusting the input levels and monitoring bal...
Page 125: ...es Connecting P 125 Disconnecting P 125 Connecting 4 Use e to select Connect and press E 5 Use e to select Yes and press E 6 Use a USB cable to connect the F and the R 7 Turn the R power ON NOTE When disconnecting the FRC 8 select Disconnect before unplugging the USB cable Using an R as a controller Connect By connecting the R to the F you can use it to adjust trim fader and pan settings for examp...
Page 126: ...s E 3 Use e to select FRC 8 and press E 4 Use e to select Keyboard Type and press E 5 Use e to select the type and press E Setting value Explanation US Use for an English language keyboard JP Use for a Japanese language keyboard A computer keyboard can be connected to the R and used to input characters Set the type of computer keyboard connected to use it ...
Page 127: ...n and press E 6 Use e to select the func tion to assign and press E Function Explanation None No function is assigned Tone Generate and stops slate tones Mark Add marks to WAV format takes during recording and playback SetTrim Link Open the MENU INPUT Trim Link screen Knob Lock Disable adjustments using a Clear Clip Indicator Clear the level meter clipping indicators Circled Circle the currently s...
Page 128: ...supply Ext DC shutdown voltage P 20 Setting the DC power supply Ext DC nominal voltage P 21 Setting the type of AA batteries Int AA P 21 NOTE When multiple power supplies are connected they will be used in the following order of precedence 1 DC power supply Ext DC 2 USB bus power supplied by F 3 AA batteries Int AA The voltages of each power supply are shown on the display Set the DC power supply ...
Page 129: ...e e to select USB and press E 3 Use e to select FRC 8 and press E 4 Use e to select USB Bus Power and press E 5 Use e to select Supply to FRC 8 and press E NOTE When the F is supplying bus power do not connect any device other than an R to the USB port Doing so could damage the F and the connected device The F can supply USB bus power to the R ...
Page 130: ...ng the R LED brightness LED Brightness 1 Press m 2 Use e to select USB and press E 3 Use e to select FRC 8 and press E 4 Use e to select LED Bright ness and press E 5 Use e to adjust the bright ness and press m You can adjust the brightness of the LEDs on the R ...
Page 131: ...wer supply 2 Copy the file for updating the firmware to the root directory on an SD card 3 Load the SD card into the SD CARD 1 slot NOTE If an SD card is loaded in the SD CARD 2 slot eject it 4 Press m 5 Use e to select USB and press E 6 Use e to select FRC 8 and press E Continue to one of the following procedures Checking the firmware version P 132 Updating the firmware P 132 You can check the R ...
Page 132: ...nd press E 8 Use e to select Yes and press E NOTE Do not turn the power off remove an SD card or disconnect the USB cable during a firmware update Doing so could cause the R to become unstartable 9 After the firmware update completes turn the R power off Checking the firmware version 7 Use e to select Firmware Version and press E ...
Page 133: ... select Level Meter and press E Continue to one of the following procedures Setting the type P 133 Setting the peak hold time P 134 Setting the track level meters shown on the Home Screen P 135 Setting the type You can set whether the level meters use VU or Peak style 4 Use e to selectType and press E 5 Use e to select the type and press E You can set how the level meters appear on the display ...
Page 134: ...al dBFS is shown VU Peak Scale VU 0 VU 20 dBFS Peak value held for set time VU value shown Both VU and peak level are shown simultaneously In this mode the bars show VU and the dots above the VU show the peak VU Only Scale VU 0 VU 20 dBFS VU value held for set time VU value shown This display style is close to human hearing Setting the peak hold time 4 Use e to select Peak Hold Time and press E 5 ...
Page 135: ...f the check boxes are checked no track level meters will appear on the Home Screen 7 Press m Setting the track level meters shown on the Home Screen You can change which tracks are shown on the Home Screen 4 Use e to select Level Meter View and press E 5 Use e to select View 1 4 and press E 6 Use e to select the tracks to show and press E NOTE A maximum of four can be selected ...
Page 136: ... procedures Changing the display backlight setting P 136 Adjusting the display contrast P 137 Changing the Home Screen timecode display P 137 Changing the display backlight setting You can set the display backlight to turn off after a set amount of time without use 4 Use e to select Backlight and press E 5 Use e to select the setting and press E You can make settings related to the display ...
Page 137: ...e Screen 4 Use e to select HomeTC Size and press E 5 Use e to select the size and press E Setting value Explanation Small The timecode is small and the time counter is large Big The timecode is large and the time counter is small Adjusting the display contrast 4 Use e to select Contrast and press E 5 Use e to adjust the con trast and press m HINT This can be set from 1 to 10 ...
Page 138: ... Use e to select SYSTEM and press E 3 Use e to select LED Bright ness and press E 4 Use e to adjust the bright ness and press m HINT This can be set from 5 to 100 Setting the LED brightness LED Brightness You can adjust the brightness of the LEDs on the front of the F ...
Page 139: ... marks are added when recording P 139 Setting how marks are added when playing P 140 Setting how marks are added when recording 4 Use e to select Recording and press E 5 Use e to select how marks are added and press E Setting value Explanation Pause Only Pressing p will pause without adding a mark Pause Mark Pressing p will pause and add a mark Mark Only Pressing p will add a mark without pausing ...
Page 140: ...select Playing and press E 5 Use e to select how marks are added and press E Setting value Explanation Pause Only Pressing p will pause without adding a mark Pause Mark Pressing p will pause and add a mark Mark Only Pressing p will add a mark without pausing Setting how marks are added manually PLAY Key Option continued ...
Page 141: ...ti Track Field Recorder 141 Checking SD card information Information 1 Press m 2 Use e to select SD CARD and press E 3 Use e to select Informa tion and press E Open space Volume label Size Remaining recordable time You can check the size and open space of SD cards ...
Page 142: ...ect the SD card to test and press E Continue to one of the following procedures Conducting a quick test P 142 Conducting a full test P 143 Conducting a quick test 5 Use e to select QuickTest and press E 6 Use e to select Yes and press E The card performance test will start The tests should take about 30 seconds 7 The test completes The result of the evaluation will be shown 8 Press m to cancel the...
Page 143: ...test result is OK there is no guar antee that writing errors will not occur This information is just to provide guidance Conducting a full test 5 Use e to select FullTest and press E The amount of time required for the full test will be shown 6 Use e to select Yes and press E 7 The test completes The result of the evaluation will be shown If the access rate MAX reaches 100 the card will fail NG ...
Page 144: ...ess E 4 Use e to select the card to format and press E 5 Use e to select Yes and press E NOTE Before using SD cards that have just been purchased or that have been formatted on a computer they must be for matted by the F Be aware that all data previously saved on the SD card will be deleted when it is formatted Format SD cards for use with the F ...
Page 145: ...select SYSTEM and press E 3 Use e to select Shortcut List and press E Use e to scroll the screen and show information that is hidden Checking the F shortcut list Shortcut List The F has a shortcut feature that allows quick access to various functions See the List of shortcuts P 156 to check the shortcut functions ...
Page 146: ...efault setting values Factory Reset 1 Press m 2 Use e to select SYSTEM and press E 3 Use e to select Factory Reset and press E 4 Use e to select Yes and press E The settings will be reset and the power will automatically turn off You can restore the factory default settings ...
Page 147: ...YL LYZPVU PYT HYL LYZPVU F Multi Track Field Recorder 147 Checking the firmware version Firmware Version 1 Press m 2 Use e to select SYSTEM and press E 3 Use e to select Firmware Version and press E You can check the firmware version ...
Page 148: ...pdating the firmware to the root directory on an SD card 3 Load the SD card into the SD CARD 1 slot and turn the power on while pressing p NOTE If an SD card is loaded in the SD CARD 2 slot eject it 4 Use e to select Yes and press E NOTE Do not turn the power off or remove the SD card during a firmware update Doing so could cause the F to become unstartable 5 After the firmware update completes tu...
Page 149: ...switch on the SD card to disable write protection The recorded sound cannot be heard or is very quiet Confirm that the volume levels of the tracks are not too low P 50 Confirm that the track keys are lit green during playback Other trouble Computer does not recognize it even though it is connected to the USB port Confirm that the operating system is compatible P 119 The operation mode must be set ...
Page 150: ... Slate Tone Level Level Meter Slate Tone MAIN 1 2 Level Meter MAIN 1 2 Fader SUB 1 2 Fader Rec Track Mute Routing P 90 Dual Channel Rec Track 1 Track 2 Track 3 Track 4 Track 5 Track 6 Track L Track R M1 M2 S1 S2 M1 M2 RTN L RTN R RTN L RTN R S1 S2 Alert Tone Track 1 Track 2 Track 3 Track 4 Track 5 Track 6 Track L Track R Trim A D Limiter φ HPF Trim A D Limiter φ HPF Trim A D Limiter φ HPF Trim A D...
Page 151: ...6 Track 1 Track 6 R L RTN RTN R RTN L Track 1 Track 6 Track 1 Track 6 R L MAIN 2 MAIN 1 Postfader Track 1 Track 6 L R L R RTN RTN L RTN R SUB 1 SUB 2 SUB OUT SUB OUT 1 SUB OUT 2 MAIN OUT MAIN OUT 1 MAIN OUT 2 HP L HP R Prefader Track 1 Track 2 Track 6 MS Stereo PFL Track 1 Track 6 SOLO Track 1 Track 6 Prefader Track 1 Track 6 Tr1 6 Fader Tr1 6 Pan L R RTN R RTN L RTN Routing ...
Page 152: ...tadata Edit Scene TAPE Name of recording destination folder MENU FINDER MENU FINDER TAKE MENU Metadata Edit Folder Tape CIRCLED Circled take MENU FINDER TAKE MENU Metadata Edit Circle TR1 Track 1 name Track names are written as follows TR1 Tr1 TR2 Tr2 TRL TrL TRR TrR During dual channel recording TR3 Tr1 TR4 Tr2 TR2 Track 2 name TR3 Track 3 name TR4 Track 4 name TR5 Track 5 name TR6 Track 6 name T...
Page 153: ...adata Edit Project SCENE MENU METADATA NextTake Scene Name Mode MENU METADATA NextTake User Scene Name MENU FINDER TAKE MENU Rename TAKE TAPE MENU FINDER recording destination folder name MENU FINDER TAKE MENU Metadata Edit Folder Tape CIRCLED MENU FINDER TAKE MENU Metadata Edit Circle WILDTRACK FALSE START NO GOOD FILE_UID UBITS MENU TIMECODE TC Ubits NOTE MENU REC NextTake Note MENU FINDER TAKE ...
Page 154: ...Bit Depth SPEED DIGITIZER_SAMPLE_RATE MENU REC PLAY Sample Rate SPEED TIMESTAMP_SAMPLES_SINCE_MIDNIGHT_HI SPEED TIMESTAMP_SAMPLES_SINCE_MIDNIGHT_LO SPEED TIMESTAMP_SAMPLE_RATE MENU REC PLAY Sample Rate iXML master tag iXML sub tag Written Read Remarks SYNC_POINT_LIST SYNC_POINT SYNC_POINT_TYPE SYNC_POINT SYNC_POINT_FUNCTION SYNC_POINT SYNC_POINT_COMMENT SYNC_POINT SYNC_POINT_LOW SYNC_POINT SYNC_PO...
Page 155: ...TIME_LO FILE_SET FILE_SET_INDEX iXML master tag iXML sub tag Written Read Remarks TRACK_LIST TRACK_LIST TRACK_COUNT TRACK CHANNEL_INDEX TRACK INTERLEAVE_INDEX TRACK NAME TRACK FUNCTION YES NO Metadata and ID3 fields contained in MP3 files Metadata ID3 field Format Timecode Artist Name TC HH MM SS FF Scene name take number TrackTitle SC scene name TK take number Frame rate file length time AlbumTit...
Page 156: ...ack 3 Open the L R track fader settings screen s 1 Open the MENU METADATA NextTake Scene Scene Note screen s 2 Open the MENU METADATA NextTake Scene User Scene Name screen s 3 Open the MENU METADATA NextTake Track Name screen s 4 Circle the currently selected take Menu Screen Shortcut Explanation Press and hold m Cancel the setting and return to the Home Screen Character input screen Shortcut Expl...
Page 157: ... weighted Crosstalk 90 dB or less between adjacent channels 1kHz RTN INPUT 5 6 Connector 3 5mm stereo mini Nominal input gain 10 dBV 4 dBu Input impedance 10 kΩ or more Maximum input level 10 dBV Level 10 dBV 24 dBu Level 4 dBu MIC IN INPUT 5 6 ZOOM mic capsule input disables RTN INPUT 5 6 when used Outputs MAIN OUT 1 2 Connectors XLR balanced output 2 hot Output impedance 150 Ω or less Reference ...
Page 158: ...to timecode Frame rate 23 976ND 24ND 25ND 29 97ND 29 97D 30ND 30D Precision 0 2 ppm Allowed input level 0 2 5 0 Vpp Input impedance 4 3 kΩ or more Output level 3 0 Vpp 10 Output impedance 50 Ω or less Power Batteries 8 AA External DC power supply HIROSE HR10A 7R 4S 4 pin connector 1 pin 4 pin 9 16 V Continuous recording time 48kHz 16 bit 2ch recording to SD1 MAIN SUB OUT OFF TIME CODE OFF LED Brig...
Page 159: ...Mass storage operation Class USB 2 0 High Speed MultiTrack audio interface operation driver required for Windows not required for Mac Class USB 2 0 High Speed Specifications 44 1 48 96kHz sampling rate 16 24 bit bit rate 6 in 4 out Stereo Mix audio interface operation no driver required Class USB 2 0 Full Speed Specifications 44 1 48kHz sampling rate 16 bit bit rate 2 in 2 out Note iOS device audi...
Page 160: ...Z2I 2761 01 ZOOM CORPORATION 4 4 3 Kandasurugadai Chiyoda ku Tokyo 101 0062 Japan http www zoom co jp ...