


For standard threading, follow the
solid lines of Figure 1 .
5
For more stretchable thread, follow
the dashed lines indicated by ‘A’.
For more stretchable thread, adjust
as Figur
(a).
17 right
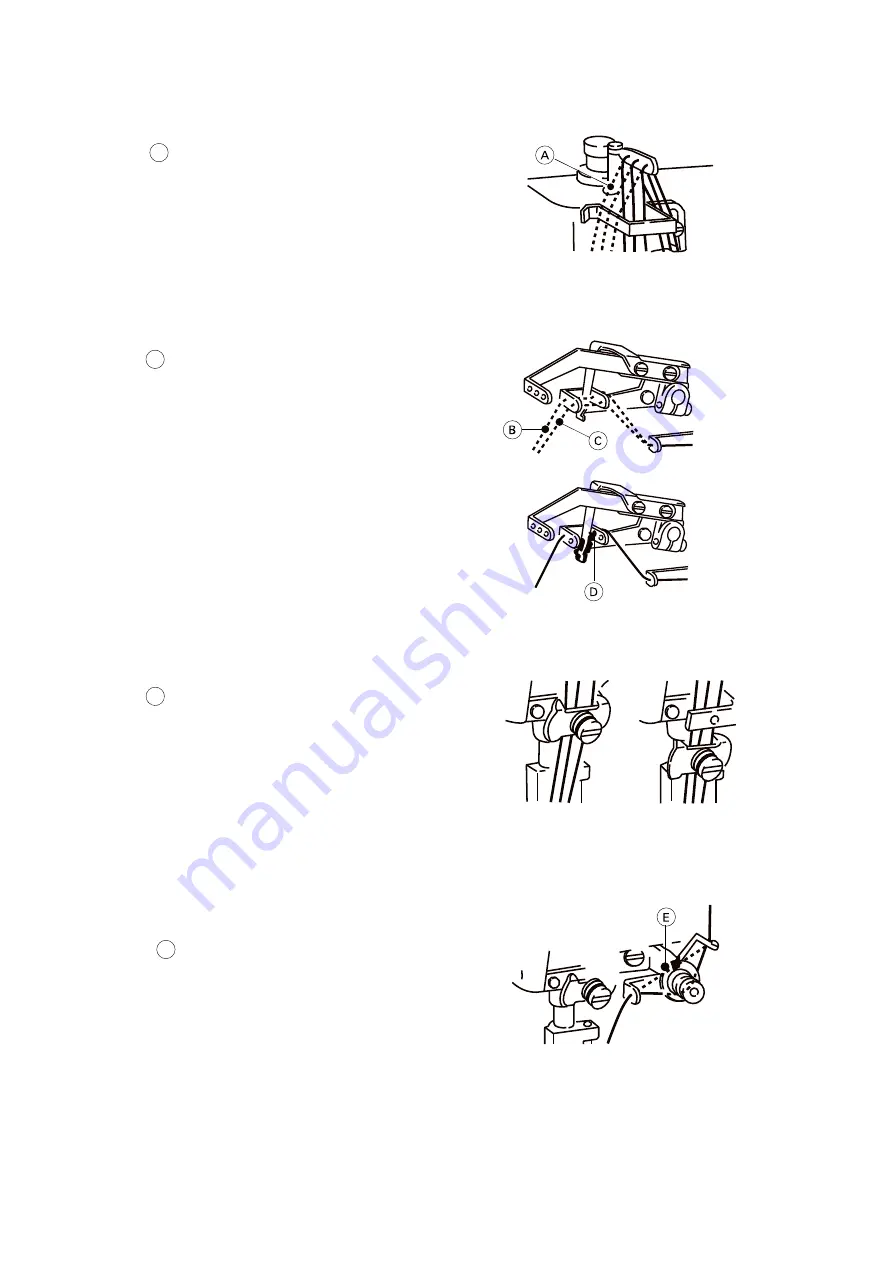
For less stretchable thread, adjust
thread the guide by referring to line
‘B’. If the top cover thread is still
too loose, then thread the guide by
referring to line ‘C’, according to
Figure
.
16
If the top cover thread is too tight,
thread the guide by referring to the
line ‘D’.
For standard threading, follow the
solid line of Figure
.
18
For more stretchable thread, follow
the dashed line indicated by ‘E’.
Figure15
Figure 16
Figure 17
Figure 18
a
b
/ 0 2,$ 3 & '
5 6 7 。
1 5
9 : ; < = 5 >,? @ 5 A B
A
。
a
D E F G >,$
H I
B .
F G,L M ,N O '
- . 。
C
1 6
D E F R > , $ 。
D
b
; < = 5 >,T '
- . U( )。
1 6
a
; < X 5 >,T '
- . Y (
。
1 6
b )
as Figur 17 left a
( ).
b
c
/ 0 2,$ 3 '
- . 6 7 。
1 8
; < = 5 > @ A B 。
E
d
If the top cover thread is too loose
-11-
Summary of Contents for ZJW663A
Page 5: ...5 1 3 Installing the sewing machine _ X Table Cut Out Drawing Figure 1A D Clutch Motor Z...
Page 20: ...2 1 A Machine bed frame A 4 5 4 7 21 8 18 9 9 10 11 12 1 13 19 6 3 20 2 16 14 15 22 17 20...
Page 54: ...5 6 3 4 2 1 7 8 13 11 12 9 10 14 15 2 13 HR device 54...
Page 60: ...10 9 5 12 11 14 6 13 7 2 3 4 8 1 15 2 16 ESDD Motor structure 60...
Page 64: ...2 18 Integrated Machine Specific Parts 64...


