background image

SAFETY 

ZIPPER MASCHINEN GmbH     www.Zipper-Maschinen.at



26   

ZI-ASA550ESA 


When working on the machine, never wear jewellery, loose clothing, ties or long, open 

hair. 


Conceal  long  hair  under  hair  protection.  Never  work  with  long,  open  hair  (danger  of 

pulling in)! 


Wear close-fitting protective clothing and suitable protective equipment (eye protection, 

dust mask, ear protection; gloves only when handling tools). Loose objects can become 

entangled and cause serious injuries! 


Metal dust can contain chemical substances that can have a negative effect on health. 

Only  carry  out  work  on  the  machine  in  well-ventilated  rooms.  Use  a  dust  mask  if 

necessary. 


Ensure that the dust extraction connections are properly connected and functional. 


Never  use  power  tools  and  machines  in  the  vicinity  of  flammable  liquids  and  gases 

(danger of explosion). 


Do not use the machine in areas where vapours of paints, solvents or flammable liquids 

pose a potential danger (risk of fire or explosion!). 


Do not smoke in close proximity to the machine. 


Protect the machine from dampness (causing a short circuit). 


Regularly check the dust collector hood for debris and clean it if necessary.  

11.4


Electrical Safety 


Each time you work with an electrically operated machine, caution is advised! There is a 

risk of electric shock, fire, cutting injury. 


Shut  down  and  disconnect  the  machine  from  the  power  supply  before  carrying  out 

maintenance or adjustment work or when leaving the machine! Make sure that the main 

switch is in the "O" position before connecting the machine to the power source. 


Only hook up the machine by means of a fault-current circuit breaker (30 mA). 


Never use the machine with a defective ON-OFF-switch. 


Do not use any provisional electrical connections. 


Only use appropriate extension cables according to IEC 60245. 


Check the connection cable regularly for damage. 


A damaged or entangled cable increases the risk of electric shock. Handle the cable with 

care. Never use the cable to carry, pull or disconnect the machine. Keep the cable away 

from heat, oil, sharp edges or moving parts. 


Do not use the extension cable to pull the plug out of the socket. 


When using a cable drum, unwind the cable completely. 


The plug of the extension cable must be splash proof. 


The  plug  of  an  electrical  tool  must  strictly  correspond  to  the  socket.  Do  not  use  any 

adapters together with earthed electric tools. 


Correct plugs and appropriate sockets reduce the risk of electric shock. 


Plugs and coupler outlets on connection cables must be made of rubber, non-rigid PVC or 

other  thermoplastic  material  of  same  mechanical  stability  or  be  covered  with  this 

material. 


Only use suitable extension cords. 


Water that enters the machine increases the risk of electric shock. Do not expose the 

machine to rain or moisture. 


The machine may only be used in humid environments if the supply is protected by a 

residual current circuit breaker. 


Protect the machine from moisture (danger of short circuit!). 


Never  use  power  tools  and  machines  in  the  vicinity  of  flammable  liquids  and  gases 

(danger of explosion!). 


Make sure that the machine is earthed. 


Avoid any physical contact with earthed parts of the machine. 


The electrical installation or repairs to electrical parts of the machine must be carried out 

by a licensed electrician. 


Damaged mains leads must be replaced by qualified person to prevent dangers.  

11.5


Special Safety Instructions for that machine 


The machine is for indoor use only. 


Work with gloves on rotating parts is not permitted! 

Summary of Contents for 9120039234151

Page 1: ...n 10 01 2020 Revision 00 TrT DE EN HR Originalfassung DE BETRIEBSANLEITUNG Absauganlage Übersetzung Translation EN USER MANUAL Dust collector HR UPUTA ZA UPORABU Odsisni uređaj ZI ASA550ESA EAN 9120039234151 ...

Page 2: ...umfang prüfen 14 6 2 Der Arbeitsplatz 14 6 3 Transport 14 6 4 Elektrischer Anschluss 14 6 5 Zusammenbau 15 7 BETRIEB 18 7 1 Betriebshinweise 18 7 2 Anschluss an die Holzbearbeitungsmaschine 18 7 3 Ein Aus Schalter 18 7 3 1 Einschalten 18 7 3 2 Ausschalten 19 7 4 Automatikbetrieb 19 7 4 1 Automatikbetrieb Einschalten 19 7 4 2 Automatikbetrieb Ausschalten 19 7 5 Nach dem Betrieb 19 8 REINIGUNG WARTU...

Page 3: ...ning the filter bag 36 14 3 Storage 36 14 4 Disposal 36 15 TROUBLE SHOOTING 36 16 PREDGOVOR 37 17 SIGURNOST 38 17 1 Namjenska uporaba 38 17 1 1 Tehnička ograničenja 38 17 1 2 Zabranjena uporaba opasna pogrešna uporaba 38 17 2 Zahtjevi za korisnika 38 17 3 Opće upute o sigurnosti 39 17 4 Električna sigurnost 40 17 5 Posebne upute o sigurnosti za ovaj stroj 40 17 6 Upozorenja na opasnost 41 17 7 Ost...

Page 4: ...anje 49 21 OTKLANJANJE POGREŠAKA 49 22 SCHALTPLAN WIRING DIAGRAM SPOJNA SHEMA 50 23 ERSATZTEILE SPARE PARTS REZERVNI DIJELOVI 50 23 1 Ersatzteilbestellung spare parts order Naručivanje rezervnih dijelova 50 23 2 Explosionszeichnung exploded view Rastavljeni nacrt 51 24 EU KONFORMITÄTSERKLÄRUNG CE DECLARATION OF CONFORMITY EZ IZJAVA O SUKLADNOSTI 52 25 GEWÄHRLEISTUNG DE 53 26 WARRANTY GUIDELINES EN...

Page 5: ...lektrični napon DE Warnschilder und oder Aufkleber an der Maschine die unleserlich sind oder die entfernt wurden sind umgehend zu erneuern EN Missing or non readable safety labels have to be replaced immediately HR Nečitka ili uklonjena upozorenja i ili naljepnice na stroju treba odmah zamijeniti DE CE KONFORM Dieses Produkt entspricht den EU Richtlinien EN EC CONFORM This product complies with th...

Page 6: ...eitenblech Side panel links rechts left right Bočni lim lijevo desno 1 1 4 Räder Wheels Kotači 2 13 Rahmen Base frame Okvir 1 5 Radkappen Wheel caps Poklopci kotača 2 14 Vormontierte Geräteeinheit Pre assembled device unit 1 6 Querverbindung Transverse joint Poprečna veza 1 15 Schnellverschluss Quick release fasteners Predmontirana jedinica uređaja 2 7 Sackaufhängung Holding device for dust bag Ov...

Page 7: ...im 5 EIN AUS Schalter ON OFF Switch Prekidač za uključivanje isključivanje 14 Absaugschlauch Extractor hose Odsisno crijevo 6 Motor Motor Motor 15 Fahrgestellrahmen Base frame Okvir voznog postolja 7 Sackaufhängung Bag suspension Ovjes za vreću 16 Schlauchadapter Hose Adapter Adapteri zacrijevo 8 Filtersack Filter bag Vreća za filtriranje 17 Y Adapter Y Adapter Adapter Y 9 Schnellverschluss Filter...

Page 8: ... und Immissionspegeln gibt kann daraus nicht zuverlässig abgeleitet werden ob zusätzliche Vorsichtsmaßnahmen notwendig sind oder nicht Faktoren welche den am Arbeitsplatz tatsächlich vorhandenen Immissionspegel beeinflussen beinhalten die Eigenart des Arbeitsraumes und andere Geräuschquellen d h die Zahl der Maschinen und anderer benachbarter Arbeitsvorgänge Die zulässigen Arbeitsplatzwerte können...

Page 9: ...Inhalte geringfügig abweichen Sollten Sie Fehler feststellen informieren Sie uns bitte Technische Änderungen vorbehalten Kontrollieren Sie die Ware nach Erhalt unverzüglich und vermerken Sie etwaige Beanstandungen bei der Übernahme durch den Zusteller auf dem Frachtbrief Transportschäden sind innerhalb von 24 Stunden separat an uns zu melden Für nicht vermerkte Transportschäden kann ZIPPER keine G...

Page 10: ...etreiben der Maschine im Freien Betreiben der Maschine ohne adäquate körperliche und geistige Eignung Betreiben der Maschine ohne Kenntnis der Bedienungsanleitung Absaugen von Holzstaub und Späne im gewerblichen Bereich Nichtgewerbliche Nutzung ist dann gegeben wenn keine Arbeitnehmer keine Personen in Berufsausbildung in einem Beschäftigungsverhältnis die Späneabsauganlage nutzen Änderungen der K...

Page 11: ... ebenen erschütterungsfreien rutschfesten Untergrund Sorgen Sie für ausreichend Platz rund um die Maschine Sorgen Sie für ausreichende Lichtverhältnisse am Arbeitsplatz um stroboskopische Effekte zu vermeiden Arbeiten Sie in gut durchgelüfteten Räumen Die Maschine darf wegen der Staubemission innerhalt eines Raumes nicht länger als eine Stunde pro Tag betrieben werden Achten Sie auf ein sauberes A...

Page 12: ...rlängerungskabel IEC 60245 Prüfen Sie regelmäßig das Anschlusskabel regelmäßig auf Beschädigung Verwenden Sie das Kabel nie zum Tragen der Maschine Schützen Sie das Kabel vor Hitze Öl und scharfen Kanten Verwenden Sie das Verlängerungskabel nicht um den Stecker aus der Steckdose zu ziehen Wickeln Sie bei Verwendung einer Kabeltrommel das Kabel vollständig ab Steckvorrichtung des Verlängerungskabel...

Page 13: ...t wurden sind umgehend zu erneuern Örtlich geltende Gesetze und Bestimmungen können das Mindestalter des Bedieners festlegen und die Verwendung dieser Maschine einschränken 5 6 Gefahrenhinweise Trotz bestimmungsmäßiger Verwendung bleiben bestimmte Restrisiken bestehen Bedingt durch Aufbau und Konstruktion der Maschine können im Umgang mit den Maschinen Gefährdungssituationen auftreten die in diese...

Page 14: ...rheitsvorschriften sind und bleiben ihr gesunder Hausverstand und ihre entsprechende technische Eignung Ausbildung der wichtigste Sicherheitsfaktor bei der fehlerfreien Bedienung der Maschine Sicheres Arbeiten hängt in erster Linie von Ihnen ab 6 MONTAGE 6 1 Lieferumfang prüfen Überprüfen Sie die Maschine nach Anlieferung unverzüglich auf Transportschäden oder fehlende Teile 6 2 Der Arbeitsplatz W...

Page 15: ...rringert die Leistungsübertragung und erwärmt sich stark 8 Ein beschädigtes Kabel ist umgehend zu erneuern HINWEIS Verwenden Sie nur zulässige Verlängerungskabel mit dem in der folgenden Tabelle angegebenen Querschnitt Spannung Verlängerung Litzenquerschnitt 220 V 240 V 50 Hz 27 m 1 5 mm2 44 m 2 5 mm2 70 m 4 0 mm2 105 m 6 0 mm2 6 5 Zusammenbau 1 Montage Räder an Fahrgestellrahmen Stecken Sie die S...

Page 16: ...teeinheit auf Fahrgestellrahmen Die vormontierte Geräteeinheit GE auf die Seitenteile den Fahrgestellrahmen F aufsetzen Fixieren der Geräteeinheit mit 2 M5x16 Schrauben und 2 M5 Muttern je Seite Anschließend werden die vier Schraubverbindungen festgezogen 4 Montage Absaugschlauch Den Absaugschlauch A anschließen und mit der Schlauchschelle S fixieren Befestigen Sie den Absaugschlauch indem Sie die...

Page 17: ...ngen und mittels Schnellverschluss S fixieren 6 Montage Filtersack Die Sackaufhängung Sa montieren Schieben Sie den Schnellverschluss S durch den Saum des Filtersackes F Den Filtersack am Hacken der Sackaufhängung einhängen Befestigen Sie den Filtersack indem Sie den Schnellverschluss 7 schließen Maschine fertig zusammengebaut ...

Page 18: ...al bestehen sowie antistatisch sein Die Distanz zwischen Absauganlage und Holzbearbeitungsmaschine sollte 10 Laufmeter nicht übersteigen Der Lieferumfang umfasst vier Schlauchadapter sowie einen Y Adapter Durchmesser und Montage Wählen Sie jenen Schlauchadapter aus welcher dem Durchmesser des Absauganschlusses der Holzbearbeitungsmaschine entspricht oder den nächst größeren und befestigen Sie dies...

Page 19: ...ition Wenn Sie die Holzbearbeitungsmaschine starten schaltet sich die Absauganlage ein 7 4 2 Automatikbetrieb Ausschalten Wenn Sie die Holzbearbeitungsmaschine ausschalten schaltet sich die Absauganlage mit Zeit Verzögerung automatisch aus 7 5 Nach dem Betrieb HINWEIS Ist die Arbeiten beendet muss erst die Holzbearbeitungsmaschine und dann die die Absaugmaschine ausgeschaltet werden Maschine durch...

Page 20: ...bwischen Achtung Spritzen Sie den Motor und Schalter nicht direkt mit einem Wasserstrahl ab Tragen Sie beim Entleeren und Reinigen unbedingt eine Staubmaske Partikelfilter Filterklasse 2 Bereiten Sie die Oberflächen auf und schmieren Sie die blanken Maschinenteile mit einem säurefreien Schmieröl ein 8 2 Wartung Die Maschine ist wartungsarm und enthält nur wenig Teile die der Bediener einer Instand...

Page 21: ...men von 65 l erreicht ist Vorgehensweise Achtung Netzstecker ziehen Filtersack schütteln und 10 Minuten ablegen lassen Gefüllten Späneauffangsack mit einer Hand festhalten Öffnen der Schnellspannvorrichtung Sack entnehmen und Inhalt umweltgerecht entsorgen Sack wieder auf die Halterung aufstecken und mit Schnellspannvorrichtung befestigen 8 2 2 Wechsel des Späneauffangsackes Vorgehensweise Achtung...

Page 22: ...s bzw Instandhaltungsarbeiten stets von der Spannungsversorgung trennen und gegen unbeabsichtigtes Wiedereinschalten sichern Viele mögliche Fehlerquellen können bei ordnungsgemäßem Anschluss der Maschine an das Stromnetz bereits im Vorfeld ausgeschlossen werden Sollten sie sich außer Stande sehen erforderliche Reparaturen ordnungsgemäß zu verrichten und oder besitzen sie die vorgeschriebene Ausbil...

Page 23: ...pment of our products illustrations pictures might differ slightly If you however find errors in this manual please inform us Technical changes excepted Please check the product contents immediately after receipt for any eventual transport damage or missing parts Claims from transport damage or missing parts must be placed immediately after initial product receipt and unpacking before putting the ...

Page 24: ... exposed to increased fire or explosion hazard The safety rules for intercepting of wood dusts of the Employer s Liability Insurance Association BG Holz ZH 1 139 are not kept with this device 11 1 2 Prohibited use Operate the machine outdoors The operation of the machine outside the stated technical limits described in this manual Operating the machine without knowledge of the instruction manual E...

Page 25: ...k etc Before starting to work on the machine wait until all tools or machine parts have come to a complete standstill and secure the machine against unintentional restart Make sure that machine parts that can heat up have cooled down completely before starting maintenance work Check the screw connections of the machine for strength before each use Only use perfect tools that are free of cracks and...

Page 26: ...chine with a defective ON OFF switch Do not use any provisional electrical connections Only use appropriate extension cables according to IEC 60245 Check the connection cable regularly for damage A damaged or entangled cable increases the risk of electric shock Handle the cable with care Never use the cable to carry pull or disconnect the machine Keep the cable away from heat oil sharp edges or mo...

Page 27: ... non readable stickers have to be replaced immediately The locally applicable laws and regulations may specify the minimum age of the operator and limit the use of this machine 11 6 Hazard Warnings In spite of intended use certain residual risks remain Due to the design and construction of the machine dangerous situations may occur when handling the machines which are marked as follows in this ope...

Page 28: ...ability training will remain the most important safety factor in the fault free operation of the machine Safe operation depends foremost on you 12 ASSEMBLY 12 1 Delivery content Please check the product contents immediately after receipt for any eventual transport damage or missing parts 12 2 Workplace requirements The workplace has to fulfill the requirements The ground has to be even in level an...

Page 29: ...rd reduces the transmission of power and heats up 8 A damaged cable must be replaced immediately NOTICE Operation is only allowed with safety switch against stray current RCD max stray current of 30mA NOTICE Use only permitted extension cable with cross section the one in the following table declared Voltage Extension Cross section 220 V 240 V 50 Hz 27 m 1 5 mm2 44 m 2 5 mm2 70 m 4 0 mm2 105 m 6 0...

Page 30: ...ired Fix the transverse joint Q to the side parts Four screws M8x12 and four nuts M8 are required Attach two rubber stoppers G to the base frame using two screws M6 16 and two washers 3 Assembly of the device unit on the base frame Put the pre assembled device unit GE on the side parts F Fix one side of the device unit with 2 M5x16 screws and 2 M5 nuts then the fix the other side Finally tighten t...

Page 31: ...the screw 1 on the hose clip S with a few revolutions 5 Assembly of the sawdust collecting bag Attach the sawdust collection bag Sp and fix it with the quick release fastener S 6 Assembly filter bag Assembly the bag suspension SA Slide the quick release fastener S through the hem of the filter bag F Hook in the filter bag Fix the filter bag by closing the quick release fastener S ...

Page 32: ...e woodworking machine in a way that it will not interfere with your work Start to work with the woodworking machine only until the dust collector has reached full speed 13 2 Connection of dust collector to machine Dust collector plug Ø 100mm Ensure dust collector tubes to be composed of hardly inflammable material and antistatic The total distance between dust collector hood and machine dust colle...

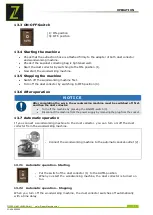
Page 33: ...r completing the work the woodworking machine must be switched off first and then the dust collector Turn off the machine by pressing the ON OFF switch 0 Disconnect the machine from the power supply by removing the plug from the socket 13 7 Automatic operation If you connect a woodworking machine to the dust collector you can turn on off the dust collector from the woodworking machine Connect the ...

Page 34: ...e machine surface Clean the machine surface with a wet cloth soaked in a mild solution Clean your machine regularly after every usage Remove chips and dust from the machine regularly after operation Clean the base frame and the device unit with a damp cloth Clean the electric motor and the ON OFF Switch only with a dry cloth Attention Do not splash the motor and the ON OFF Switch directly with a w...

Page 35: ...ollector hood Check for deposits especially on the protective fence If necessary clean it 14 2 2 Emptying the sawdust collecting bag Empty the chip collection bag after completing the work but at the latest when the maximum filling volume of 65 l has been achieved Procedure Attention Disconnect the machine from power supply Shake the sawdust collecting bag and let the dust settle for 10 minutes Ho...

Page 36: ...rtain countries to dispose of your old machine properly 15 TROUBLE SHOOTING WARNING Danger due to electrical voltage Manipulating the machine with the power supply up may result in serious injury or death Before carrying out any troubleshooting work always disconnect the machine from the power supply and secure it against unintentional recommissioning Many possible sources of error can be excluded...

Page 37: ... neznatno razlikovati Ako uočite pogreške molimo vas da nas obavijestite Pridržavamo pravo tehničkih izmjena Robu odmah po primitku provjerite i na teretnom listu zabilježite eventualne reklamacije prilikom primopredaje od strane dobavljača Transportna oštećenja treba nam posebno dojaviti u roku od 24 sata Za transportna oštećenja koja nisu zabilježena ZIPPER ne može preuzeti nikakvo jamstvo Autor...

Page 38: ...fizičkih ili mentalnih sposobnosti Rad stroja bez poznavanja Upute za uporabu Usisavanje drvne prašine i piljevine za komercijalnu upotrebu O nekomercijalnoj upotrebi radi se kad uređaj za odsis piljevine ne upotrebljavaju zaposlenici osobe u strukovnom obrazovanju u radnom odnosu Promjene konstrukcije stroja Promjene postavki za regulaciju motora Nije dopušten rad stroja s materijalima koji nisu ...

Page 39: ...alat za namještanje Iz okruženja stroja uklonite sve prepreke npr prašine piljevine odrezanih dijelova obradaka itd Stroj nikada ne ostavljajte bez nadzora dok radi Isključite stroj prije napuštanja područja rada i osigurajte ga od nehotičnog odn neovlaštenog ponovnog uključivanja Strojem smije rukovati samo jedna osoba Rad održavanje i popravljanje stroja smiju obavljati samo osobe koje poznaju s...

Page 40: ...poja Električne alate i strojeve nikada ne koristite u okruženju zapaljivih tekućina i plinova opasnost od eksplozije Pazite da stroj bude uzemljen Izbjegavajte kontakt tijela s uzemljenim dijelovima Priključivanje na struju odn popravljanje električnih dijelova stroja mora obavljati ovlašteni električar Oštećene vodove za mrežni priključak mora zamijeniti kvalificirana osoba radi sprečavanja opas...

Page 41: ...avi zabranjena je upotreba stroja Neispravne dijelove treba odmah zamijeniti Upotrebljavati se smiju samo rezervni dijelovi koje je odobrio proizvođač Zabranjene su izmjene na stroju Prije svakog pokretanja stroja provjerite je li potpuno ispravan Opasnost od strujnog udara Strojem radite samo na izvoru struje koji je osiguran zaštitnom strujnom sklopkom Utičnice moraju biti propisno instalirane u...

Page 42: ...ciji moguće su teške ozljede zbog strujnog udara Zato Stroj mora raditi na utičnici s uzemljenjem Sljedeće upute upućene su električaru Priključivanje stroja treba obavljati isključivo električar 9 Električni priključak stroja pripremljen je za rad na uzemljenoj utičnici s naponom od 230 V 10 Na utikaču za priključak ne smiju se vršiti nikakve izmjene 11 Vod za uzemljenje je žuto zelene boje 12 St...

Page 43: ...aticu nemojte prejako zatezati Kotač se mora moći okretati Kotač vijcima pričvrstite u osovinu okvira voznog postolja F i maticu zategnite protiv osovine Stavite poklopac kotača R 8 Sastavljanje okvira voznog postolja Vijcima pričvrstite oba bočna lima S1 S2 Za svaki bočni lim potrebna su vam 2 vijka M8x40 i 2 matice M8 Poprečnu vezu Q s 4 vijka M8x12 i 4 maticama M8 montirajte na okvir voznog pos...

Page 44: ...ani pričvrstite s pomoću 2 vijaka M5x16 i 2 matica M5 Nakon toga treba zategnuti četiri vijčana spoja 10 Montaža odsisnog crijeva Spojite odsisno crijevo A i pričvrstite ga crijevnom obujmicom S Odsisno crijevo pričvrstite tako da vijak 1 na obujmici za crijevo zategnete s nekoliko okreta 11 Montaža vreće za piljevinu Postavite vreću za piljevinu Sp i pričvrstite ju brzim zatvaračem S 12 Montaža v...

Page 45: ...da treba izvršiti vizualnu provjeru stroja Sigurnosne naprave električne vodove i komandne elemente treba vrlo detaljno prekontrolirati Provjerite čvrsti dosjed i oštećenje vijčanih spojeva 19 1 Upute o radu UPOZORENJE Sve radove prepravljanja izvršavajte samo kad je stroj isključen sa strujne mreže NAPOMENA Stroj postavite uz stroj za obradu drva tako da vas ne ometa tijekom rada Važno stroj za o...

Page 46: ... odsisno crijevo čvrsto spojeno na odsisni uređaj odn na odsisni adapter na stroju za obradu drva Provjerite je li vreća za piljevinu dobro pričvršćena Odsisni uređaj uključite pritiskom na I i pričekajte da ventilator postigne puni broj okretaja Ako se vreća za filtriranje nakon nekoliko sekundi sama ne napuše povucite ju prema gore Uključite stroj za obradu drva 19 3 2 Isključivanje Isključite s...

Page 47: ...i uređaj može biti zadovoljavajuće pomagalo Nedostatno održavanje ili njega mogu dovesti do nepredvidivih nezgoda i ozljeda Popravke koji zahtijevaju posebna stručna znanja trebaju obavljati samo ovlašteni servisni centri Nestručne intervencije mogu oštetiti uređaj ili ugroziti Vašu sigurnost 20 1 Čišćenje NAPOMENA Upotreba otapala agresivnih kemikalija ili abrazivnih sredstava dovodi do materijal...

Page 48: ... vijci Provjeriti čvrstoću i po potrebi zategnuti labave vijčane spojeve Vreća za piljevinu Kontrola po potrebi isprazniti Vreća za filtriranje Kontrola po potrebi očistiti vreću za filtriranje kako bi se sačuvao njezin kapacitet filtriranja Odsisno crijevo Kontrola oštećenja Kabel Kontrola oštećenja Prekidač za uključivanje isključivanjeKontrola oštećenja Kućište prekidača Kontrola oštećenja Elek...

Page 49: ...nikad ne zbrinjavajte s običnim otpadom Po potrebi kontaktirajte lokalne vlasti u vezi s informacijama o dostupnim mogućnostima zbrinjavanja Ako kod specijaliziranog trgovca kupite novi stroj ili ekvivalentni uređaj u nekim je zemljama trgovac dužan odgovarajuće zbrinuti stari stroj 21 OTKLANJANJE POGREŠAKA UPOZORENJE Opasnost od električnog napona Rukovanje strojem može dovesti do teških ozljeda ...

Page 50: ...t are attuned to each other shorten the installation time and elongate your machines lifespan I M P O R T A N T The installation of other than original spare parts voids the warranty So you always have to use original spare parts When you place a spare parts order please use the service form you can find in the last chapter of this manual Always take a note of the machine type spare parts number a...

Page 51: ...le 1 27 washer 4 15 wheel 2 39 clap 1 4 screw 2 28 washer 1 16 board 1 40 bowl upper 1 5 lower clip 1 29 bolt 14 17 screw M5 6 6 41 bowl lower 1 6 plastic bag 1 30 screw 6 18 nut M8 8 42 screw 1 7 left plate 1 31 socket 1 19 suction hose 1 43 strong plate 1 8 nut 20 32 switch box 1 20 hose clip 2 44 right plate 1 9 bolt 4 33 current transformer 1 21 plate 1 45 cap 1 10 underframe 1 34 circute boar...

Page 52: ...chem Treibstoffen Frostschäden in Wasserbehältern Treibstoff über Winter im Benzintank des Gerätes c Ausgeschlossen sind Defekte an Verschleißteilen wie Kohlebürsten Fangsäcke Messer Walzen Schneideplatten Schneideeinrichtungen Führungen Kupplungen Dichtungen Laufräder Sageblätter Spaltkreuze Spaltkeile Spaltkeilverlängerungen Hydrauliköle Öl Luft u Benzinfilter Ketten Zündkerzen Gleitbacken usw d...

Page 53: ...n water tanks leaving fuel in the tank during the winter etc c Defects on wear parts are excluded e g carbon brushes collection bags knives cylinders cutting blades clutches sealings wheels saw blades splitting crosses riving knives riving knife extensions hydraulic oils oil air fuel filters chains spark plugs sliding blocks etc d Also excluded are damages on the machine caused by incorrect or ina...

Page 54: ...icima vode gorivo preko zime ostalo u spremniku benzina c Isključeni su kvarovi na potrošnim dijelovima ugljene četke prihvatne vreće noževi valjci rezne ploče rezne naprave vodilice spojke brtve kotačići listovi za piljenje križevi za cijepanje klinovi za cijepanje produžeci klina za cijepanje hidraulička ulja filtri za ulje zrak i benzin lanci svjećice klizni blokovi itd d Isključene su štete na...

Page 55: ...treten experiences that may be useful for other users and for product design Erfahrungen die für andere Benutzer wichtig sein können Experiences with malfunctions that occur in specific operation modes Wir bitten Sie derartige Beobachtungen zu notieren und an diese per E Mail Fax oder Post an uns zu senden We would like to ask you to note down your experiences and observations and send them to us ...

Page 56: ...PRODUKTBEOBACHTUNG ZIPPER MASCHINEN GmbH www Zipper Maschinen at 57 ZI ASA550ESA ...

Reviews: