


Getting Started
Installing the Battery
Zipit Now User Guide
Copyright © 2013 Zipit Wireless, Inc. All rights reserved.
Page 2 of 23
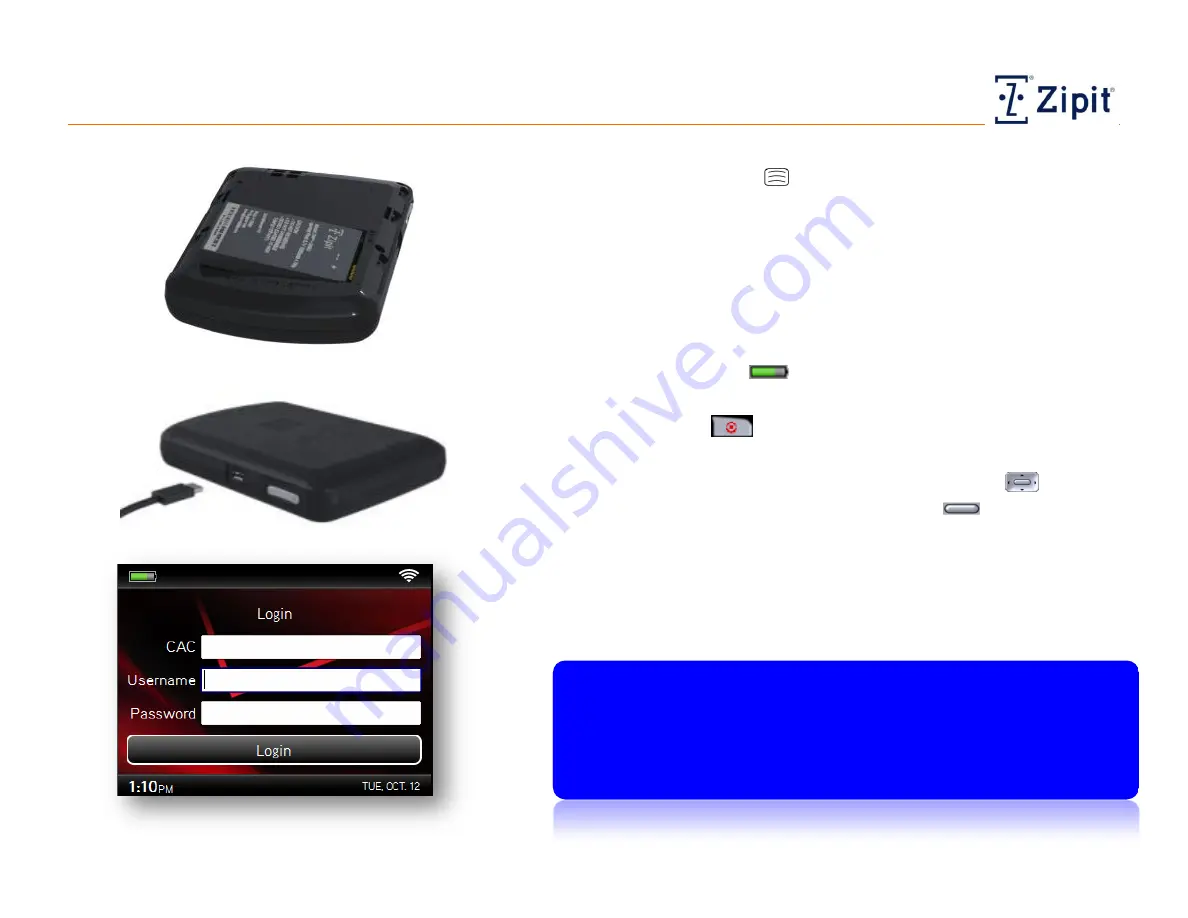
1. Remove the battery cover by placing your thumb on the depression
on the back of the unit
and pressing in while sliding your thumb
towards the top of the unit.
2. Insert the battery as shown.
3. Replace the battery cover by inserting its tabs into the slots on the
bottom of the device and sliding it down into place.
4. Plug the AC adapter’s mini-USB connector into your Zipit Now DC
charging socket as shown; then plug the adapter into a power outlet.
The unit will turn on and operate normally while charging. Charge it
until the battery icon
at the top left of the display is solid green.
5. You can use your Zipit Now device while it is charging. Press and hold
the Power / End
button for 2 seconds to turn the device on.
6. Enter the Customer Access Code (CAC), Username, and Password
provided by your communications administrator. Scroll
to
highlight the Login button and press the Select
button. (You will
not need to repeat this step.)
7. Your Zipit Now device will automatically detect available networks
pre-selected by your communications administrator
*
, and download
your account settings. You may now begin sending and receiving
messages.
.
*
Your communications administrator manages your global
account settings, including your default Wi-Fi access points.
Your Zipit Now device will always attempt to connect to one of
these Wi-Fi access points first. You can also add your own
personal Wi-Fi access points for external or home use.


